

Thursday, March 5, 2009

Spinach Bacon Quiche


This quiche was just plain good. I'm bummed because this picture doesn't really do it justice. The whole house smelled wonderful while this quiche baked and my mouth waters just typing about it. I love that I just dumped the ingredients together, poured the mixture into a pie shell and played in the back yard with the kids for 45 minutes while it baked.

That's right, I used a pre-made pie shell straight from my freezer.


I covered it with a double layer of foil and popped it into a 450 degree oven for 8 minutes. Then, following the recipe, I uncovered the pie shell and baked it for 4 more minutes.


The recipe said to cook 1/2 of a chopped onion with the bacon and then drain. I'd already cooked and blotted my bacon yesterday when I made BLT's, so I started cooking the onion first in a skillet with a little nonstick cooking spray. Then I chopped the cooked bacon and tossed it in when the onions started to get tender. I cooked it a few minutes longer to crisp up my bacon and my onions started to caramelize a little. I'm thinking that I shaved off a little fat this way, since the onion didn't actually cook in bacon grease.


Time to take the pie shell outta the oven. Shoot. It got a little "done". And it cracked too. Oh well. I'm a card carrying member of the "It'll be fine" club. It's how I deal with all minor kitchen disasters and come to think of it...it's how I take on life. Most days. I just shrug my shoulders and say, "It'll be fine." And usually "it" is. Don't sweat the small stuff, right? Don't ask my husband to vouch for me on this one, though. I can get worked up with the best of em'. But stuff like cracked pie crust, spilled milk, flat tires...it'll be fine.


Now that our crust is ready, we need to fill it. I cracked 8 eggs into a bowl, then added lowfat sour cream and skim milk. Whisk it all together. I'm shaving some fat and calories here. The recipe called for regular sour cream and cream or half and half. Truthfully, the finished product was so tasty, I didn't regret cutting back the fat.


Chop up a couple of cups of nice, healthy spinach.


Stir in the mozzarella, Swiss, spinach, salt, pepper, and a dash of nutmeg.


And don't forget to add in the bacon and onion.


Now pour the mixture into the pie shell. Pop your quiche into a 325 degree oven for 45-50 minutes. It's done when the center is set and a knife stuck into the middle comes out clean. Mine seemed to take a little longer...like 55-60 minutes, which is surprising because my oven bakes hot. If any of you try this, please let me know how long yours baked.


There she is, fresh from the oven. Only, don't dig in just yet. Let her sit there for another 10 minutes before slicing. I know, it smells so good and it's difficult to exercise restraint. Just a little longer...


There. Now you can eat.

You may notice where the egg ran down under the crust, through those cracks that I said would "be fine". It pushed the crust up into the center of the quiche. Guess what? It was fine. Actually, better than fine. Completely and totally, deliciously, better than fine.

Spinach Bacon Quiche adapted from Better Homes and Gardens

Ingredients

1 recipe Pastry for Single-Crust Pie
1/2 cup chopped onion (1 medium)
6 slices bacon, chopped
8 beaten eggs
1/2 cup reduced fat dairy sour cream
1/2 cup skim milk
1/4 teaspoon salt
1/8 teaspoon ground white pepper
Dash ground nutmeg (optional)
2 cups tightly packed chopped fresh spinach
2/3 cup shredded reduced fat mozzarella cheese (about 3 ounces)
1/2 cup shredded Swiss cheese (2 ounces)
Cherry tomatoes, cut up (optional)
Directions
1. Prepare and roll out Pastry for Single-Crust Pie. Line a 9-inch pie plate with the pastry. Trim; crimp edges as desired. Line the unpricked pastry shell with a double thickness of foil. Bake in a 450 degree F oven for 8 minutes. Remove foil. Bake for 4 to 5 minutes more or until pastry is set and dry. Reduce oven temperature to 325 degrees F.

2. Meanwhile, in a large skillet cook onion and bacon until onion is tender and bacon is crisp. Drain on paper towels.

3. In a bowl stir together eggs, sour cream, milk, salt, pepper, and, if desired, nutmeg. Stir in onion mixture, spinach, and cheeses.

4. Pour egg mixture into the hot, baked pastry shell. Bake in the 325 degree F oven for 45 to 50 minutes or until a knife inserted near the center comes out clean. If necessary, cover edge of crust with foil to prevent overbrowning. Let stand for 10 minutes before serving. If desired, garnish with cherry tomatoes.

5. Makes 6 to 8 servings

Wednesday, March 4, 2009

BLTs, Please.

I was in the mood for a no-fuss kind of dinner last night. Luckily, BLT's were on the menu. I grew up eating BLT sandwiches. While I think that they're best in the summer with a tomato sliced fresh off of the vine, we ate them all year round. My mom's secret ingredient:


That's right. Peanut butter. Mayonnaise on one piece of bread, peanut butter on the other and bacon, lettuce, and tomato in between. And because this is the only way I'd ever eaten a BLT, I didn't think that the flavor combination was in any way strange. I still remember the first time someone pointed out that it was odd. I was well into my teens and my grandma took me to lunch at the diner in our little Indiana town. The BLT on the menu just sounded good and I ordered it. I remember how disappointing that first bite tasted. Something was definitely missing. I lifted the bread and looked underneath. Then I checked the other side. "Hey," I said to my grandma. "They left the peanut butter off of this." My grandma laughed a little and explained that not everyone eats them that way. I can't understand why not. When the waitress checked back, I asked if she had any peanut butter. She said they did and then she asked if I'd like some bread for the peanut butter. With a "no thank you", I explained that I needed the peanut butter for my sandwich. She just gave me a strange look and brought the peanut butter.

Last night, for the first time since that diner BLT, I decided to try my sandwich without peanut butter. I made an avocado spread instead. We'll get to that in a minute. Right now, I wanna talk about bacon. I have this theory that you're either a bacon or a sausage when it comes to breakfast meat. Me, I'm a bacon. I love a nice chewy-crisp piece o' bacon alongside my over-easy eggs in the a.m. My husband, he's a sausage guy. Links, patties, in his gravy...that's his breakfast meat of choice. For me,(Smoky Links, aside) sausage is great in recipes AND I'm cool with a nice Italian sausage with some grilled peppers and onions for dinner. I just don't want a patty of sausage with my eggs in the morning.

Whenever we go out to breakfast, I order bacon. I've eaten a wide variety of bacon(Tee hee. Funny that I should use the word "wide" when talking about bacon). I guess I'm somewhat of a bacon connoiseur. You might imagine that I have a favorite bacon. I do. It's Stonie's Hickory Smoked Cured Bacon all the way from Missouri. I'm serious, this bacon tops all of the other bacon that I've ever tasted. I first tried this bacon 5 or 6 years ago. I was visiting my family's lake property in Missouri and my parents took me by Stonie's Sausage Shop to stock up for a weekend's worth of grilling and breakfast meat. My dad fried the bacon for breakfast the next morning. It was unbelievable! It's so good in fact, that when we have it in the house, my husband becomes a "bacon man". Stonie's does a great job on sausage too, but their bacon is out-of-this-world good.


Don't believe me that I'm a bacon expert? Okay, I'm going to let you in on a secret. This is against the advice of my "city boy" husband who had never set foot on a farm until the day that he went home to meet my parents nearly 12 years ago. Anyone seen that Paulie Shore movie "Son In Law"? My dear husband actually once said, "Babe, maybe that's not really something that you want to tell people...that you were the County Pork Queen." Yep. That's right. 16 or so years ago, I was selected to represent my county's Pork Producer Association as THE pork queen. I know, such an honor.

Here I am fulfilling one of my Pork Queen responsibilities, handing out ribbons at the County Fair Swine Show.


Check out my ultra-cool big, puffy hair bow. Clearly, I was in style...look at that other chic's hair bow.


I wasn't just there to hand out ribbons. Oh no. I was there to show off my very own specimen of swine that I raised in our barn. See, I told you. I'm a bit of an expert when it comes to bacon. I've been up close and personal with the source. A spokesperson of swine, even.


Alrighty, so now that we've established my credibility as a bacon expert, let's fry some up for our BLTs. I ended up frying 6 extra slices for the quiche that I made for dinner tonight.


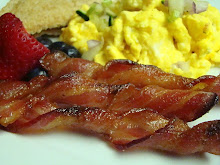
Bacon lovers of the world unite! Doesn't this look yummy? Don't be ashamed...


My BLT building station is all ready. Oh yeah, I was going to tell you about the avacado spread. I just mashed a ripe avocado, squeezed a couple of teaspoons of lemon juice, and added some salt and cayenne pepper. Then I stirred it all up.


Oh wait, I forgot the peanut butter!
No, not peanut butter. Step away from the peanut butter. Avocado. No peanut butter allowed! C'mon Krista. Focus already.


You all can probably take it from here. I spread one piece of the bread with mayo and the other with the avocado spread.


Pile on the bacon. Oh, glorious bacon.


And of course the "L" and the "T".


There you have it. Simple Wednesday night dinner. I told you that I was ready for a no-fuss meal, hence the paper plates. Not terribly "green" of me. Although, I am an avid re-cycler lately. Still, I know ya'll have those days when you can't muster the energy to even lift one more plate into the dishwasher. This is where I found myself last night.

Oh, and the verdict on my BLT's with avocado? Delicious. I mean, how bad could it be with my favorite bacon in there? Still, I found myself longing for peanut butter with every bite. So, next time I'll stick with what I love best, perfect bacon-lettuce-tomato-mayonnaise-peanut butter sandwiches. However, that avacado spread worked wonderfully at lunch today when I constructed a turkey club sandwich. Mayo and avocado spread on the bread, roast turkey, leftover bacon, lettuce, and tomato. Perfection.

Monday, March 2, 2009

Pasta with Green Beans, Potatoes, and Pesto


I came across this recipe in my Williams Sonoma Food and Wine Pairing Cookbook. I received it as a shower gift about 6 years ago. I believe that this is the first recipe I've tried. Not that it's a bad book. I've got more with post-it's on them, but they are recipes for when I have more time and a little more cash in my budget for ingredients. I deemed this one "do-able" when compiling my meal plan last week. I'm getting so sick of my cookbooks, I was ready to use something different. But I'll be posting on my cookbooks one day soon. Tonight, I'm talking about this awesome pasta!

I will say that it was absolutely delicious. Everyone loved it, even the kids. And it's green, so that's a pretty big accomplishment. It is a little involved for a Monday night dinner. I had the oven (for toasting pine nuts and roasting potatoes), the stovetop, and food processor going. Nothing tricky here, it was just a lot going on while the baby was tugging on my pant legs and crying for dinner. Also, my four year old was "helping" (and consuming large amounts of pine nuts). About half way through the preparation she announced, "This is too fancy! We have to pretend it's a restaurant. Lights out!" So, we ended up having this dinner by candlelight. My husband arrived late for dinner to a dark house and rounded the corner to the kitchen to find his ladies shoving this yummy pesto pasta into our faces around the glow of one candle.

Here's how it went: I began by toasting 1/4 cup of pine nuts for the pesto until they took on some color and were fragrant. I set them aside to cool and then...

I rubbed about 10 oz. of new potatoes with olive oil and salt and pepper and put them into the oven to roast for about 35 minutes.


While the potatoes roasted, I combined the basil, garlic, and toasted pine nuts in my food processor to make the pesto.


Pulse until the basil is chopped. Speaking of basil, it's a little pricey for this amount. I am so looking forward to this Summer when I can grow and harvest my own for recipes like this.


Add in the cheese and pulse to combine.


Now, with the food processor running, pour in the olive oil until the mixture reaches the consistency of mayonnaise. Salt and pepper to taste.


And presto...it's pesto!


Let's clean and snap our green beans.


Cook them in a pot of salted water until tender. Scoop them out with a skimmer and rinse under cold water. Save the cooking water for your pasta!


Remove the potatoes from the oven and cut them into bite sized pieces.


Toss them into 2 tablespoons of heated oil and cook em' until they get a little crispy.


Add the beans to the potatoes and cook until heated through.


Return the green bean water to a boil and drop in the fresh pasta for a couple of minutes until cooked.


Add the pesto to the potatoes and beans and stir to combine.


While the pasta cooks, I grate some Parmiggiano-Reggiano to sprinkle on top of the finished dish. Set aside.


Toss the pasta well with the pesto and veggies and top with grated cheese. I wish you all could just smell and taste this right now! Wow!


And since it was a "fancy dinner" we HAD to have dessert. I thawed some of the leftover Chocolate Lava Cakes that I froze from our Valentine's Day dinner. I warmed them in the microwave (they re-heated beautifully) and to add insult to injury I frosted them with some Hershey's chocolate frosting. Truly decadent.


Pasta with Green Beans, Potatoes, and Pesto from Williams Sonoma

For the pesto
1/4 cup (2 oz/60 g) pine nuts or walnuts
2 cups (3 oz/90 g) tightly packed fresh basil leaves
2 or 3 cloves garlic
1/4 cup (1 oz/30 g) grated pecorino sardo or Parmesan cheese
1/2 cup (4 fl oz/125 ml) extra-virgin olive oil, or as needed
salt and ground pepper to taste

8 new potatoes, 9-10 oz (280-315 g) total weight
4 tablespoons (2 fl oz/60 ml) extra-virgin olive oil
salt and ground pepper to taste
1/2 lb. (250 g) green beans, trimmed and cut into l-l 14-inch (2.5—4-cm) lengths
1 lb. (500 g) fresh tagliarini or fettuccine
1/4 cup (1 oz/30 g) grated pecorino sardo or Parmesan cheese

To make the pesto, preheat an oven to 35O°F (18o°C). Spread the nuts on a baking sheet and toast until they take on color and are fragrant, 5-8 minutes. Let cool. Leave the oven set at 35o°F (18o°C). In a food processor, combine the nuts, basil, and garlic. Pulse until the basil is chopped. Add the cheese and pulse to combine. With the motor running, pour in the 1/2 cup (4 fl 02/125 ml) oil, a few drops at a time, until the mixture has the consistency of mayonnaise, adding more oil as needed. Season with salt and pepper; set aside.

Rub the new potatoes with 2 tablespoons of the olive oil, then season with salt and pepper. Place in a baking dish and roast, shaking the dish from time to time, until tender when pierced, about 35 minutes.

Meanwhile, bring a large pot three-fourths full of salted water to a boil. Add the beans and cook until tender, about 4 minutes. Scoop out with a skimmer, cool under running water, and drain.

Remove the potatoes from the oven and cut into bite-sized pieces. In a large saute pan over high heat, warm the remaining 2 tablespoons olive oil. Add the potatoes and saute until golden, about 4 minutes. Add the beans and stir until heated through, about 1 minute. Keep warm.

Meanwhile, return the large pot of water to a boil. Drop in the pasta, stir well, and cook until al dente (tender, but firm to the bite), about 2 minutes. Drain, reserving a few tablespoons of the cooking water. Transfer to a warmed serving bowl.

Stir the pesto and the reserved water into the vegetables in the pan (off the heat). Add to the pasta and toss well. Pass the cheese at the table.

NUTRITIONAL ANALYSIS PER SERVING: Calories 894 (Kilojoules 3,755); Protein 24 g; Carbohydrates 82 g; Total Fat 56 g; Saturated Fat 10 g; Cholesterol 92 mg; Sodium 654 mg; Dietary Fiber 7 g

WW points per serving: I don't wanna talk about it.

Smoked Chicken Pot Stickers


My whole family loves the steamed dumplings that we get at our local Chinese take-out joint. My four year old begs for them. Three years ago I came across a recipe for these Smoked Chicken Pot Stickers in the Weight Watchers magazine. Not only are they delicious,but you can eat 2 whole dumplings for only 75 calories and 2 grams of fat. I decided it had been too long since I last made these dumplings, so they became my Sunday evening project. I say project because these little dumplings take some time. Thankfully, not as much as my hand made tortellini, but you're still probably looking at an hour in the kitchen with these. Definitely worth it. Definitely yummy. But also a little time consuming. Just a heads up. : )

I begin by making the dipping sauce. You'll need soy sauce, dark sesame oil, some scallions, rice vinegar, and sugar. Combine the sauce ingredients and set it aside until you're ready to dip something into it.


Now lets prepare that pot sticker filling. Begin by chopping 1/3 cup of chives.


To prepare the cabbage, finely chop 1-1/2 cups of Napa or Savoy cabbage and place it in a sieve. Boil 2 cups of water and pour the boiling water over the cabbage. Press the excess water out using a wooden spoon or a spatula.


Here are the filling ingedients ready to go into the food processor. That's two chopped green onions, chives, 1/4 lb. of smoked chicken, and corn starch.


Put it all into the food processor with salt and pepper and an additional tablespoon of soy sauce.


Pulse until finely chopped.


Now you're ready for the wonton skins. The recipe calls for 24 round wrappers. I could only find square. I wonder if they would have been prettier if I used the round. The recipe calls for 24 wrappers, but I think I used around 36.


I covered my work surface with waxed paper. Work with 6 wrappers at a time, keeping the wrappers that you're not working with covered in damp paper towel to prevent them from drying out. Put 1 teaspoon of the filling in the center of each wrapper.


To shape the wonton, I dipped a finger in water and wet the edges of the wonton. Fold in half and press to seal. Then, I pleated the edges. I'm not skilled in wonton shaping. I'm not even sure that this is exactly correct. I tried to make them look as much like the picture provided on the recipe. It was a little tricky and took some time. As you can see, my wontons are like snowflakes, each one is different from the next and unique.


Now, spray a large nonstick skillet with cooking spray and heat over medium high heat. Add 12 or so dumplings and cook until they're golden brown on the bottom.


Then flip and cook for another minute or two.


Add 1/2 cup of water to the pan and cover. Reduce heat and steam for 4 minutes, until heated through. Remove from the pan and keep warm. Repeat the cooking steps with the rest of the dumplings.


Here's my first batch of perfectly steamed dumplings all cozy in the skillet.


Serve em' up with the dipping sauce.


Smoked Chicken Pot Stickers

Dipping Sauce:
1/2 cup reduced-sodium soy sauce
1 teaspoon sesame oil
2 green onions, finely chopped
1 tablespoon rice vinegar
1 teaspoon sugar
4 teaspoons water

Combine ingredients in a bowl and set aside.

Filling:
1-1/2 cups finely chopped Savoy or Napa cabbage
1/4 lb. smoked chicken breast, chopped
1/3 cup thinly sliced chives
1 tablespoon soy sauce
2 sliced green onions
1 teaspoon cornstarch
1/2 teaspoon salt
1/4 teaspoon pepper

Bring two cups water to a boil in a small saucepan. Place the cabbage in a sieve and pour the boiling water over it. With a wooden spoon or spatula, press excess liquid from the cabbage. Transfer to a food processor; add the chicken, chives, cornstarch, salt, pepper, soy sauce, and green onions. Pulse until finely chopped.

To make the dumplings:

24 to 36 3-to 3-1/2 inch wonton skins

Line a baking sheet with wax paper. Place 6 wonton skins on a work surface. Keep the remaining skins covered with a damp towel so they don't dry out. Place 1 teaspoon firmly packed filling in the center of each skin. Brush the edges of the skins with water. Fold in half and press the edges together to seal. Pleat the edges together, placing the dumplings on the baking sheet, and cover with plastic wrap.

To cook:

Spray a large nonstick skillet with cooking spray and set over medium high heat. Add 12 dumplings and cook until golden brown on the bottom, about 2 minutes. Flip and cook a minute or two longer. Add 1/2 cup water to the pan and cover. Reduce heat and simmer until the dumpling are cooked through, about 4 minutes. Transfer to a platter and keep warm. Repeat with the remaining dumplings. Serve with the dipping sauce.

Nutritional Information

Serving size: 2 dumplings with 1 tablespoon of dipping sauce 75 Calories, 2 g Fat, 0 g Sat Fat, 0 g Trans Fat, 13 mg Cholesterol, 622 mg sodium, 12 g Carbs, 1 g fiber, 4 g Protein, 12 mg calcium
Points per Serving: 1! Just 1!
Related Posts with Thumbnails