Wednesday, June 29, 2011

Honey-Grilled Chicken Breasts with Corn and Black Bean Salad


This was the perfect summer dinner. The flavorful grilled chicken with a delicious, cool and colorful salad really hit the spot!

The Honey-Grilled Chicken recipe also happened to offer a great way to showcase some of my favorite Pampered Chef kitchen tools too.

To begin, I prepared the marinade for the chicken. I cut the recipe for the marinade in half since only two of us would be dining at home tonight and the recipe makes enough for 8 chicken breasts.

First, I used my Microplane Grater to quickly and perfectly grate the fresh ginger.


Then I grabbed my juicer with a convenient built-in strainer AND a pour spout to juice a lime.


Next, I dropped clove after clove of garlic into my garlic press. This garlic press is awesome! One little squeeze and you've got fresh garlic without the hassle of mincing or chopping.


See?


It even comes with this handy little tool for quick and easy removal of any garlic debris left in the press.


Best of all, so you don't misplace the little tool, it conveniently fits right into the handle of the press for storage.


Once the ingredients are prepped, add them to a bowl with honey, soy sauce, orange juice, salt, and pepper.


Then whisk it all together. I totally love my sturdy little Pampered Chef whisk for jobs like this.


The pour spout on my small batter bowl made for an easy and clean transfer of the marinade to the plastic zip-top baggie filled with chicken breast. If you choose to make the marinade ahead, the batter bowl comes with a tightly fitted lid to cover the bowl before refrigerating.

Seal the plastic bag and marinate the chicken for at least 8 hours or overnight.


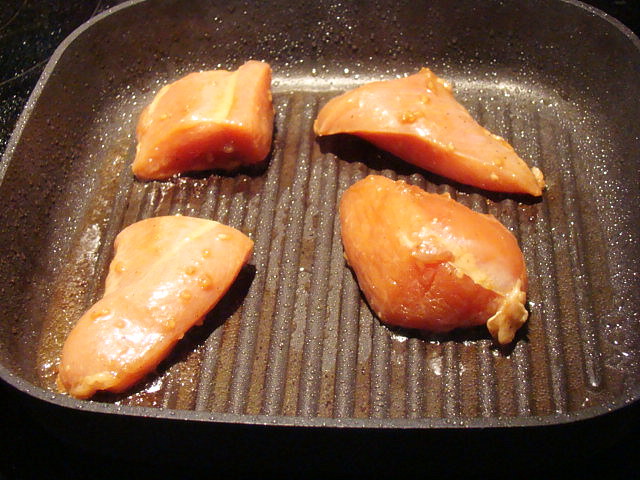
Because it was just my 3 year old and I dining in tonight, I didn't want to bother with firing up the grill. Instead, I heated up my Grill Pan and added the chicken.


Then I topped the chicken with my pre-heated Grill Press. This is a great tool not only for making paninis, but it's excellent for applying even heat to both sides of the meat. Last weekend one of my friends raved that her husband loves this tool for preparing hamburgers on the grill.

Please ignore all of the oil splatters in the picture. I added a little too much oil to the pan before adding the chicken and it splattered EVERYWHERE!


The chicken turned out beautifully! Very tasty! But I will say that it tasted more like Teriyaki Chicken than Honey Chicken. Even so, it was yummy! I'd used this recipe in place of store-bought teriyaki marinade again for sure!


The salad is a great "make ahead" dish and it came together in a snap. You just dump all of the ingredients into a bowl: corn, black beans, tomato, onion, cilantro, and garlic.


Then add all of the dressing ingredients to a jar that has a lid: sugar, vinegar, oil, lime juice, garlic powder, cumin, salt, and pepper. Put on the lid and shake until combined.


Pour the dressing over the salad and stir to combine. Then cover and refrigerate for at least an hour before serving. This salad just gets better with time, as the ingredients marinate in the dressing and the flavors mix n' mingle.

Confession: I doubled the dressing recipe. I tasted it after one application and the salad seemed a bit dry to me. After a second batch of the dressing, it was just right! Albeit not quite as healthy....

This dish would be the perfect addition to your 4th of July cookout. You could even serve it with tortilla chips as a salsa.


Enjoy!

I adapted both of these recipes from the June/July 2008 issue of Healthy Cooking.

Honey-Grilled Chicken Breasts original recipe found HERE

8 ServingsPrep: 15 min. + marinating Grill: 10 min.

Ingredients
1/2 cup orange juice
1/3 cup honey
1/4 cup fresh lime juice
1/4 cup reduced-sodium soy sauce
2 tablespoons minced fresh gingerroot
12 garlic cloves, minced
1/2 teaspoon pepper
1/4 teaspoon salt
8 boneless skinless chicken breast halves (6 ounces each)

Directions

•In a small bowl, combine the first eight ingredients. Pour 1/2 cup
marinade into a large resealable plastic bag; add chicken. Seal bag
and turn to coat; refrigerate for 8 hours or overnight. Cover and
refrigerate remaining marinade.

•Drain and discard marinade. Using long-handled tongs, moisten a paper
towel with cooking oil and lightly coat the grill rack. Grill,
covered, over medium heat or broil 4 in. from the heat for 5-7
minutes on each side or until a meat thermometer reads 170°,
basting frequently with reserved marinade. Yield: 8 servings.

Nutrition Facts: 1 chicken breast half equals 221 calories, 4 g fat (1 g saturated fat), 94 mg cholesterol, 331 mg sodium, 10 g carbohydrate, trace fiber, 35 g protein. Diabetic Exchanges: 5 lean meat, 1/2 starch.

Corn and Black Bean Salad original recipe found HERE.

8 ServingsPrep: 15 min. + chilling

Ingredients
1 can (15-1/4 ounces) whole kernel corn, drained
1 can (15 ounces) black beans, rinsed and drained
2 large tomatoes, finely chopped
1 large red onion, finely chopped
1/4 cup minced fresh cilantro
2 garlic cloves, minced

DRESSING:
2 tablespoons sugar
2 tablespoons white vinegar
2 tablespoons canola oil
1-1/2 teaspoons lime juice
1 teaspoon garlic powder
1/4 teaspoon salt
1/2 teaspoon ground cumin
1/4 teaspoon pepper

Directions

•In a large bowl, combine the first six ingredients. In a small bowl,
whisk the dressing ingredients; pour over corn mixture and toss to
coat. Cover and refrigerate for at least 1 hour. Stir before
serving. Serve with a slotted spoon. Yield: 8 servings.

Nutrition Facts: 2/3 cup equals 142 calories, 4 g fat (trace saturated fat), 0 cholesterol, 326 mg sodium, 21 g carbohydrate, 4 g fiber, 4 g protein. Diabetic Exchanges: 1 starch, 1 vegetable, 1 fat.

* I doubled the dressing recipe.

To shop my personal Pampered Chef website, click HERE or just click the link in the upper left sidebar of this site. Choose "Shop Online" in the top tool bar, then click on option #2 on the next screen. Happy shopping!

Friday, June 24, 2011

Bananas Foster Bread


Hello, friends! I realize that my posts have been sporadic this summer. Weekend trips, visits to and from family, and all of our summer activities are keeping us extra busy! I baked this delicious Bananas Foster Bread to share with my sister when she visited with her 3 young sons this week (ages 5, 3, and 6 weeks). I figured the least I could do was have a fresh-from-the-oven treat ready after she braved 4 hours of highway alone with 2 active boys and an infant to come and see me. Our late night snack doubled as breakfast the next morning when I served it with a side of fruit.

I found this Cooking Light recipe on Elizabeth's Edible Experience blog. She had me at "Bananas Foster". I love the traditional version of the dessert so much that and I've even translated it into french toast casserole. The combination of bananas, brown sugar, and rum is always a winner in my book! This banana bread was no exception. It's easily one of the best banana breads to come out of my oven. It was super moist with a fine crumb and sweet with loads of banana flavor. This recipe is a keeper for sure!

Here's how it came together:

You begin by melting 5 tablespoons of butter in a skillet or saucepan, then add in 1-1/2 cups of mashed ripe banana, 1/2 cup of brown sugar, and 3 tablespoons of dark rum. Cook over medium heat, stirring occasionally until the mixture is bubbly, then remove from heat and cool.


Meanwhile, combine fat free yogurt, eggs, and another 1/2 cup of brown sugar in a mixing bowl.


Add in the cooled banana mixture and mix until combined.


Add flour, baking soda, salt, and cinnamon and mix until just combined. Over-mixing will make for a less tender bread, so either hand-stir or go easy with your mixer.


Pour the batter into a loaf pan prepared with cooking spray. Bake at 350 degrees for 50 minutes or until a toothpick inserted in the center comes out clean.

While the bread bakes, mix up a simple glaze with a tablespoon of butter, a tablespoon of rum, and powdered sugar. I ended up adding a couple teaspoons of milk to thin the glaze to a drizzling consistency.


Remove the loaf from the pan to a rack for cooling.


Then slide a piece of wax paper under the rack to catch the drips and drizzle the glaze over the loaf while still warm.


Slice it up and enjoy!


Here's the recipe from Cooking Light as seen on Elizabeth's Edible Experience:

Bananas Foster Bread

Yield: 16 servings (serving size: 1 slice)

Ingredients
1 1/2 cups mashed ripe banana
1 cup packed brown sugar, divided
6 tablespoons butter, melted and divided
1/4 cup dark rum, divided
1/3 cup plain fat-free yogurt (I used vanilla)
2 large eggs
6.75 ounces all-purpose flour (about 1 1/2 cups)
3/4 teaspoon baking soda
1/2 teaspoon salt
1/2-3/4 teaspoon ground cinnamon
Cooking spray
1/3 cup powdered sugar

Preparation
1. Preheat oven to 350°.
2. Combine banana, 1/2 cup brown sugar, 5 tablespoons butter, and 3 tablespoons rum in a nonstick skillet. Cook over medium heat until mixture begins to bubble. Remove from heat; cool. Place yogurt, remaining 1/2 cup brown sugar, and eggs in a large bowl and mix until combined. Add the cooled banana mixture and beat with a mixer at medium speed.
3. Weigh or lightly spoon flour into dry measuring cups; level with a knife. Combine flour and next 4 ingredients (through cinnamon) in a small bowl. Add flour mixture to banana mixture; beat just until blended. Pour batter into a 9 x 5-inch loaf pan coated with cooking spray. Bake at 350° for 50 minutes or until a wooden pick inserted in center comes out clean. Remove from oven; cool 10 minutes in pan on a wire rack. Remove bread from pan; place on wire rack.
4. Combine remaining 1 tablespoon melted butter, remaining 1 tablespoon rum, and powdered sugar; stir until well blended. Drizzle over the warm bread.

Wednesday, June 15, 2011

Thai Shrimp Curry


If you've been reading my blog for long, then it's no secret that I love Thai food. Thai is one of my favorite cuisines. When I found this recipe for Thai Halibut-Shrimp Curry in the April edition of Bon Appetit magazine, I knew the dish would make it's way onto our meal plan (Although I have failed to post our weekly meal plan lately it is STILL alive and well!) sooner rather than later. This recipe combines all of those Thai flavors that I love; the coconut milk, the curry spices, the lime, basil, and cilantro. I was certainly not disappointed!

Here's how this recipe made it's way from the glossy pages of Bon Appetit to our kitchen table:

First order of business: the limes. First I grated the peel with my newest favorite kitchen tool, the Microplane grater. In my opinion, there is no better grater. It's super sharp, plows through citrus, nuts, and ginger in no time flat, and comes with it's own adjustable "kick-stand" for easy grating.


Then I cut the limes in half and used my juicer to extract the tart juice.


Finally, I cut one last lime into wedges for a garnish.


Next up, I employed the Microplane Grater again to prepare the ginger. Tip: keep whole pieces of ginger in the freezer for effortless grating.


Here's one of my favorite features about the Microplane Grater: the food can be pressed into place with this handy guard. Grate without fear! Your fingers WILL be safe!


The Microplane Grater turned the chunk of ginger into this finely grated heap in just seconds!


Next, I cut a sweet red pepper in half and then chopped it.


Add the red pepper, some chopped shallots, and the ginger to a skillet prepared with oil and heated over medium-high heat. Saute until the shallots are tender and the peppers soften.


While the veggies sauteed, I gathered the sauce ingredients: coconut milk, red curry paste, and fish sauce.


Add them to the vegetables with the lime juice and peel. Bring to a simmer and cook, stirring often, for 5 minutes.


Add a pound of shrimp to the sauce. Cook until they are pink and opaque. Season to taste with salt and pepper.


Stir in the fresh herbs: basil and cilantro.


Serve over steamed jasmine rice and garnish with limes.


Enjoy!


Thai Shrimp Curry adapted from Thai Shrimp-Halibut Curry from Bon Appetit Magazine (original recipe HERE)
4 servings
PREP: 50 minutes TOTAL: 50 minutes
Ingredients
3 large limes
1 tablespoon vegetable oil
1 cup chopped shallots
1 large red bell pepper, cut into 1/2- to 3/4-inch dice
1 1/2 tablespoons minced peeled fresh ginger
2 1/2 teaspoons Thai red curry paste (such as Thai Kitchen brand)
1 13 1/2- to 14-ounce can unsweetened coconut milk
1 tablespoon fish sauce (such as nam pla or nuoc nam)
1 lb. peeled deveined uncooked medium shrimp
1/3 cup chopped fresh cilantro
1/3 cup chopped fresh basil
Preparation
Finely grate enough peel from 2 limes to measure 11/2 teaspoons. Squeeze enough juice from 2 limes to measure 2 tablespoons. Cut third lime into wedges.
Heat vegetable oil in large saucepan over medium-high heat. Add chopped shallots, diced red bell pepper, and minced ginger; sauté until shallots are tender and peppers soften, about 5 minutes. Stir in curry paste, coconut milk, fish sauce, 11/2 teaspoons lime peel, and 2 tablespoons lime juice. Simmer gently, stirring often, about 5 minutes. Sprinkle fish and shrimp with salt and pepper. Add fish and shrimp to curry sauce. Return to very gentle simmer and cook just until fish and shrimp are opaque in center, 5 to 6 minutes. Season to taste with salt and pepper. Gently stir in cilantro and basil; serve with lime wedges.

Nutritional Information
One serving contains:
Calories (kcal) 296.0
Calories from Fat 28.1
Fat (g) 9.3
Saturated Fat (g) 3.0
Cholesterol (mg) 145.9
Carbohydrates (g) 12.4
Dietary Fiber (g) 1.2
Total Sugars (g) 3.0
Net Carbs (g) 11.2
Protein (g) 40.1
Sodium (mg) 622.2

Friday, June 10, 2011

Old-Fashioned Rhubarb Pudding Cake


My parents brought along a bag of rhubarb on their visit a couple of weeks ago. Yay! I'm always on the lookout for new rhubarb recipes. I collect them in a file folder that stays tucked in between my cookbooks until I pull it out each Spring when rhubarb is in season. It's always a dilemma to decide which recipe to try first when I get a bunch of rhubarb. Since this one happened to be the recipe on top of the stack and it looked quick and easy, I called it a "sign" and grabbed for the simple ingredients, all of which I already had in my fridge and pantry. A pudding cake is always sure to please!

I think that I copied this one from a Taste of Home cookbook sometime last year. This recipe is for true rhubarb lovers (like me) who enjoy the taste of the tart vegetable, uninhibited by lots of spices and ingredients. The rhubarb flavor really shines through with this recipe! My only complaint (not that it stopped me from eating a couple of pieces) was that this was less like a pudding cake and more like a regular cake. The pudding cakes that I have made in the past tend to have a denser, more gooey texture. Still, this was a yummy way to use up rhubarb, especially when topped with freshly whipped cream.

To begin, I chopped 4 cups of fresh rhubarb.


Then I put the rhubarb in a saucepan and added in a cup of sugar. Cook over medium heat for 12-15 minutes or until the rhubarb is tender. My oldest daughter volunteered to tend to the simmering rhubarb while I went about mixing up the cake batter. While she didn't want to eat the cake, she really enjoyed tasting the sweetened, cooked rhubarb.


With the rhubarb cooking, I creamed 1/2 stick of butter with 1/2 cup of sugar. Then I beat in an egg and a teaspoon of vanilla.


Mix the dry ingredients together and add them to the batter alternately


with 1/2 cup of milk.


Pour the batter into the bottom of a greased 9 inch square baking dish.


Then top with the cooked rhubarb-sugar mixture.


Bake at 350 degrees for 30-35 minutes until a toothpick inserted in the center comes out clean.


Serve with whipped cream, if you like.


I did like this, but the next time I want a Rhubarb Pudding Cake, I think that I will use my Peach Pudding Cake recipe and substitute rhubarb for the peaches. I really prefer the pudding-like texture and sweetness of a denser pudding cake.

But if you're looking for a simple and delicious rhubarb "snack" cake then give this one a try!

Here's the recipe from Taste of Home:

Old-Fashioned Rhubarb Pudding Cake adapted by Krista's Kitchen

Prep: 30 min. Bake: 30 min. + cooling

Ingredients
4 cups diced fresh or frozen rhubarb
1-1/2 cups sugar, divided
1/4 cup butter or shortening
1 egg
1 teaspoon vanilla extract
1 cup all-purpose flour
2 teaspoons baking powder
1/4 teaspoon salt
1/2 cup milk

Directions
•In a large saucepan, combine rhubarb and 1 cup sugar. Cook over
medium heat for 12-15 minutes or until rhubarb is tender.

•Meanwhile, in a small bowl, cream shortening and remaining sugar
until light and fluffy; beat in egg and vanilla. Combine the flour,
baking powder and salt; add to creamed mixture alternately with
milk. Beat just until combined.

•Pour into a greased 9-in. square baking dish. Pour rhubarb mixture
over batter. Bake at 350° for 30-35 minutes or until a toothpick
inserted near the center comes out clean. Cool on a wire rack.

Yield: 9 servings.
Related Posts with Thumbnails