Showing posts with label Vegetables. Show all posts

Monday, November 17, 2014

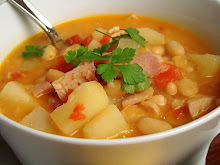
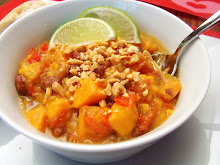
Butternut-Spinach Noodle Soup

 
I ate this soup all by myself. I remember that I went in to work on the day that I prepared this and that leftovers were on the menu for dinner. Except, I didn't want to eat leftovers. It was a cold, rainy day. After staring out of a classroom window at the blustery, gray day and hopping in and out of the car while picking up the kiddos after school, all I wanted was a great bowl of soup. And so, while my daughters did their homework, I threw together this simple soup and then heated leftovers for them while it simmered.
 
This soup was just what I needed. It warmed my bones and filled my belly and made me happy. I know that I just wrote I ate it "all by myself", but that's not completely true. While staring up at me from his leftovers, the baby got a case of soup envy. And so I shared. It made him happy too.
 
I used prepared chicken broth in this recipe, but you could easily make a vegetarian version by using vegetable broth.
 
Here's how it came together:
 
First, I heated a little olive oil in the bottom of my small stock pot. Then I added in the equivalent of 1/2 of a large onion, diced. I just used onion that was already chopped from my refrigerator, which consisted of part red onion and part yellow onion. Any type of onion is fine. My personal favorite from the onion family is the shallot, but I didn't have any of those laying around on this particular night. Saute the onion until tender.


While the onion  sautéed, I chopped the bottom part of the butternut squash that was leftover from the Squash Fries that recently wrote about. I ended up with a heaping cupful of squash.


Add the squash to the onion and saute for a few minutes longer. Salt and pepper the mixture. Then pour in 6 cups of broth and bring it to a boil. I forgot to take a picture of this step. I got a little caught up with helping with homework, heating leftovers for the kids, and toddler wrangling....


Once the broth boils, add 2 cups of wide egg noodles. Cook according to package directions, or until the noodles are tender.


While the noodles cook in the soup mixture, chop 1/2 of an 8 oz. bag of fresh baby spinach. Or if your household is like mine; chop the spinach, assist your 4th grader with long division, listen to the nightly 1st grade reading assignment, unload the dishwasher, pull your toddler off of the top of the dining room table (from where he is firing his entire toy train/tractor collection over the edge and then leaning dangerously close to toppling over while watching them crash below because, well, his head is big and heavy and the rest of his body may just follow his head onto the hardwood floor below and land on the whole train/tractor pile-up that has accumulated there) then attempt to engage him in an activity closer to the kitchen, but not quite underfoot, perhaps a session of banging on pots with a wooden spoon, then carry a basket of laundry up from the dryer (which may or may not get folded within the next 24 hours) and set the coffeemaker for the next morning. #multitasking

Add the spinach to the soup, then cook and stir for a couple of minutes until it wilts.


And that's it! Super quick and easy soup. Packed with flavor, low in fat, high in dietary fiber, and there are even some vitamins and anti-oxidants in there.


Butternut-Spinach Noodle Soup

Olive oil
1/2 of a large onion, diced
1 cup butternut squash, chopped
6 cups chicken or vegetable broth
2 cups wide egg noodles
4-6 oz. fresh baby spinach, chopped
salt and pepper, to taste

Heat enough olive oil in the bottom of a large saucepan or small stockpot to keep onion from sticking. Add diced onion and saute until tender. Add squash and saute for 3-5 minutes. Pour in broth, then bring to a boil. Add noodles and cook according to package directions or until tender. Stir in spinach and cook until just wilted. Remove from heat. Salt and pepper to taste.

*Add a teaspoon of Italian seasoning or a pinch of red pepper flakes with the broth if a more complex flavor is desired.

This concludes my series of posts on butternut squash. Probably. There is 1 more butternut squash staring at me from my kitchen counter as I type these words, but I think that I'm going to "give it a rest" on my posts about squash for a bit. Tune in next time for my review of ways to seed a pomegranate. Have a wonderful day, everyone!

Thursday, November 6, 2014

Squash Fries


On my most recent trip home to see my family, my middle sister plucked 3 butternut squash from her garden for me to bring back to Ohio. I was certainly grateful, as the herd of deer (I'm not exaggerating!) that reside in my backyard chose to rip out every last one of my vining plants this year. Those pesky deer also ate everything else, including the hot peppers which they saved for very last. I hope that they got a wicked heartburn!  Quite the animal lover, aren't I?

But I digress, the point of this post is not to rant about my love-hate relationship with the wildlife in my backyard. Fun to watch, not so fun to deal with. Let's get back to the squash. Nearly every fall I make Cream of Butternut Soup, but with 3 squash in my possession, I wanted to explore some other preparations of this late season garden staple. I took my search to Pinterest and ended up making 3 separate recipes with the squash, 2 of them inspired by Pinterest and one an invention of my very own. Stay tuned for upcoming posts about how the other 2 recipes turned out.  Today I feature the simplest of those recipes, Butternut Squash Fries.

 I wanted to introduce squash into my kiddos diet in a way that I was sure they would eat...or at the very least try. My children don't eat french fries often. Mainly because, for them, fast food is a big treat or a necessity on a road trip. And even when we do hit a drive-thru, the fries are not their first priority. They are far more excited about the chance to order a beverage that isn't water, 100% fruit juice, or milk. I know, they are soooo deprived by their controlling, nutrition-conscious mom. They certainly don't get their ambivalent attitude towards fries from me. I happen to LOVE french fries. Unfortunately. Hey, I said "nutrition-conscious". Just because I am conscious of the fact that french fries are not super nutritious doesn't mean that I possess the self-control to completely eliminate them from my diet.  In fact, sometimes my choice of fast food restaurant is driven entirely by the type of fries that I am in the mood for.

While my children do not share my enthusiasm for the perfect batch of fries, I do know that they will eat fries. They are not a scary, new food for them to try. I theorized that disguising squash as fries would be a brilliant way to get them to try butternut squash. Plus, I already had Cheeseburger Soup on the menu for dinner on the night that I served these. I thought that these fries served alongside the soup might be a fun twist on the traditional "Cheeseburger and Fries" pairing. Here's how it came together:


I began with a butternut squash with a long neck. This made it easier for cutting fries. I made one initial cut, decapitating the long top of the squash from the rounded bottom, then I peeled both portions with my vegetable peeler. I removed the seeds from the bottom portion and put it into the fridge for use in the soup that I will feature in an upcoming post.


I sliced the top portion into "steak-fry like" sticks.


Then I drizzled them with olive oil and tossed to coat. In my haste, my drizzle turned into more of a pour. Next time, I think I will back off a bit on the oil. It may have prevented my fries from reaching their crispiest potential.


Then I gathered the spices: smoked paprika, garlic salt, and chili powder. I think parmesan cheese would have worked nicely here too.


I liberally sprinkled the spices on the fries and tossed them a bit to coat.


I decided to arrange them on a rack over a foil-lined baking sheet (less mess!) to keep them up out of the oil and hopefully contribute to a "crisp" finished product. Next time I think that I'll bake them directly on the foil-lined baking sheet and possibly flip them 5-10 minutes before they finish baking. Pop them into a pre-heated 450 degree oven and bake for 30 minutes until tender in the middle and crispy on the outside. Then plate them and dig in!

 
It is my oldest daughter's habit to ask, "What's for dinner?" within minutes after I pick her up from school. On this day I answered, "Cheeseburger and fries." Eyebrows raised, she looked at me with a certain amount of (warranted) skepticism. "Really?" she asked.  "Yep," I answered.
 
When I served up dinner a few hours later, she confronted me, "You tricked us!"  True. I tricked them- into a healthy, delicious dinner. Guilty as charged. Please note from the picture above: That little hand grabbing for a fry? Yeah, that hand is attached to my 10 year old and she was happy to consume the healthier version of fries that had been placed before her.  
 
 
The baby liked them too. He took great joy in dipping the fries into the Cheeseburger Soup and exclaiming, "Mmmmm." I have to a agree. These fries were delicious!
 
Here is the recipe adapted from Busy in Brooklyn, original recipe found HERE.
 
 
Butternut Squash Fries
 

Thursday, September 15, 2011

Cream of Butternut Soup

As promised in the meal plan, I served squash all week long. I even updated my spaghetti squash recipe and wrote about it in my weekly column for the Strongsville Patch. You can check out the article and the new and improved step-by-step pictures HERE. But somehow, it has taken me all week to get around to posting a single squash recipe on this blog.

Tonight, with my daughter's very first sleepover party on the agenda for tomorrow and the start of a nasty cold slowing me down, I have grounded myself to the couch on this fine, crisp, fall Friday night in order to share my Cream of Butternut Soup recipe with all of you and to rest up for tomorrow's birthday festivities. Wish me luck! : )


As is the case with many of my favorite foods, this one comes with a memory.

I lived in Dublin, Ohio for 9 months in 2004. My husband had been transferred there for work. It was summertime and I was 5 or 6 months pregnant with our first child when I moved. I say "I" instead of "we" because my husband had moved before I did. (Lucky him, missing out on my entire nauseous first trimester!) I stayed behind to pack up our household and finish teaching my students until the end of the school year.

I didn't know a single person in our new town and my husband worked long hours, so once I had unpacked, I explored the shops and restaurants of Dublin's pretty downtown. Oscar's Restaurant and their welcoming outdoor patio quickly caught my attention.

My mother-in-law came to visit soon after we settled in. I knew exactly where I wanted to take her for lunch. I can't remember anything else that we ordered at Oscar's on that lunch date, but their butternut squash soup (or was it a bisque?) left an impression on both of us. Smooth, creamy, and delicious- the soup was definitely a winner! We visited Oscar's and ordered this soup on a number of subsequent visits.

After my mother-in-law headed back to Indiana, I set out to re-create this recipe in my own kitchen. I can't remember where I initially found this recipe, but I've tweaked it over the years to make it my own. The following spring, I left Dublin with a beautiful 8 month old daughter and the ability to make my very own butternut soup. I've carried the recipe with me through moves to 3 states and I still look forward to it every fall.

Fast forward to the present. My mother-in-law is visiting this weekend for my daughter's 7th birthday. We're living in Ohio again. With an abundance of squash atop my kitchen counter, I can't think of a better way to commemorate the occasion than to cook a batch of the soup we fell in love with 7 years ago when that baby was still kicking against my tightly stretched tummy.

It feels like I have known this amazing little girl forever (maybe because she is my mini-me in both appearance and personality?) and at the same time, it feels like just yesterday that I held her in my arms for the very first time. Ahhh. Where did the time go!?

Look at me, all nostalgic on the eve of my daughter's 7th birthday party...

Okay, I've allowed myself a "moment", now it's time to put away the Kleenex and write about soup!

Here's how it came together.

I began with a Butternut Squash.


I like to cut it into more manageable portions by cutting off the neck, then slicing the round, lower portion in half.


Scoop out the seeds from the middle and discard.


Then, peel the tough skin from the flesh of the squash. Warning: this requires a sharp paring knife and a bit of persistence.


Here is the peeled squash.


Cut it up.


Now begin the base of the soup. Start by sauteing some onion and celery in butter or oil until tender.


Stir in all of the spices: Salt, pepper, tumeric, ginger, cinnamon, nutmeg, and a bay leaf.

With all of those spices stirred in, your house will smell amazing! When I smell this soup simmering, I can't help but embrace the cooler fall temperatures. It makes the house seem so cozy!


Once the spices have heated up, stir in some chicken broth.


Bring the mixture to a boil, then add in the chopped squash and a few peeled, cubed, potatoes.


Bring to a boil, then simmer for 15-20 minutes until the squash and potatoes are tender.

If you've got an immersion blender, put it into the pot and start blending!

Otherwise you can transfer the soup in batches to a traditional blender or food processor.


Blend until smooth.


Finally, stir in sherry (for a punch!) and milk (for a creamier texture).


Serve with a baguette for sopping or homemade garlic croutons. Garnish with a sprinkle of nutmeg or fresh parsley.


Cream of Butternut Soup

1 medium onion, diced
2 celery ribs, chopped
2 tablespoons butter
2-3 (14.5 oz) cans chicken broth
1 tablespoon sugar
1 bay leaf
1/2 teaspoon salt
1 teaspoon ginger
1 teaspoon tumeric
1/2 teaspoon cinnamon
1/4 teaspoon nutmeg + more for garnish
1 (2-1/2 to 3 lb) butternut squash, cubed
3 medium potatoes, peeled and cubed
1-1/2 cups milk
2-4 tablespoons sherry

Saute onion and celery in butter. Stir in spices and heat through, then add broth. Bring to a boil. Add squash and potatoes. Return to boil. Reduce heat, cover, and simmer for 15-20 minutes or until squash and potatoes are tender. Remove from heat. Cool slightly. Remove bay leaf. Puree. Stir in milk and sherry. Heat through. Divide into serving bowls and garnish.

Notes: I used cooking sherry, versus regular sherry. I needed to use more. If using "real" sherry, add a lesser amount and then add more according to taste.

If the soup is too thick, thin with additional broth or milk. I've made this soup too thick in the past. It resembled baby food. Not good!

Don't be afraid to play around with the spices, adjusting the amounts until the flavor of the soup suits your personal taste.

Enjoy!

Sunday, September 11, 2011

Squash is on the Menu! The Meal Plan 9/12-9/18

My family is going on a squash diet this week.


In addition to the acorn squash that I picked from my garden on Friday, my youngest sister arrived for a weekend visit with bags of squash from our middle sister's enormous Indiana garden. Since I need to use it up, the focus of our meals this week will be some of my favorite squash recipes. I have acorn, butternut, spaghetti, yellow crookneck, and still more zucchini.

I haven't made a concrete plan yet. It will be a busy week. I'm preparing for my daughter's 7th birthday party and some out-of-town company. So, instead of daily meals and a grocery list, this week I have provided the links to some of my family's favorite squash recipes.

For Acorn Squash, we prefer it halved and filled with sausage, brown sugar, and spices.

Spaghetti Squash eats much like pasta, hence the name. I like to top mine with a fresh tomato sauce.

The crookneck squash is similar to zucchini and can complete many main dishes. However, one of my favorite recipes, "Squashed Squash" is a side dish that allows the crookneck to shine on it's own.

Zucchini is so versatile that I haven't yet decided what I will prepare with it this week. In THIS POST, I featured a number of delicious zucchini recipes. I may re-visit one of them or try something new.

I don't have a link for a Butternut Squash recipe...yet. Stay tuned this week, because I will be posting my favorite Cream of Butternut Soup recipe in addition to a non-squash recipe for Cheesesteak Pizza.

So that's the meal plan for this week. Sort of. I'll try to be better next week and return to my usual daily meal/grocery list format. I intended to post a more specific plan tonight, but The History Channel sucked me in. I couldn't take my eyes away from the horror and sadness on the screen long enough to commit to a recipe.

I don't know about you, but after re-living the tragedy of September 11th, 2001 through the 10 Year Anniversary coverage this weekend, I'm ready for an uplifting Monday.

One of my friends posted this on her Facebook page tonight:

"What are we doing in our daily lives to remember 9/11? Taking life for granted? Or soaking in every precious moment, telling family and friends we love them, and setting our priorities straight? Let's make this day more than about remembering where we were then - let's take a good look at where we are now."

I thought that it was good "food for thought". I remember the intensity of my emotions following 9/11. I was focused on all of the things that my friend listed above. I wish that I could say I have continued to do those things consistently over the last 10 years. While I will certainly "never forget", that intensity has waned over the years. My friend's post and everything that I watched this evening have served as a much needed reminder.

God Bless America and each and every one of you! I hope that you all have a wonderful week.

Thursday, September 1, 2011

Harvest Vegetable Tart


When I found this Harvest Vegetable Tart in an old issue of Light & Tasty magazine, it looked so good and was so timely with all of the garden produce that was piling up on my kitchen counter that I couldn't NOT make it.

Note: This tart is NOT a quick weeknight dinner. It involves pastry making, chopping, sauteing, mixing, and baking. But it certainly is yummy! This recipe would be perfect for a late summer brunch with friends or even a baby or bridal shower. It's pretty, impressive, and delicious.

Of course, my family enjoyed it as a Wednesday night dinner, so if you've got the time, I say, "Go for it!"

I started by making the pastry. I combined all-purpose and whole wheat flour with cornmeal, Parmesan cheese, salt, and cayenne pepper.


Then I cut in 1/2 stick of cold butter.


Next, I stirred in ice cold water by tablespoonfuls until the dough began to stick together.


After that, I dropped the stirring spoon and used my hands to work the dough until I could form it into a ball. You want to work the dough as little as possible for a tender, flaky crust. Wrap the ball in plastic wrap before placing it in the refrigerator for at least 30 minutes.


While the dough chilled, I prepared the other components of this tart.

First I gathered all of the vegetables. I am proud to say that all of these veggies were gathered from my garden and my grandma's garden save the green onions.

I sliced and chopped them all up as directed by the recipe.


Then I heated a little oil in a non-stick skillet and added the green onions and garlic. Cook for a couple of minutes.


Then add the slices of eggplant. Cook for 5 minutes or until the eggplant softens, then set aside to cool.


While the eggplant cooked, I whisked together the eggs and evaporated milk that hold the whole thing together. Season with salt and pepper.


To roll out the crust, I placed the dough on a piece of waxed paper.


Then I covered it with another sheet of waxed paper and rolled it out to fit a 9 inch pan. A tart pan is recommend for this recipe (after all, it is a tart!). However, I still don't have a tart pan, so I opted for my trusty Pampered Chef springform pan. Peel off one of the sheets of paper and press the pastry down into the pan.


Then carefully peel away to top sheet of waxed paper.


Line the pastry with a double layer of heavy duty aluminum foil and put it into a 450 degree oven to bake for 8 minutes. Then remove the foil and bake for another 5 minutes, uncovered.


Remove the crust from the oven and lower the heat to 350 degrees.

While the oven cools, it's time to build the tart. Start with the eggplant. Arrange the slices with the green onions and garlic over the bottom of the tart.


Next, arrange a sliced tomato over then eggplant.


And some red and green bell pepper slices.


Sprinkle with Parmesan.


Top with 1/2 cup of frozen corn. Season with salt and pepper.


Now pour on the egg/evaporated milk mixture.

This is where things got a little "hairy". I assume that because I didn't use a tart pan, the crust shrank as it baked, decreasing the surface area that should have accommodated all of the fillings. The egg mixture ran over the sides and began to fill, then leak out of my springform pan.


Despite the filling dripping from the pan, I decided to press on. I placed a layer of aluminum foil on the bottom rack of my oven to catch the drips, then I put the tart into the oven to bake as instructed.

Luckily, it turned out great! It didn't even stick to the bottom of the pan when I removed it to a serving plate.


The only thing left to do was slice and eat!


The verdict: I loved this! The flavor of the tart was wonderful. I was tempted to eat the whole thing by myself! The eggplant provided a nice meaty/hearty element. However, if you are anti-eggplant, you might try using sliced zucchini instead. I also thought that the tart would be yummy with some mushroom slices.

My only beef was with the crust. Despite my efforts to keep it tender and flaky, I thought that the crust was a little tough. However, it tasted wonderful with the flavor of the Parmesan and that hint of heat from the cayenne pepper. I also appreciated the crunch provided by the cornmeal.

As for the rest of my family's reaction: My kiddos could not be persuaded to try this. The tart just had too many vegetables and worse yet, they were all mixed in there together (mixed veggies constitutes a "double strike" in this household). They did repeatedly comment on how great it smelled while baking, but in the end I made a freezer pizza for them. My husband, on the other hand, shared my enthusiasm for this tart. After a bout of the stomach flu early in the week, this was his first meal in 2 days. He ate slices of this tart right up!

Here's the recipe from the August/September 2006 edition of Light &Tasty magazine

Harvest Vegetable Tart
6 Servings Prep: 45 min. + chilling Bake: 30 min.

Ingredients
1/2 cup all-purpose flour
1/4 cup whole wheat flour
1/4 cup cornmeal
2 tablespoons grated Parmesan cheese
1/2 teaspoon salt
1/8 teaspoon cayenne pepper
1/4 cup cold butter, cubed
3 to 4 tablespoons cold water

FILLING:
1/2 cup thinly sliced green onions
2 garlic cloves, minced
1 tablespoon olive Oil
5 slices peeled eggplant (3-1/2 inches x 1/4 inch)
2 tablespoons grated Parmesan cheese, divided
1 small tomato, cut into 1/4-inch slices
3 green pepper rings
3 sweet red pepper rings
1/2 cup frozen corn
2 eggs, lightly beaten
2/3 cup fat-free evaporated milk (I did not use fat free)
3/4 teaspoon salt
1/4 teaspoon pepper

Directions
•In a bowl, combine the first six ingredients. Cut in butter until
crumbly. Gradually add water, tossing with a fork until dough forms
a ball. Cover and refrigerate for at least 30 minutes.

•Roll out pastry to fit a 9-in. tart pan with removable bottom.
Transfer pastry to pan; trim even with edge of pan. Line unpricked
pastry shell with a double thickness of heavy-duty foil. Bake at
450° for 8 minutes. Remove foil; bake 5 minutes longer.

•In a large nonstick skillet coated with cooking spray, cook onions
and garlic in oil for 2 minutes. Add eggplant; cook for 4-5 minutes
or until softened. Cool for 5 minutes. Spoon into crust. Sprinkle
with 1 tablespoon Parmesan cheese. Top with tomato slices and pepper
rings. Sprinkle with corn.

•In a small bowl, whisk the eggs, milk, salt and pepper; pour over
vegetables. Sprinkle with remaining Parmesan cheese. Bake at
350° for 30-35 minutes or until a knife inserted near the center
comes out clean. Yield: 6 servings.

Nutrition Facts: 1 piece equals 256 calories, 13 g fat (6 g saturated fat), 95 mg cholesterol, 691 mg sodium, 27 g carbohydrate, 3 g fiber, 9 g protein. Diabetic Exchanges: 2 fat, 1-1/2 starch, 1 vegetable.

Notes: Make this tart your own! Add in vegetables that you have in your own kitchen. If you don't have any eggplant, consider zucchini.
Related Posts with Thumbnails