Showing posts with label royal icing. Show all posts

Tuesday, December 16, 2008

Gingerbread Cookies


I began making these gingerbread cookies 4 years ago. Before that, I went back to my parent's house and baked an impressive assortment of Christmas cookies with my mom and sisters. After my daughter was born, I decided that we needed a Christmas tradition of our own. I'd never made gingerbread before in my life, but they look so pretty and festive that I decided that they were the perfect pick for our cookie tradition. That first Christmas my daughter sat in her bouncy seat at 3 months old and watched me roll out the cookies. Each year she's been a little more involved in the process. Last year her special job was the sprinkles. This year, she's still "queen of the sprinkles", but she actually helped to make the dough. I make, decorate, and individually wrap about 9 dozen of these cookies to take to each family Christmas celebration and to give to friends and neighbors. That means these cookies don't happen in just one day. I make the dough on day 1, roll out and bake on day 2, and decorate and wrap on day 3. This year, because our Christmas parties are more spread out, most of the cookies are still waiting in the freezer to be decorated.

You begin by sifting the dry ingedients together. That's flour, ginger, cloves, nutmeg, cinnamon, and baking powder.


Next, melt and cool 1 cup of butter.


Now add a cup of molasses.


And an egg, water, and vanilla.


Add the dry ingredients.


Mix until combined and formed into a soft dough.


Divide the dough into 3 parts. I spoon mine right onto plastic wrap.


Then I smoosh (technical term here) the dough to about 1 1/2" thick. Make sure that it's sealed tightly in the plastic and refrigerate for at least 3 hours.


When the dough (and you) are ready, roll it out on a floured surface.


Cut out the cookies.


Transfer them to a baking sheet and bake for 10-12 minutes. They are done when they appear dry and are soft to touch.


Once they've cooled, they are ready to decorate. I begin by piping on two blue eyes and a smile.


Next, I add cinnamon candy buttons for the men and sashes for the ladies.


Then I pipe on cuffs and collars and skirt ruffles and sprinkle with green sugar. This is where I made a royal mistake with my first two dozen cookies this year. I always use Buttercream Icing on my gingerbread cookies. Well, I had quite a bit of white royal icing left over from the gingerbread barn and I hated to waste it, so I just used it to pipe on the cuffs and collars and ruffles. Big mistake. Huge. That stuff dries to a rock hard consistency. When I finished decorating, I wrapped the cookies and plated them up. Unfortunately, two days went by before I got a chance to deliver them to my neighbors. So the cookies sat there getting stale in addition to having cement for icing. I delivered the cookies last night and when I returned home, I decided to have one for myself. I bit, or should I say tried to bite into one of these pretty cookies. It was hard as a rock. Uh-oh. I am so embarrassed. If you happen to be one of the people that recieved my cookies and you're reading this now : I am so sorry! If I had only tried the cookies first....
The moral of the story is royal icing is great for gingerbread houses (and barns) but stick to buttercream for the cookie decoration AND always sample the final product before you give it away to people...especially if you want them to like you.


Once the frosting is dry, I wrap each cookie in plastic wrap and tie with a ribbon. I just love how pretty they look.


Gingerbread Cookies

6 c. flour
1 T. baking powder
1 T. ginger
1 t. cloves
1 t. nutmeg
1 t. cinnamon
1 c. butter, melted and cooled
1 c. molasses
1 c. brown sugar
1/2 c. water
1 egg
1 t. vanilla

1. Sift the dry ingredients together and set aside.

2. Combine the other ingredients and mix until smooth. Gradually stir in dry ingredients.

3. Divide dough into 3 pieces. Pat down to 1 1/2" thickness. Wrap in plastic and chill at least 3 hours.

4. Roll out to 1/4" thickness on a floured surface. Place 1" apart on a baking sheet. Bake 10-12 minutes at 350 degrees. They will look dry and be soft to touch when done.

Gingerbread Barn

Gingerbread House? That has SO been done. We decided to attempt a gingerbread barn this year.

When my husband came down the stairs on Saturday morning and saw me piping the red siding onto the gingerbread barn, a smile broke across his face. "Oh, no. You are making a barn? Remember what happened the last time? I hope you don't plan to put this on your blog." Then my sister called and asked what I had planned for the day. When I explained that my daughter and I were constructing a barn from gingerbread, she had a similar reaction to that of my husband. That's because they remember the barn cake disaster of 2005. I have to admit that creating an edible barn has defeated me in the past.

Please, allow me to take you back in time about 3 and a half years. My first child was turning one. Not one to do anything low-key, I proceeded to paint a mural and make table centerpieces and of course, make and decorate the perfect barn cake for her farm themed birthday party. I put three layers of cake together and began piping on the heavy icing. It was looking pretty good and then the whole thing just started falling apart. The icing was too heavy for the delicate, crumbly cake. I tried supporting it. My husband went out and bought kabobs skewers and we ran them through the cake. It just kept getting worse and worse. When he suggested that he just run to Kroger and buy a cake for the guests (that would arrive in about 2 hours) I burst into tears. "No! I am making her birthday cake," I screamed. I was a wreck. I had this idea that everything had to be perfect, you know, because my one year old was going to remember every detail of her party and the cake. Hindsight is 20/20. I have to admit, it was not one of my finer moments. I ended up serving the wreck of a cake. I even peeled the label off of a soup can and stuck a cupcake on top and shoved it again the cake to hold it up. I called it a silo. Here is a picture of the last barn I attempted:


If there's one thing I'm not, it's a quitter. If at first you don't succeed, try, try again. So here goes...

After you have made the gingerbread dough, pull one of the discs out of your refrigerator and roll it out to 1/4" thickness. I had pre-cut pattern pieces for this barn. I think I got them from a 1994 issue of Successful Farming. Okay, so maybe this is my third attempt at a barn. I'm pretty sure that I tried this my junior year in high school after my grandma clipped the recipe for me. The pre-cut pieces are from all the way back then and my mom sent them home with me after a recent cleaning of her cupboards. Anyway, lay the pieces on the gingerbread and cut around them.

Now place the pieces on a baking sheet and bake for 10-12 minutes at 350 degrees. I baked these a little longer. I decided that they didn't need to be soft and that hard walls probably = sturdy walls.


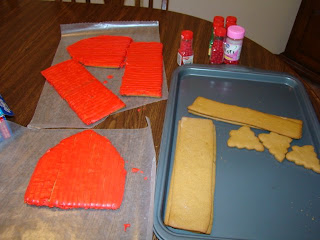
Once the pieces have cooled, I piped red Royal Icing onto the front and sides of the barn. This stuff is like cement when it dries. It's edible, but awfully crunchy.
Royal Icing
3 egg whites
1 lb. powdered sugar, sifted
1 teaspoon vanilla
1/2 teaspoon cream of tartar

Combine all of the ingredients and beat on high with an electric mixer for 7-10 minutes or until very stiff.

I made 2 batches. I colored 1 cup of blue, black, green, and left 1 cup plain white and the rest was colored red.

Next, I added the details to the sides and front; doors, windows, wreaths...


After the icing dried it was time for assembly. I piped the red icing on the edges and pressed the pieces together. I supported the pieces with pint canning jars and rolling pins. I'm not going to lie, a couple of the pieces fell over while I was trying to set them up. Luckily, nothing broke and it went together okay. Let the icing dry before constructing the roof.


The roof construction was trickier, which might explain why I didn't get any pictures of the process. One of the roof pieces broke, but I was able to "glue" it back together with icing. Then, when I piped on the shingles, the icing kept hardening and crumbling off. The roof didn't look the greatest, so I decided to sift powdered sugar over the top and cover all of the flaws with a layer of "new fallen snow". All in all, it looks pretty good. I'm going to call it a success. It's still standing. It even made a trip to pre-school for Show and Tell. I have redeemed myself in the edible barn department.

I put together the little fence on a flat surface. I just used dots of the royal icing to adhere the pretzel sticks together and once dry, I stood it up.

The 360:


Related Posts with Thumbnails