Showing posts with label Italian Recipes. Show all posts

Thursday, October 27, 2016

Stuffed Shells, Lightened Up

Stuffed shells, albeit a little more time consuming than say, lasagna...and much more time consuming than spaghetti with sauce from a jar (aka what I serve for dinner at least once a month), are a big hit when they make an appearance on our dinner table. This recipe gets my personal "Mom's Seal of Approval" award for several reasons. 1) I can make them ahead, and then pop them into the oven when I get home from work or school activities. 2) Everyone eats these without complaining. 3) They are delicious. They actually remind me of my favorite lasagna recipe. 4) They are fairly cost effective- not counting the salad and bread, the cost per serving was $2.09 for 6 servings. In reality, my 2 youngest did not eat a full serving portion, so there were enough leftovers for 2 addition meals. *Grocery prices based on my Ohio ALDI receipts. 5) They are low calorie- for stuffed shells, that is. With a few lighter ingredient substitutions, these come in at 430 calories per serving. Very reasonable for a flavor-packed, filling, cheesy dinner!


Here's how it all came together:

Count out 24 shells, or about half of the package. Or cook the whole package. You can always use the extra noodles to make a different recipe later in the week. Or boil them all and double the recipe so that you can deliver the other dish to a friend who could use a night off from making dinner. Or  freeze the extra pan for a future meal. Or hand out individual shells to trick or treaters. Or.... you get the idea. I cooked the whole box.


Brown up a pound of hamburger with an onion. Salt and pepper to taste. Drain the excess fat.

Then stir in a can of tomato paste.

And 2 cups of hot water.

Add in bouillon, oregano, and basil. Bring it up to a nice simmer and keep it there, uncovered, for 30 minutes.

Whilst your sauce simmers and the shells boil, go ahead and mix up the ingredients for the filling.

Once the shells are ready to come out of the water, roll out some parchment paper. Then drain the noodles and place them open and face down on the parchment. Why face down? This is my little trick to keep them from rolling closed when I am trying to fill them. If they cool this way, they are easier to fill.
See?!? Now just take a small spoon and add a scoop or two of filling to each shell. If you're feeling ambitious you can pipe it in from a plastic baggie or pastry bag. However, I think this is just as quick and easy.

Place the filled shells in a "greased" (I used non-stick olive oil spray) 9X13 baking dish.

Now let's check back with that sauce that's been a-simmerin' away on the stovetop. This recipe made a surprisingly rich and tasty meat sauce. I was a little skeptical when reading the ingredients: Water, tomato paste, bouillon.... But seriously, this sauce was awesome! Now is the time to taste it and see if you need to add any additional seasonings. I finished mine off with a little garlic salt after taste-testing.


Spread the sauce over the stuffed shells and bake them covered for 30 minutes at 350 degrees until bubbling around the edges. If you make this ahead and refrigerate, you might need to bake longer, checking to make sure the center is nice and hot. Then uncover and sprinkle with cheese and bake some more until the cheese is melted.


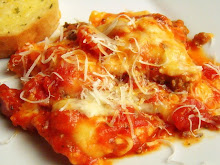
It should look something like this when it emerges from your oven. YUM!


We plated ours up with a spinach salad and some garlic bread. And everyone was happy around our dinner table. #winning

Ahhhh. That first bite! Mmmmmm. CHEESY!


Italian Stuffed Shells from Taste of Home
adapted by Krista's Kitchen

TOTAL TIME: Prep: 50 min. Bake: 35 min. YIELD:6 servings


Ingredients


  • 1 pound ground beef lean ground beef (90/10) 
  • 1 cup chopped onion
  • 3 garlic cloves, minced
  • 2 cups hot water
  • 1 can (12 ounces) tomato paste
  • 1 tablespoon beef bouillon granules or 2 cubes
  • 1-2 teaspoons garlic salt                           
  • 1-1/2 teaspoons dried oregano
  • 1 teaspoon dried basil 
  • pepper, to taste                          
  • 2 egg whites, lightly beaten
  • 2 cups (16 ounces) 1% cottage cheese
  • 2 cups (8 ounces) shredded part-skim mozzarella cheese, divided
  • 1/2 cup grated Parmesan cheese
  • 24 jumbo shell noodles, cooked and drained

Directions

  • 1. In a large skillet, cook beef, onion and garlic over medium heat, crumbling beef, until meat is no longer pink; drain. Stir in water, tomato paste, bouillon and spices. Reduce heat; simmer, uncovered, for 30 minutes.
  • 2. Meanwhile, combine egg, cottage cheese and 1 cup mozzarella. Salt and pepper. Stuff shells with cheese mixture.
  • 3. Preheat oven to 350°. Arrange shells in a greased 13x9-in. or 3-qt. baking dish. Pour meat sauce over shells. Cover; bake 30 minutes. Uncover; sprinkle with remaining mozzarella cheese and parmesan. Bake until cheese is melted, about 5 minutes longer.
    Freeze option: After assembling, cover and freeze. To use, partially thaw in refrigerator overnight. Remove 30 minutes before baking. Preheat oven to 350°. Bake as directed, adding remaining 1 cup mozzarella and parmesan after 30-40 minutes and increasing time as necessary for a thermometer inserted in center to read 165°. Yield: 6 servings.

Nutritional Facts

4 stuffed shells and sauce: approximately 430 calories

Thursday, June 24, 2010

Focaccia: Four Ways!


I made focaccia bread for the first time ever this afternoon! Sure, I've made an easy version of mini focaccias found HERE...and when I worked in the deli in college we baked focaccia bread...after we took the dough out of the freezer the night before proofing, baking, and bagging it. But I've never rolled up my sleeves and kneaded, shaped, and topped foccacia from scratch. I'm so glad that I did! Focaccia is pretty fun to make and versatile in what you can top it with. I went with caramelized onions, olives, roasted garlic and parmigiano-reggiano cheese, and red onion and rosemary. My house smells gloriously of fresh baked bread, garlic and rosemary as I sit here typing. Mmmmm.

So, who is going to eat all of this focaccia? A group of our family and friends at an Italian dinner tomorrow night! I'll definitely take pictures and post about it next week. The fact that we will be attending this dinner is just plain lucky. On Tuesday, I was talking to one of my Indiana friends and informed her that we'd be in town this weekend for a wedding. "When are you coming in?" she asked. I answered, "Friday...why?" She told me that a gourmet club formed by a group of our college friends was holding their first ever dinner on Friday night. The theme: Italian. I'm so excited to see all of our friends, catch up, and see what everyone brings to share. What luck! What timing! The hostess emailed and suggested that we bring the bread. Good call, since I'm not sure that my tiramisu or tortellini alla panna would have weathered the 5 hour drive very well. Right away I pulled out my copy of The Best Ever Italian Cookbook and flipped to focaccia.

The recipe called for 1 recipe Basic Pizza Dough, 3 tablespoons of olive oil, and coarse sea salt. I had to flip back a few pages to find the pizza dough recipe. Once I'd gathered the ingredients for that, I realized that I had a blank canvas to top as I pleased. Yay!

Here's how I made the focaccias:

I know that this picture looks like I made myself a nice cup of Chai while I was mentally preparing to make the bread, but really it's my yeast proofing in a cup of warm water, stirred with a pinch of sugar.


Actually, it's 4 cups of yeast proofing because I quadrupled the recipe. I believe that 16 people are attending the dinner. If we have extra bread at the end of the night, we can eat it throughout the weekend while enjoying the lake at my in-law's house.


Once the yeast has dissolved and started to foam, add it to 1/3 of the flour and a teaspoon of salt in a mixing bowl. You can stir this with a spoon, but I opted for my mixer.


Once combined, add in another third of the flour and mix or stir until the dough forms a mass and begins to pull away from the sides of the bowl. If you're not using a mixer, at this point you can turn it onto a floured surface and add the remaining flour as you knead. I put the dough hook on my mixer and added the remaining flour as it mixed. Does the following picture look a little ominous, or is it just me? Like Captain Hook is about to make some focaccia...


After a little time with the dough hook, I still turned the dough onto my pastry mat and kneaded it for a couple of minutes until it had that "just right" smooth and elastic feel.


Then I plopped the dough ball into a lightly greased bowl, covered it, and kept it someplace warm until doubled...about 50 minutes.


To determine whether the dough has risen enough, poke two fingers into the center. If the indentation remains, it's ready. Punch it down...


And transfer it to a pastry mat or lightly floured surface and knead it for another 3-4 minutes.


Brush a large, shallow baking dish with a tablespoon of oil and use your fingers to press the dough into an even layer, 1 inch thick. I failed to read this instruction and just looked at the picture provided which showed the dough covering the whole baking sheet. Consequently, my focaccias turned out MORE crispy and LESS soft and chewy than I would have liked. Cover the pans and let rise again for 30 minutes.


While the dough raised, I prepared my toppings. I started the onions caramelizing in a couple of tablespoons of oil.


I took out the roasted garlic that I purchased from my grocery store antipasta bar. I've roasted my own garlic in the past, you can check it out HERE...but I was trying to make this a project that I could fit into my daughter's naptime...so purchased garlic was a great shortcut.


I sliced up the cloves.


Then I grabbed for the olives. This is an Italian blend of olives, also purchased from the antipasta bar. I had lots of samples while choosing this blend...

I cut them in half.


Oh, and there was the King of Parmesan... the Parmigiano-Regianno cheese. If you’ve never used Parmigiano-Reggiano cheese before, you’re in for a treat. Parmigiano-Reggiano has a sweet-nutty flavor and crumbly texture that is a favorite of both cheese lovers and connoisseurs. This cheese has significantly more flavor than regular parmesean, so you can use less of it and conserve calories. Good thing, because this retails for 18.99/lb. Pictured below is $6.46 worth of Parmigiano-Reggiano. Whenever it's time to re-stock my supply of this cheese, I take a chunk out of the deli cooler and have the nice girl at the cheese counter cut it down to an affordable size for me. Try it sometime!


I cut a small chunk off of my already small chunk of cheese and popped it into my Pampered Chef Cheese Rotary Grater. I feel like I'm on The Olive Garden staff everytime I use it. All of the fun and none of the fuss of pre-bussing tables, doing side work, and being extra friendly to people for a couple of bucks + tips.


By the time I rounded up my toppings, the focaccia had puffed up and it was time to give it "dimples". Use your fingers to press rows of light indentations into the surface of the dough.


Then brush with a couple tablespoons of olive oil, apply toppings if desired, and sprinkle with a little coarse salt. Here's the olive focaccia.


The caramelized onion....(Note: I stirred a teaspoon or so of crushed rosemary into the onions before spreading them onto the dough)


The red onion and rosemary.


I grated cheese over this one...


And the roasted garlic. Again, I added rosemary and cheese. Can you tell that I really like rosemary on my focaccia?


They all baked (two at a time, of course) in a 400 degree oven for 25 minutes until golden brown. Here are all of my focaccia cooling on racks in our dining room. I could just dig in!


Here's a closer look at the baked version of each of these Italian flat breads:

The caramelized onion.


The olive.


The red onion.


Abd the roasted garlic.


I stacked them all up in my Wilton Ultimate 3-In-1 Cupcake Caddy and Carrier. Who knew it would work so well for focaccia!?


Sealed up nice and tight and ready for the 5 hour road trip!


Here's the recipe:

Focaccia from The Best Ever Italian Cookbook

Ingredients:

1 recipe Basic Pizza dough, risen once
3 tablespoons olive oil
coarse sea salt

Basic Pizza Dough

Ingredients

1 package dry yeast
1 cup lukewarm water
1 tsp. salt
3 to 3-1/2 cups unbleached white flour

1. Warm a mixing bowl by swirling some hot water in it. Drain. Place the yeast in the bowl and pour on the warm water. Stir in the sugar, mix with a fork, and allow to stand for 5-10 minutes until the yeast dissolves and begins to foam.

2. Use a wooden spoon or mixer to mix in the salt and 1/3 of the flour. Mix in another third of the flour, stirring until the dough forms a mass and begins to pull away from the sides of the bowl.

3. Sprinkle some of the remaining flour on a smooth work surface. Turn dough onto surface and knead it working in the remaining flour a little at a time. Knead for 8-10 minutes until dough is smooth and elastic. OR switch to the dough hook attachment on your mixer and mix until the flour is incorporated and the dough forms and smooth ball. Knead for a couple of minutes on a smooth surface.

4. Lightly oil a mixing bowl. Place the dough in the bowl. Stretch a moistened, wrung-out dish towel across the top and leave it stand in a warm place until the dough has doubled in volume, about 40-50 minutes.

For Foccacia:

1. After punching dough down, knead it for 3-4 minutes. Brush a large shallow baking pan with 1 tablespoon of oil.

2. Place the dough in a pan, and use your fingers to press into an even layer 1 inch thick. Cover the dough and let rise in a warm place for 30 minutes. Preheat oven to 400 degrees. Prepare toppings, if using them.

3. Just before baking, use your fingers to press rows of light indentations into the surface of the focaccia dough.

4. Brush with remaining oil, add toppings if desired, and sprinkle with coarse salt. Bake for about 25 minutes, or until just golden. Cut into squares or wedges and serve as an accompaniment to a meal, or alone, at room temperature.

Monday, April 19, 2010

Crock Pot Pasta e Fagiole


One day in my parenting group (a valued group of moms and one dad whom I meet with weekly to discuss parenting issues...and life), I mentioned that I was thinking about trying more crock pot recipes. That afternoon, my friend Jill emailed two of her favorite crock pot recipes. I decided to try this "Copy Cat" recipe for Olive Garden Pasta e Fagiole first. I threw it together this uncharacteristically cool Spring morning and then we all went about our busy day. My mother-in-law is visiting, so she took our daughters on an outing. We all met up for lunch and then I took one kiddo home for a nap and and sent my oldest off with grandma to find some shirts to match last year's shorts. Strangely, most of her shorts survived last summer and still fit, but her shirts are either too short or stained from a summer of Popsicles and mud pies...or both. My husband took the afternoon off so that we enjoy do some kid-free hiking and rock climbing together. It was a good day!

We all returned home at nearly the same time this evening and converged upon this hearty, traditional, Italian soup. Pasta e fagiole. Pasta and beans. The dish is traditionally meatless, however this recipe is "beefed up" with hamburger. From my research I found that this dish was originally a peasant dish, due to cheaply available beans and pasta. Many homemade versions also use leftover homemade marinara. This particular version uses canned spaghetti sauce...but if you've got homemade sauce, good for you!

Here's how it all came together...

First, I browned and drained 2 lbs. of lean ground beef.


Then, I chopped up my veggies and added them to the crock pot: onions, carrots, and celery.


Add the cooked beef to the veggies, then dump in all of the other ingredients. Stir them together and cover and cook on LOW for 7-8 hours.


In the last 30-60 minutes before serving, stir in the pasta. I stirred mine in about an hour prior to serving because I'd rather have my pasta a little too mushy than too chewy. I know, I know...the whole concept of al dente is lost on me. Sorry. Really, I think that this pasta would have been just fine after 30 minutes. It cooked pretty quickly, especially sinced I had turned my crock pot to HIGH.


It looks like this when it's all cooked up. Look at all of that yummy goodness going on!


We dished this up, grated some cheese over the top, and served it with a side of freshly baked Italian bread for sopping. Holy cow, this was good! I was ravenous after an evening of finding a piece of rock to grip and a place for my foot, rather than fall and break my legs(or worse). I stand reminded that climbing (and un-climbing) is much trickier than hiking! This soup definitely hit the spot! It got rave reviews from both my mother-in-law and (surprisingly) my husband, who had questioned my menu choice. "We're just having that soup for dinner?" Mine turned out super thick, definitely more like a stew than a soup. I even ended up thinning it with some tomato juice. I intended to use broth, but I was out. Upon tasting, I'm really glad I used the juice. This was delicious!

Truthfully, I don't remember if I've tried The Olive Garden's Pasta e Fagiole, but my mother-in-law is a big fan...this is her favorite soup on the menu. She deemed this version, "better than Olive Garden." She may have just been being nice, but I was flattered. : )


Olive Garden Pasta E Fagioli Soup in a Crock Pot (Copycat) Recipe

Cook Time: 7¼ hours | 15 min prep Serves: 12 –14 people

2 lbs ground beef
1 onion, chopped
3 carrots, chopped
4 stalks celery, chopped
2 (28 ounce) cans diced tomatoes, undrained
1 (16 ounce) can red kidney beans, drained
1 (16 ounce) can white kidney beans, drained (I used butter beans because I couldn't find the white kidneys)
32 oz. beef stock
3 teaspoons oregano
2 teaspoons pepper
1 tablespoon parsley
1 teaspoon Tabasco sauce (optional)
1 (20 ounce) jar spaghetti sauce
8 ounces pasta like macaroni, ditalini, or radiatore

1.Brown beef in a skillet.
2.Drain fat from beef and add to crock pot with everything except pasta.
3.Cook on low 7-8 hours or high 4-5 hours.
4.During last 30 min on high or 1 hour on low, add pasta

Notes: I also added 1-2 cups of tomato sauce to thin this out, and a teaspoon of garlic powder and a couple teaspoons of salt for flavor.

For a printable copy of this recipe, please click here!
Related Posts with Thumbnails