Showing posts with label Italian Cooking. Show all posts

Thursday, October 27, 2016

Stuffed Shells, Lightened Up

Stuffed shells, albeit a little more time consuming than say, lasagna...and much more time consuming than spaghetti with sauce from a jar (aka what I serve for dinner at least once a month), are a big hit when they make an appearance on our dinner table. This recipe gets my personal "Mom's Seal of Approval" award for several reasons. 1) I can make them ahead, and then pop them into the oven when I get home from work or school activities. 2) Everyone eats these without complaining. 3) They are delicious. They actually remind me of my favorite lasagna recipe. 4) They are fairly cost effective- not counting the salad and bread, the cost per serving was $2.09 for 6 servings. In reality, my 2 youngest did not eat a full serving portion, so there were enough leftovers for 2 addition meals. *Grocery prices based on my Ohio ALDI receipts. 5) They are low calorie- for stuffed shells, that is. With a few lighter ingredient substitutions, these come in at 430 calories per serving. Very reasonable for a flavor-packed, filling, cheesy dinner!


Here's how it all came together:

Count out 24 shells, or about half of the package. Or cook the whole package. You can always use the extra noodles to make a different recipe later in the week. Or boil them all and double the recipe so that you can deliver the other dish to a friend who could use a night off from making dinner. Or  freeze the extra pan for a future meal. Or hand out individual shells to trick or treaters. Or.... you get the idea. I cooked the whole box.


Brown up a pound of hamburger with an onion. Salt and pepper to taste. Drain the excess fat.

Then stir in a can of tomato paste.

And 2 cups of hot water.

Add in bouillon, oregano, and basil. Bring it up to a nice simmer and keep it there, uncovered, for 30 minutes.

Whilst your sauce simmers and the shells boil, go ahead and mix up the ingredients for the filling.

Once the shells are ready to come out of the water, roll out some parchment paper. Then drain the noodles and place them open and face down on the parchment. Why face down? This is my little trick to keep them from rolling closed when I am trying to fill them. If they cool this way, they are easier to fill.
See?!? Now just take a small spoon and add a scoop or two of filling to each shell. If you're feeling ambitious you can pipe it in from a plastic baggie or pastry bag. However, I think this is just as quick and easy.

Place the filled shells in a "greased" (I used non-stick olive oil spray) 9X13 baking dish.

Now let's check back with that sauce that's been a-simmerin' away on the stovetop. This recipe made a surprisingly rich and tasty meat sauce. I was a little skeptical when reading the ingredients: Water, tomato paste, bouillon.... But seriously, this sauce was awesome! Now is the time to taste it and see if you need to add any additional seasonings. I finished mine off with a little garlic salt after taste-testing.


Spread the sauce over the stuffed shells and bake them covered for 30 minutes at 350 degrees until bubbling around the edges. If you make this ahead and refrigerate, you might need to bake longer, checking to make sure the center is nice and hot. Then uncover and sprinkle with cheese and bake some more until the cheese is melted.


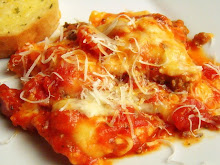
It should look something like this when it emerges from your oven. YUM!


We plated ours up with a spinach salad and some garlic bread. And everyone was happy around our dinner table. #winning

Ahhhh. That first bite! Mmmmmm. CHEESY!


Italian Stuffed Shells from Taste of Home
adapted by Krista's Kitchen

TOTAL TIME: Prep: 50 min. Bake: 35 min. YIELD:6 servings


Ingredients


  • 1 pound ground beef lean ground beef (90/10) 
  • 1 cup chopped onion
  • 3 garlic cloves, minced
  • 2 cups hot water
  • 1 can (12 ounces) tomato paste
  • 1 tablespoon beef bouillon granules or 2 cubes
  • 1-2 teaspoons garlic salt                           
  • 1-1/2 teaspoons dried oregano
  • 1 teaspoon dried basil 
  • pepper, to taste                          
  • 2 egg whites, lightly beaten
  • 2 cups (16 ounces) 1% cottage cheese
  • 2 cups (8 ounces) shredded part-skim mozzarella cheese, divided
  • 1/2 cup grated Parmesan cheese
  • 24 jumbo shell noodles, cooked and drained

Directions

  • 1. In a large skillet, cook beef, onion and garlic over medium heat, crumbling beef, until meat is no longer pink; drain. Stir in water, tomato paste, bouillon and spices. Reduce heat; simmer, uncovered, for 30 minutes.
  • 2. Meanwhile, combine egg, cottage cheese and 1 cup mozzarella. Salt and pepper. Stuff shells with cheese mixture.
  • 3. Preheat oven to 350°. Arrange shells in a greased 13x9-in. or 3-qt. baking dish. Pour meat sauce over shells. Cover; bake 30 minutes. Uncover; sprinkle with remaining mozzarella cheese and parmesan. Bake until cheese is melted, about 5 minutes longer.
    Freeze option: After assembling, cover and freeze. To use, partially thaw in refrigerator overnight. Remove 30 minutes before baking. Preheat oven to 350°. Bake as directed, adding remaining 1 cup mozzarella and parmesan after 30-40 minutes and increasing time as necessary for a thermometer inserted in center to read 165°. Yield: 6 servings.

Nutritional Facts

4 stuffed shells and sauce: approximately 430 calories

Friday, April 15, 2011

Arancini di Riso


When I made Giada's Mushroom and Pea Risotto earlier this week, I was pretty sure that there no way to improve upon the recipe. It was creamy and cheesy and everything I ever wanted in a risotto. But NOW I know how to 1-UP plain ol' risotto. It goes like this: stir in more cheese, then shape the risotto into balls, then stuff the balls with even more cheese, then DEEP FRY the suckers! Holy cow, were these good! My whole family loved them. Even the picky kid who turned her nose up at the risotto as a side dish gobbled up the same risotto when deep fried (and asked for seconds). Probably Jaimie Oliver is on his way to my house right now to bury our deep fryer in the backyard....

Seriously, the Arancini di Riso (which I will refer to as "risotto balls" or just "balls" for the remainder of this post because I'm not even sure how to pronounce "Arancini" and I have to keep checking the spelling every time I type it.) is a great way to use up leftover risotto. These were kind of like a cross between a hush puppy and fried mozzarella sticks, but with more complex flavors. Am I making any sense? Maybe I'm in some kind of deep-fried, carbohydrate, food coma right now...

These really are simple to make. Just stir some eggs, Italian bread crumbs, and Parmesan into your leftover risotto.


I used my medium Pampered Chef cookie scoop to make perfect, uniform balls. You want them to end up about 1 3/4-inches in diameter.


Cut some mozzarella cheese into 1/2" chunks and press them into the center of each ball, then roll the risotto balls between your hands to cover the cheese and round out the shape.


Roll the balls around in some Italian bread crumbs to coat.


Then drop them into oil heated to 350 degrees. Fry for 4 minutes. You can either heat 3 inches of oil in a heavy skillet or use a deep fryer. I used our fryer because every once in a while he needs to come out and prove that he's worth the storage space. Plus, with the manual heat setting, a built-in timer, drop-in basket, and cover (no hot grease splatters) our fryer really does make frying easier.


Dump them onto a plate lined with paper towel to drain and cool before eating.

Serve with sauce for dipping if you like.


Mmmmm. Cheesy! And LOOK...there are peas in there! A vegetable. These really are good for you.

NOT!

Everything in moderation, people.


Here's the recipe as posted on The Seventh Level of Boredom.

Arancini di Riso

• Vegetable oil, for deep-frying
• 2 large eggs, beaten to blend
• 2 cups Risotto with Mushrooms and Peas, recipe follows, cooled
• 1/2 cup grated Parmesan
• 1 1/2 cups dried Italian-style bread crumbs
• 2 ounces mozzarella, cut into 1/2-inch cubes
• Salt

Pour enough oil in a heavy large saucepan to reach the depth of 3 inches or heat your deep fryer. Heat the oil over medium heat to 350 degrees F.

Stir the eggs, risotto, Parmesan, and 1/2 cup of the bread crumbs in a large bowl to combine. Place the remaining breadcrumbs in a medium bowl. Using about 2 tablespoons of the risotto mixture for each, form the risotto mixture into 1 3/4-inch-diameter balls. Insert 1 cube of mozzarella into the center of each ball. Roll the balls in the bread crumbs to coat.

Working in batches, add the rice balls to the hot oil and cook until brown and heated through, turning them as necessary, about 4 minutes. Using a slotted spoon, transfer the rice balls to paper towels to drain. Season with salt. Let rest 2 minutes. Serve hot.

Mushroom Risotto with Peas courtesy Giada De Laurentiis altered slightly by me

Ingredients
•8 cups canned low-salt chicken broth
•1/4 cup unsalted butter
•2 tablespoons olive oil
•2 cups finely chopped onions + 1 diced shallot (if desired)
•10 ounces white mushrooms, finely chopped
•2 garlic cloves, minced
•1 1/2 cups Arborio rice or short-grain white rice
•2/3 cup dry white wine
•3/4 cup frozen peas, thawed
•2/3 cup grated Parmesan
•Salt and freshly ground black pepper, optional

Directions

Bring the broth to a simmer in a heavy medium saucepan.Keep the broth warm over very low heat.

Melt the butter in a heavy large saucepan over medium heat. Add olive oil. Add the onions and saute until tender, about 8 minutes. Add the white mushrooms and garlic. Stir in the rice and let it toast for a few minutes. Add the wine; cook until the liquid is absorbed, stirring often, about 2 minutes. Add 1 cup of hot broth; simmer over medium-low heat until the liquid is absorbed, stirring often, about 3 minutes. Continue to cook until the rice is just tender and the mixture is creamy, adding more broth by cupfuls and stirring often, about 28 minutes (the rice will absorb 6 to 8 cups of broth). Stir in the peas. Mix in the Parmesan. Season with salt and pepper, to taste.

Thursday, April 14, 2011

Mushroom Risotto with Peas

I totally dig risotto. The creamy Italian rice dish is so versatile. You can add any number of ingredients and flavors and it makes for a perfect side dish or a filling main course. I haven't prepared a risotto in my kitchen since October, so when I saw Beth's post about Arancini di Riso on her blog The Seventh Level of Boredom, I knew that I would making risotto (and Arancini di Riso) in the near future. Arancini are rice balls coated with bread crumbs and deep fried. I know that they may not sound impressive from that description, but believe me, they are! (Stay tuned for the rice balls made with leftover risotto in tomorrow's post). For today, I'm going to focus solely on the risotto. Beth's post pointed me in the direction of Giada De Laurentiis' Mushroom Risotto with Peas. I altered the recipe to fit my kitchen and was so pleased with the result! It was seriously good, and had everyone (well everyone except for my oldest) reaching for seconds!

This is the fourth risotto recipe that I have prepared for this blog. The biggest difference between risotto and other types of rice/rice dishes is that you add the liquid gradually and stir the pot (a lot!)as the liquid is absorbed. Since I've written about this before, I'll spare you all of the details in this post. Feel free to check out my other risotto posts for more detailed instructions: Shrimp and Spinach Risotto, Summertime Risotto, and Ham and Cheese Risotto.

This recipe begins by heating butter and olive oil together in a skillet and sauteing onions. I added in a shallot (because I found one at the bottom of my onion basket) as well.


Then I stirred in a cup of finely chopped mushrooms. I used my Pampered Chef Chopper. Add some garlic too! The original recipe called for dried porcini mushrooms. I omitted them 1) because I didn't have any AND 2) because I have a weird mushroom allergy. (Weird because only certain types of mushrooms trigger this allergy and I haven't yet put the porcini to the test). Cook and stir for a few more minutes.


Then pour in the arborio rice. (You have to use a risotto rice like arborio to create the signature creamy texture.) Stir it for a bit to toast.


Then I began the task of adding liquid,(starting with a dry white wine and graduating to hot chicken broth) and stirring until the rice reaches the desired texture.


Once that creamy texture is achieved and the rice is tender, stir in Parmesan cheese.


And then some peas. My youngest daughter and I would have been happy with more peas. My husband and oldest daughter would be happy if peas did not exist.


With the peas warmed in the risotto, dinner was ready to go. Kudos to Giada! This is a delicious risotto!


Mushroom Risotto with Peas courtesy Giada De Laurentiis altered slightly by me

Ingredients
•8 cups canned low-salt chicken broth
•1/4 cup unsalted butter
•2 tablespoons olive oil
•2 cups finely chopped onions + 1 diced shallot (if desired)
•10 ounces white mushrooms, finely chopped
•2 garlic cloves, minced
•1 1/2 cups Arborio rice or short-grain white rice
•2/3 cup dry white wine
•3/4 cup frozen peas, thawed
•2/3 cup grated Parmesan
•Salt and freshly ground black pepper, optional

Directions
Bring the broth to a simmer in a heavy medium saucepan.Keep the broth warm over very low heat.

Melt the butter in a heavy large saucepan over medium heat. Add olive oil. Add the onions and saute until tender, about 8 minutes. Add the white mushrooms and garlic. Stir in the rice and let it toast for a few minutes. Add the wine; cook until the liquid is absorbed, stirring often, about 2 minutes. Add 1 cup of hot broth; simmer over medium-low heat until the liquid is absorbed, stirring often, about 3 minutes. Continue to cook until the rice is just tender and the mixture is creamy, adding more broth by cupfuls and stirring often, about 28 minutes (the rice will absorb 6 to 8 cups of broth). Stir in the peas. Mix in the Parmesan. Season with salt and pepper, to taste.

*I mentioned that I used my Pampered Chef Chopper to chop the mushrooms for this recipe. If you're in the market for any Pampered Chef products, please check out MY PAMPERED CHEF SITE. The company is offering FREE shipping TOMORROW ONLY on orders of $75 or more. We're also offering some wonderful Mother's Day gift set specials too!(They'll even gift wrap) Check those out HERE. To shop my site click on the "Shop Online" option. Then, go to option #2 "Not invited to a show, but would like to place an order. It will ask if you're sure that you want to continue...the answer is YES, of course. : )

Saturday, March 26, 2011

Tomato Gnocchi in Broccoli Pesto Sauce


Comfort food! These soft little tomato dumplings, swimming in pesto cream sauce, certainly fit into my definition of comfort food. My family truly enjoyed this recipe. Bonus: I got a serving of veggies into them without a single complaint!

Gnocchi are pretty simple to make, you just start by boiling a pound of peeled and quartered Russet potatoes. Once the potatoes are cooked, drain them. Then over a warm burner or very low heat, stir potatoes for 1-2 minutes or until steam is evaporated. Next, press them through a potato ricer or strainer into a small bowl and cool slightly.


Now, make a well in the center of those mashed (or riced) potatoes and add in an egg, tomato paste, and salt. Then sprinkle flour over the whole mess and stir until combined.


Turn the dough onto a floured surface and knead it 10-12 times to form a soft dough. You don't want to over-knead this or add too much more flour. The first time I made gnocchi, I went way overboard with the flour and the kneading. I treated the dough like homemade pasta, not tender potato dumplings. Consequently, those first gnocchi were awfully chewy.

Shoot for a soft, slightly sticky dough. Just use enough flour on your work surface and hands to keep the dough from sticking.


Divide the dough into 4 equal portions.


Then roll them each out into a long rope, about 1/2" inch in thickness.


Cut the rope into 3/4 inch pieces.


And roll them on the back of a floured fork to give them those signature gnocchi grooves. The grooves come in handy for holding more sauce in each wonderful bite!


Because I make my gnocchi on the soft side, I don't pile them on top of each other before cooking because they tend to lose their shape and stick together.


To cook the gnocchi, simply drop them into boiling water (in batches). When they float to the top, they're done!


Drain. I like to use a hand held colander to remove them from the water.


Now for the sauce. I used 1 cup of broccoli pesto, leftover from the Broccoli Pesto Pizza that I posted a couple of weeks ago. Recipe found HERE. Then I mixed in a cup of prepared Alfredo sauce and heated it through. Sure, the pesto would have been fine on it's own and yes, I added more fat AND calories with the addition of the Alfredo sauce. No regrets. It was delicious!


To finish, toss the gnocchi with the sauce and top with fresh basil or parsley and enjoy!


Tomato Gnocchi from Light & Tasty Magazine February/March 2007

1 pound russet potatoes, peeled and quartered
3 quarts water
2/3 cup all-purpose flour
1 egg
3 tablespoons tomato paste
3/4 teaspoon salt, divided

•Place potatoes in a saucepan and cover with water. Bring to a boil. Reduce heat; cover and simmer for 15-20 minutes or until tender.Drain.

•Over warm burner or very low heat, stir potatoes for 1-2 minutes or until steam is evaporated. Press through a potato ricer or strainer into a small bowl; cool slightly. In a Dutch oven, bring water to a boil.

•Using a fork, make a well in the potatoes. Sprinkle flour over potatoes and into well. Whisk the egg, tomato paste and 1/2 teaspoon salt; pour into well. Stir until blended. Knead 10-12 times, forming
a soft dough.

•Divide dough into four portions. On a floured surface, roll portions into 1/2-in.-thick ropes; cut into 3/4-in. pieces. Press and roll each piece with a lightly floured fork. Cook gnocchi in boiling water in batches for 30-60 seconds or until they float. Remove with a strainer and keep warm.

For the sauce:

Mix together 1 cup broccoli pesto (recipe found HERE) with 1 cup prepared Alfredo sauce. Toss cooked gnocchi with sauce until coated. Top with fresh basil or parsley.

Note: Any pesto would work well with this recipe.

Monday, February 7, 2011

Stewed Garlicky Sausage and Peppers


I had a pot of this Stewed Garlicky Sausage and Peppers simmering to perfection on my countertop all afternoon before the Super Bowl yesterday. Taken from my autographed copy of The Deen Family Cookbook, this recipe is sure to please!

This one is great for a crowd or perfect for an easy weeknight dinner. To start, just chop red and green bell peppers, onions, and mix with 4 cloves of minced garlic.


Then take out 1-3/4 lbs of Italian sausage (or more if you're expecting company).


Cut the sausage up and brown in a large skillet, then stir in red pepper flakes and oregano.


Add in tomato paste and stir to combine, followed by a can of diced tomatoes and some dry white wine.


Arrange half of the onion-pepper-garlic mixture in a crockpot.


Top with the sausage mixture.


Then pour the rest of the onions and peppers over the top.


Cover and cook on high for 4 hours or low for 2 hours.


You can serve this as a stew with crusty bread for dipping OR do what I did and make it a sandwich. This was pretty amazing topped with a slice of provolone!


Stewed Garlicky Sausage and Peppers from The Deen Family Cookbook

2 large onions, chopped
2 large green bell pepper, seeded and cut into chunks
1 large red bell pepper, seeded and cut into chunks
4 clove garlic, minced
3 tbsp olive oil
1 3/4 lbs sweet or hot Italian sausage, cut into chunks
1 tsp dried oregano
Pinch red pepper flakes
2 tbsp tomato paste
1 (14 oz) can diced tomatoes, undrained
1/2 cup dry white wine
1/4 tsp salt

Toss vegetables and garlic in a bowl. Heat oil in a skillet and add sausages and brown them, turning occasionally. Stir in seasonings and cook for 30 minutes more. Stir in paste and cook another minute. Add diced tomatoes with their juices, wine and salt; simmer for 2 minutes.

Arrange half the onion and pepper mixture in the bottom of the crock pot. Cover with half the sausage mixture. Repeat layers and cover. Cook on LOW for 4 hours or on HIGH for 2 hours. Serves 4.
Related Posts with Thumbnails