Friday, April 30, 2010

Coyote Pizza


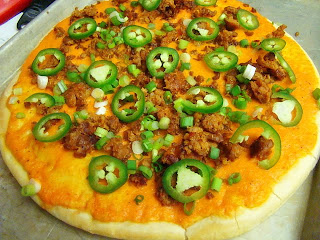
Friday nights are usually make-your-own pizza night around here. Last weekend we even made our own dough...from scratch! More on that tomorrow. Tonight, with my discovery of the Better Homes and Gardens 20-Minute Super Suppers cookbook, this Friday night brought us a gourmet pizza made easy. 20 minutes from start to finish and SO delicious!

I happened to have some chorizo left in the freezer from those Chorizo-Topped Pizzas that I made a couple of weeks ago. To begin, I followed the recipe and browned 8 oz. to top this pizza. I didn't take a picture of this step, but I thought that I should mention it here in the beginning. It's good to have the sausage browning while you do all of the other steps, so that you don't have to wait for it at the end. Next, the recipe called for bottled roasted sweet red pepper sauce. I didn't see any at my grocery, so I decided to make my own. I totally winged it. Remember that cheap jar of roasted red peppers that I snagged for my Fabulous Focaccia Sandwiches? Well, I grabbed them out of my fridge and dropped 1 cup into my immersion blender mixing cup. They were packed in water, so I drained them a little first. Then, I added in about 1/3 cup of olive oil. Truth be told, I had a dipping cup of olive oil mixed with spices, sitting on my counter from the night before. We had some friends over for dinner and I served bread with dipping oil. Since I set out 3 different types of dipping oil to sample, it didn't all get eaten. I hated to waste it (olive oil is NOT cheap!) so I added 1/3 cup of the dipping oil to the roasted red peppers. I mix my own dipping oil spices and I don't measure a thing. Here's what I think was in that olive oil: garlic powder, red pepper flakes, Kosher salt, and Italian seasoning. Then, I poured in about a teaspoon of sugar. After plunging my immersion blender into the mix for a few seconds, it made a really delicious sauce.


I spread the sauce over a pizza shell that I purchased in my grocery store's bakery. Not Boboli, my local grocery actually bakes and bags pizza shells. Better than Boboli! I put the sauce covered pizza shell directly onto the rack of my 425 degree oven and baked it for 5 minutes.


While the pizza shell baked, I drained the chorizo and chopped up some green onion and sliced a jalapeno pepper. When the pizza came out of the oven, I sprinkled it with the chorizo and green onion and then arranged those jalapeno slices over the top.


Next, I grated a little less than a cupful of queso fresco. I found mine at ALDI, but I'm pretty sure that most grocery stores carry this Mexican crumbling/grating cheese in their deli section. Sprinkle it over the top and bake the pizza for just 5 more minutes.


Once it's all sliced up and on your plate, top it with a little sour cream and some tomato slices. The tomato in the bottom of my crisper drawer was less than perfect, so these slices didn't look pretty...but the tomato added a really nice, fresh bite to the pizza. This recipe is definitely a keeper!


Coyote Pizza adapted from BHG 20-Minute Super Suppers
Makes: 6 servings

Ingredients:

8 oz. bulk chorizo, casings removed
12 inch pizza bread shell
2/3 cup refrigerated or bottled roasted sweet red pepper sauce

Or to make your own sauce:
1 cup roasted red peppers
1/3 cup olive oil
1/2 t. Italian seasoning
1/2 t. garlic powder
1/2 t. Kosher salt
1/8 t. red pepper flakes
1 t. sugar
Combine ingredients in a blender, food processor, or with your immersion blender.

1/4 cup sliced green onion
1 thinly sliced and seeded jalapeno pepper
2/3 cup crumbled or shredded queso fresco cheese and/or 2 1/2 oz. Monterrey Jack Cheese
Tomatoes, thinly sliced
Light sour cream

In a skillet, cook sausage until no longer pink, drain well. Meanwhile, spread the pizza shell with the roasted red pepper sauce and place directly on the rack of an oven pre-heated to 425 degrees. Bake for 5 minutes. Remove and top with cooked chorizo, green onion, jalapeno, and cheese. Bake for another 5 minutes, until heated through and cheese is melted.

Top with tomato slices and serve with sour cream.

*Note: I baked the pizza directly on the rack for the first 5 minutes, with a baking sheet heating on the rack underneath. After topping the pizza, I transferred it to the pre-heated baking sheet for the next 5 minutes of baking. This allowed for the crust to crisp, but ease of baking a fully topped pizza. The baking sheet also provides a nice surface to slice the pizza before serving.

TGIF! Enjoy your weekend!

Wednesday, April 28, 2010

Fabulous Focaccia Sandwiches


I recently checked out a wonderful cookbook from my library: Better Homes and Gardens Fresh and Simple 20 Minute Super Suppers. As I flipped through the pages, I was sticking post-it's all over the place! This book is full of quick and easy recipes that look and sound SO good. The Fabulous Focaccia caught my eye because it called for rotisserie-style chicken...a perfect way to use leftover Sticky Chicken! This was on the table in 15 minutes or less and a big hit at our house. Gotta love that!

You start with a round of foccacia. Focaccia comes in so many flavors. This one happens to be roasted garlic, but next time I might have to go with something with rosemary or onion. Just slice it in half with a serrated knife.


Now mix 3 tablespoons of light mayo with a couple tablespoons of fresh, chopped basil.


Spread the mayo on the top and bottom halves of the sliced bread. Wondering why my sandwich is missing a wedge? I sliced a quarter of the focaccia out for the kids. I knew that they wouldn't go for mayonnaise, roasted red pepper, or onion...they ate their with just spinach and chicken. Lay some roasted red peppers on the bread. I had planned to roast my own red peppers for this recipe. You can read about how to roast your own red peppers HERE. I grabbed a couple of red peppers in produce, but when I hit the condiment aisle, I found a whole jar of roasted red peppers on sale for less money than a pound of peppers. Oh, yeah! I'm all for saving time and money, so I added that jar of peppers to my cart and returned the fresh ones to produce.


Layer on the chicken.


Then spinach and thinly sliced red onion.


Put a lid on it and cut into triangles.


I thawed some of my Cauliflower Cheese soup from the freezer and heated it up while I made the sandwiches. It was a winning soup and sandwich combo. Such a quick and delicious dinner!


Fabulous Foccacia Sandwiches adapted from Better Homes and Gardens 20 minute Super Suppers

Ingredients
1 8- to 10-inch Italian flatbread (focaccia)
3 tablespoons light mayonnaise dressing or salad dressing
2 tablespoons shredded fresh basil
1 1/2 cups packaged prewashed spinach
1 1/2 cups sliced or shredded deli-cooked rotisserie chicken
1/2 of a 7-ounce jar roasted red sweet peppers, drained and cut into strips
sliced red onion

Directions
1. Using a long serrated knife, cut the bread in half horizontally. In a small bowl stir together mayonnaise dressing and basil. Spread cut sides of bread halves with mayonnaise mixture. 2. Layer spinach, onions, chicken, and roasted sweet peppers between bread halves. Cut sandwich into quarters.

Tuesday, April 27, 2010

Crock Pot Sticky Chicken


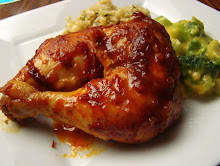
I first saw this recipe for Sticky Chicken on Deep South Dish. Mary's chicken looked and sounded so easy and delicious that I put it into my meal plan right away. In addition, I had another recipe that I've wanted to try that calls for 1 lb. of rotisserie-style chicken, and I knew there would likely be enough leftover to make it. A whole chicken sells for just 89 cents a pound at my local grocery, so Sticky Chicken qualifies as an excellent meal to work into our rotation. Delicious, easy to stretch into 2 or 3 meals, and economical. Love it!


Mary's Sticky Chicken recipe instructs to bake at 250 degrees for 5 hours. As I read through her post, I wondered if this could be done in the crock pot. Mary posed the same question at the end of her post. The answer is YES! I searched cooking a whole chicken in the crock pot and quickly found a recipe. It just said, "Cook on low for 8 hours." That's it. No big secret. However, in "The Complete Idiot's Guide to Slow Cooker Cooking" I read that it's best not to cook a whole chicken in the crock pot unless you're cooking it on high because the low heat might keep the meat in the bacterial "danger zone" for more than two hours. Okay...I was conflicted. Then Sunday morning came brought another bout of the stomach flu to our house, so I figured, "I'm already washing out the barf bucket and washing sheets, what do I have to lose?" Not really...I mean yes, really the stomach flu briefly re-visited my daughter, but I wasn't really going to invite salmonella poisoning into our home. I did some research and I found lots of conflicting views on slow cooking a whole chicken. In the end, I decided to go for it. I resolved to cook the chicken on HIGH for the first hour to get it out of the danger zone and then turned it down to the LOW setting for the remainder of the cooking time. It worked beautifully. I was shooting for an internal cooking temp of 180 degrees when the bird was finished. After 5 hours in my crock pot (1 hour on HIGH, 4 hours on LOW), I decided to check the temp. My meat thermometer skyrocketed to 200 degrees! I think I succeeded in killing any bacteria.

I served it up with mashed potatoes and oven roasted carrots, and smothered everything with a gravy that I made from the drippings. Doesn't this combo just scream Sunday Dinner?

To make the chicken, just combine the seasonings in a small bowl. This is kosher salt, pepper, Cajun seasoning, onion powder, garlic powder, cayenne pepper, paprika, and crushed thyme.


Next, I prepared the chicken. I removed the neck and giblets, then I rinsed the whole thing off and patted it dry. My daughters were particularly fascinated by my dealings with a whole bird and kept talking to and about "Mr. Chicken". Lovely. I may have perpetuated this behavior by making Mr. Chicken wave to them with his wings. Me and my sick sense of humor, I tell ya. I've mentioned before that I am not squeamish about dealing with raw meat. I grew up on a farm, ya'll! When I was a kid, we used to raise and butcher our own chickens. I was "the plucker". Ick. Admittedly, this is a really horrible job and I didn't really enjoy chicken for quite some time after this assignment was complete. However, it did not "scar me for life". From early on, I knew exactly where our food came from. As a result, I've never kept it a secret from my own kiddos. Unfortunately, it never occurred to me to discourage my children from "enlightening" their friends. As a result, I've needed to make an apology or two to other parents. I've since explained to my oldest that not everyone really wants to hear about grandpa's cows as they enjoy their Happy Meal. Apparently, the teaching gene is present in my first born. : )


Rub the chicken inside and out with the spices and loosely cover before putting it into the fridge overnight to allow the meat to marinate.


The next day, I quartered and onion, stuffed it into the cavity and dropped my chicken into the crock pot. I cooked on HIGH for 1 hour and LOW for 4 hours.

The chicken turned out flavorful and fall off the bone tender. By cooking it in the crock pot, you do sacrifice the deeper color and crisping of the skin that you'd see from an oven roasted bird. Everyone enjoyed this, especially my 5 year old, who had miraculously recovered from her stomach bug and ate more than any of us. The chicken yielded more than enough meat for a family of 4 (considering 2 of the 4 are little) and I had plenty of meat to bag up for tomorrow's Fabulous Focaccia Sandwiches.


Here's the recipe:

Rotisserie Style Sticky Chicken for the Crock Pot
Adapted from a recipe by Mimi Hiller
From the Kitchen of Deep South Dish
and adapted again by me.

1 (3 to 4 pound) whole chicken
1 medium onion, cut into chunks
4 teaspoons of kosher salt
20 turns of the pepper grinder
1 Cajun seasoning
1/2 teaspoon of garlic powder
1 teaspoon of onion powder
1/4 teaspoon cayenne pepper
2 teaspoons of paprika
1 teaspoon of dried thyme, crushed

Remove neck and giblets from chicken if it has them. In a small bowl, mix together thoroughly the salt, pepper, Cajun seasoning, garlic powder, onion powder, white pepper, paprika and thyme and rub this mixture all over the inside and outside of the chicken. Cover loosely and refrigerate overnight if possible, to marinate. Before cooking, quarter the onion and stuff into the cavity of the chicken. Place the chicken in your crock pot and cover. Cook on HIGH for 1 hour and LOW for about 4 hours. Check temp at 3 hours to avoid overcooking. The chicken is ready when the internal temperature is between 175/180 degrees when an instant read thermometer is inserted into the thickest part of the thigh.

I think that I'll use Mary's disclaimer here: The U.S. Department of Agriculture recommends cooking poultry at oven temperatures of 325 degrees or higher. You should proceed with this recipe with that knowledge and at your own risk.

Monday, April 26, 2010

Sliders


I vividly remember my first "slider". I was a sophomore in high school and I was at the Indiana FFA Convention at Purdue University in West Lafayette, Indiana. My chapter had attended meetings and contests all day in Elliot Hall of Music and we were ready to have a little fun for the evening. We shucked off our navy blue corduroy jackets, black skirts, nylons, and pumps (slacks for the gentleman, of course) and returned to our usual summer teenager uniforms...tees, shorts, and sandals. I fluffed my permed bangs and applied another layer of pink and purple eyeshadow. I was ready for a night out in the college town! (Little did I know that a few short years later, I'd perform the same evening ritual in my Purdue dorm room, sans the bangs and purple eye shadow, as I prepped for a night of frat party hopping). We met up at our school's 15 passenger van to see what our advisor, Mr. Addison, had in store for the evening: miniature golf. Cool. After 18 holes in the muggy summer heat, we were all wilting and ready for some refreshment. The neon blue of the White Castle sign cast a glow on the park benches where we rested, ready to turn in our putters. Mr. A suggested that we walk across the parking lot to the restaurant. His eyes seemed to glow a bit as the sun slid behind the Lafayette skyline and his famous smile grew beneath his fu manchu. "Mmmm. Sliders!" What?! I thought. Sliders? That didn't sound appetizing at all. "You know, greasy gut bombs!" he replied enthusiastically. Clearly, I had been sheltered from this delicacy in my rural upbringing. And so we all trudged next door, the boys in our group joking about the intestinal effects that these "gut bombs" would produce for our roomates. Gross. Minutes later, Mr. Addison emerged with a huge sack of sliders for all to sample. I took one, carefully unwrapped it, smelled that unmistakable aroma wafting off the tiny burger. In true 16 year old fashion... I wrinkled my nose. Then I took a bite. Um, YUM! Still, I had to be cool. "What do you think?" my advisor inquired. "Uh huh. Yeah. It's okay." I answered. I wasn't about to admit that I truly enjoyed something called A SLIDER. The convention concluded, we returned home, and I went on with my busy teenager life. I didn't have another White Castle burger until I was 21 and I drove a carload full of my boyfriend (now my husband) and his fraternity brothers across town to that very same establishment and devoured part of a 10 sack in the parking lot late one night.

Mr. Addison taught me many things in my years as an FFA officer: all of the rules of parliamentary procedure (we practically memorized Robert's Rules of Order), honed my public speaking and demonstration skills, polished my livestock and soil judging skills, and drove us all over the country in that 15 passenger van, pointing out every battlefield and National Monument along the way...but today I remember him for introducing me to my very first "slider". I've decided to dedicate this post to him. Now that my youngest sister is an Ag teacher and an FFA advisor, and as a former high school teacher and club sponsor myself, I can truly appreciate his dedication and the countless hours spent away from his family to educate us and provide us with little "cultural" experiences such as this trip to White Castle.

Now I'm all grown up and I have no idea where the nearest White Castle might be. But when I saw this slider post on Noble Pig, I knew that I'd have to give it a try. My husband is a big fan of the slider and my daughters like cheeseburgers, so I figured that it'd be a hit. It was. So simple and easy, made with ingredients that were already in my fridge and pantry, it came together quickly and everyone ate them. My five year old ate 3 in quick succession! I've seen other blog posts about sliders...I've even posted my own meatball slider recipe, but this one seemed the easiest for a Monday night dinner.

To begin, sprinkle dried, minced onion into the bottom of a 9 X 13 in baking dish. My advice is to liberally sprinkle the onion into the bottom of the dish. These were delicious, but I wish that I'd used more onion.


Next, pat 2 lbs. of 80/20 ground beef into the dish. It has to be 80/20 or the burgers will be dry. (Dry is not a characteristic of sliders) Season with seasoning salt. Again, I say liberally, because you want them to have lots of flavor. Really, no one who considers eating a slider is even remotely concerned about their sodium intake at the moment of consumption. There are so many other things to worry about here...


Bake the ground beef at 400 degrees for 25 minutes. It shrinks quite a bit as the fat cooks off. I drained this fat. I couldn't help myself.


Now top the beef with 6 slices of American cheese and return the dish to the oven for 3-5 minutes until the cheese is melted.


While the cheese melts, open a package of dinner rolls. Separate them.


Then slice em' in half. I ended up putting the plate of sliced rolls into the oven for a few minutes so that they got extra soft and warm.


Cut your giant cheeseburger into slider-sized portions. I found that 3 vertical slices and 5 horizontal slices created the perfect size of patty for the dinner rolls. Of course, I only had a dozen rolls, so there were three patties left over.


Finally, I assembled my sliders. Put a patty between each roll, then top with pickles.


YUM!


Sliders from Noble Pig who adapted them from Big Red Kitchen

Ground chuck (80/20) 2 pounds for a 9 x 13 pan, 2-1/2 pounds for a 10 x 15 pan
Dried, minced onion
Seasoning salt
6 slices of cheese
Sliced dill pickles
Dinner rolls, any brand

Sprinkle dried minced onion on the bottom of a 9 x 13 or 10 x 15 pan. Use as much as you like.

Press ground chuck into pan, on top of onions until it completely covers the bottom. Use two pounds of ground chuck if you are using a 9 x 13 pan or 2-1/2 pounds of ground chuck if you are using a 10 x 15 pan. Sprinkle the meat with seasoning salt.

Place in a 400 degree oven for 25 minutes. (Make sure you use an 80/20 mixture of ground beef, otherwise your burgers will be dry.)

The meat will shrink in the oven. After 25 minutes remove and cover with six slices of cheese. Place meat back in the oven for two minutes until the cheese is melted.

With a pizza cutter or a knife, slice the meat into as many square pieces as you have rolls.

Place the meat in between the bun with some of the onion and pop on a few dill pickles. You are ready to serve.

* A note: The next time that I make these, I might try adding a packet of onion soup mix to the beef and maybe even some fresh diced onion. My husband asked if I added onion to these...which means that there was not enough onion to rival that White Castle flavor.

To download or print this recipe, click here!

Sunday, April 25, 2010

Meal Plan and Grocery List 4/25-5/2

Whoa! It feels like an eternity rather than a week since I sat down to type last week's meal plan. We had out of town company for part of the week, a short-lived (thank goodness) stomach bug visited our house, the house got clean, the house got very dirty, the weather turned beautiful, the weather turned ugly. Somehow, with all of this going on, I did a ton of cooking and baking. First, for our Cookie Task Force Care Package, then yesterday we tried our hand at Compost Cookies, an unusual but yummy cookie recipe! I'm still working on recipes for Paula Deen's Real Women of Philadelphia contest so I whipped up two amazingly delicious new recipes: Three Bean Salad with Creamy Green Chile Pesto dressing (inspired by last week's Espresso Rubbed Steak with Green Chile Pesto) and a mean plate of Cinnamon Nachos with Cream Cheese Sauce and Strawberry Salsa. I promise that I'll try to work these recipes into my posting schedule soon. On top of all of this, I've been hired to teach an evening cooking class in the Fall and I'm working diligently to complete my course outlines to turn in this week. More on that later...

Do you ever have weeks like that? Crazy, right? Let's hope that this week is a little more "chill". I'm an optimist by nature, but I won't hold my breath. We're leaving on vacation next Monday. So much to do...so little time. At least I know what we're having for dinner each and every night this week and my fridge and pantry are stocked! With that said, here's the meal plan:


Monday April 26th

Sliders (bumped from last
week’s plan)

Tuesday April 27th

Crock Pot Sticky Chicken

Wednesday April 28th

Fabulous Focaccia Sandwiches

Thursday April 29th

Leftovers

Friday April 30th

Coyote Pizza

Saturday May 1st

Asian-style Braised Short Ribs

Sunday May 2nd

Leftovers...again

Grocery List

Produce

Onion
Basil
Spinach
Green onion
3 tomatoes
Jalapenos
Garlic
Lemongrass
Ginger
Lemon

Meat

3-4 lb. whole chicken
3-4 lb. beef roast
8 oz. chorizo
5 lbs. Short ribs

Dairy

shredded cheese for tacos
Queso fresco
Sour cream
Orange juice

Canned Goods

Mayonnaise
Roasted red pepper strips
1 jar salsa
Sweet red pepper sauce
Soy sauce
Rice vinegar
Hoisin sauce

Dry Goods

kosher salt
Cajun seasoning
Garlic powder
Onion powder
Paprika
Thyme
8-10 in. focaccia bread
Flour tortillas
3 pkgs taco seasoning
1 pre-baked pizza shell
Crushed red pepper
Jasmin rice

*ingredients for the Sliders can be found on last week's grocery list HERE.

I hope that you all have a wonderful week!

Friday, April 23, 2010

Caramel Puff Corn for My Cookie Task Force Care Package


In our family, my Grandma Shirley's Caramel Puff Corn is a favorite snack. It is soooo good! Before I go on with this post and convince you to try this recipe, I feel that I must issue a warning: This snack is dangerously additive! I'm not kidding...we added it to the gift bags at our wedding and the recipe requests were still trickling in months later. The caramel puff corn got into people's heads! I posted my caramel corn recipe back in December. It was perfect on the Christmas goodie plates that I put together for friends, family, and my daughter's teachers. But Grandma's recipe has two things on mine. 1) It's made in the microwave...so much easier (no baking or stirring) and less mess too! 2) There are no pesky popcorn seeds in puff corn!

Last week I made this puff corn recipe for a care package sent to our soldiers serving in Afghanistan. I recently discovered an organization called The Cookie Task Force and admire their effort to send care packages to show appreciation for those in the service of our country. In case you're wondering...

"The Cookie Task force is part of the Charlie Company Family Readiness Group (FRG), a group of Family Members whose Spouses, Sons and Daughters are proud Soldiers of Charlie Company. The Cookie Task Force also includes friends who want to support our Soldiers in Afghanistan. As part of the 101st Airborne Division, Charlie Company is on a 12 month deployment to Afghanistan. Their goal is to make our brave men and women feel remembered and appreciated. While cookies or other treats may not seem like much, it's our way of bring a little taste of home to our Soldiers."

Ideally, the Cookie Task Force (CTF) would like to send 4-5 care packages a month. However, if more people are interested in sending packages, that would be awesome! If you're interested in showing your appreciation to the soldiers you can sign up to send a care package of your own. Just click this link to sign up for the month of your choice: Cookie Task Force Schedule.

If you'd like more information about the Cookie Task Force, you can sign up for the CTF Newsletter HERE or email The Cookie Task Force at cookietaskforce@aol.com. I know that some of you out there love to bake, so I'm sure that the CTF would be glad to hear from you and I'm sure our brave soldiers would love to have a taste of home and be grateful for the acknowledged appreciation. Oh, and if you aren't a baker, the Soldiers receiving the packages would be pleased with a wide variety of treats. Here are a few ideas for items that ship well: * Power Bars* Trail mix* Gum, hard candies,* Powdered mixes to add to water (Gatorade, lemonade, etc.)* Popcorn/Caramel Corn* Pringles* Nuts

When I was thinking about what goodies that I wanted to fill my standard rate shipping box with, Grandma's Puff Corn popped into my mind right away. It keeps and travels well, I've already covered the fact that it is delicious, AND I thought that it could serve as edible packing peanuts to cushion my favorite Monster Cookies, the other edible component of this care package. Pretty clever, right?

The Puff Corn starts out like most caramel corn recipes. Just add brown sugar, butter, corn syrup (I was out of light corn syrup so I used dark...then I ran out of that too and had to add in a little molasses), and salt to a medium sauce pan or bowl.


Bring it to a boil and stir for 2 minutes. I did this on the stovetop, but you can cook it in the microwave too. Just cook it for 1 minute 30 seconds. Give it a stir, then return to the microwave for another 2 minutes.


Next, stir in 1/2 teaspoon of baking soda. If you've never done this before, I should give you the "heads up" to make sure that you've got a big enough bowl or pan once that soda is stirred in, because it will G-R-O-W. The soda makes the caramel sort of fluffy.


Now grab your puff corn. Grandma uses Mikesell's, but I found Shearer's here in Ohio.


Round up a paper grocery sack.


Spray the inside with non-stick cooking spray.


Dump the puff corn into the sack, then pour the caramel mixture over the top. Now, shake it like you mean it. : )


Next, pop it into the microwave for 1 minute and 15 seconds. Remove and shake. Return to the microwave for 45 seconds. Remove and shake. Then microwave for 30 seconds and take it out and shake it again. And just for good measure...put er' back in for another 15-20 seconds and give it one final shake before....


Spreading it onto waxed paper to cool and harden.


Oh Boy! Grandma's Caramel Puff Corn! I've made it before, but I always get excited when there's a batch cooling on my tabletop. I sent most of this puff corn to the soldiers, but I did squirrel away a couple of bags for us. It's gone now (it was gone in less than 24 hours!)...thanks to a neighbor, my kids, and my visiting mother-in-law. Told you it's addictive! I only popped a couple of pieces...but I'm not bitter. Remember, swimsuit season is quickly approaching...


I also made my favorite cookie for the care package. Monster cookies. Love, love, love these...eat em' for breakfast, even. You can get the recipe HERE. They work beautifully in care packages because they hold their "chewy" factor like a granola bar.


From The Cookie Task Force: Because packages have been taking 1-3 weeks for shipping, below are some packaging ideas to ensure your baked goods stay fresh. Flat rate boxes are the most economical option for shipping. These are free of charge at your Post Office. * Use airtight, foil-lined containers or tins.* Wrap cookies back to back in pairs, stacked flat or on end.* Layer bars between sheets of waxed paper.* Cushion items well with tissue or waxed paper up to the top of the container to keep them snug.* To keep flavors from changing or blending with others, pack cookies in separate containers or wrap the different types separately within a container.

These are good tips no matter who you're sending a care package off to. Maybe it's your college student, your grandkids that live 3 states away, or your long distance sweetheart that you met last summer at camp. Everyone loves care packages! I remember getting care packages from the sweet ladies of my home church during finals week every semester through ALL 5 years of college (Hey, I switched majors in my senior year!) It was awesome to cut into a box full of cookies and good wishes! CTF (and the soldiers) would love to have you on board, but if nothing else, I hope that this post inspires some of you to send a care package to someone you love. It totally makes anyone's day to get a package full of goodies in the mail!

Following the excellent CTF tip, I wrapped my cookies back-to-back.


Then I nestled them around a big bag of puff corn.


The Cookie Task Force provides a thank you note that is easily printed once you click this link. I let my daughter "decorate" it. She's clearly a gifted artist. lol. Hey, she's only 5 and what she lacks in artistic skill, she makes up for in compassion.(For the record, I have no idea of the significance of those numbers she drew on the picture. I'm just excited that she is writing her numbers legibly. Baby steps, ya know?) Having family members, friends, and husbands of friends serving overseas and away from their families, my heart goes out to those who make this sacrifice. I took the opportunity to explain to my daughter that the soldiers were far away from home, their family, and sometimes even their kids. I guess it made an impression. She was excited to help with our care package. I was listening in while she colored. As she tends to narrate her every action, I often know what she's doing or thinking about. This is a bit of what I overheard, "And now I'm drawing a house, so that they can feel at home and maybe not so homesick." Awww.


Oh, if you're wondering what Rakkasan (from the thank you) means, I Googled it. HERE is what I found.

I packed the goodies and thank you into a large flat rate shipping box. This means that you pay the same for shipping no matter what the weight, up to 20 lbs. I was supposed to include a postcard from our area...but after 2 stores and then the post office did not have post cards available, I settled on adding a couple of new magazines too. People and Us. Who doesn't enjoy a little light gossip reading? The CTF also provides an address label HERE, which you see pictured on my care package below.


Head's up: if you're sending an international package for the first time, don't be surprised...you will probably have to fill out a "Customs" slip. No worries, this only takes moments. Also, if you tell the assisting postal worker that the package is going to the troops, you're eligible for a discount. My large flat rate shipping box sent for $12.50. Pretty inexpensive, and I smiled as I walked back to my car in the post office lot, knowing how excited someone so far from home would be to open a box full of treats.


Here's the recipe for that puff corn:

Grandma Shirley's Puff Corn

1 cup brown sugar
1/2 cup butter
1/4 cup light corn syrup
1/2 teaspoon salt
1/2 teaspoon baking soda
1 bag Puffed Popcorn (plain or buttered)
1 paper grocery sack
non-stick cooking spray

Spray the inside of a paper grocery sack with non-stick cooking spray. Pour in 1 bag puffed popcorn (look for it in your grocery's snack food aisle). Boil the brown sugar, butter, corn syrup, and salt for two minutes on the stove top or microwave the ingredients for 1 min 30 secs and then return to the microwave for 2 minutes. Stir in the baking soda. Pour into the grocery sack, over the puffed popcorn. Shake well. Fold down top of bag and microwave for 1 minute 15 seconds. Remove and shake. Microwave for 45 seconds. Remove and shake. Microwave for 30 seconds. Remove and shake. Microwave for 15-20 seconds. Remove and shake. Spread onto waxed paper to cool and dry.

To download or print a copy of this recipe, just click here!

Wednesday, April 21, 2010

Espresso-Rubbed Steak with Green Chile Pesto


When I found this recipe in the September 2009 edition of Better Homes and Gardens magazine, I was intrigued. "Definitely worth a try", I thought. I filed it away until tonight. I had no idea how amazing this would be. Really, truly, a wonderful recipe. 2 thumbs up, 5 stars, and the approval of the whole family. In fact, my 5 year old exclaimed, "This is the best steak I've ever had!" as she finished her first helping. It really is that good. If you're a steak lover, you've gotta try this!

To make the rub you'll need oregano, chili powder, black pepper,garlic powder, kosher salt and....espresso! The recipe called for a teaspoon of instant espresso powder. I wasn't about to buy instant espresso powder just because I needed one tiny teaspoon. I have an espresso maker (a gift from my dad who shares my love for strong coffee), so I brewed a shot, then cooled it and stirred it into the rub. I bet if you don't have espresso powder or an espresso machine that you could just make some strong coffee and it would work just fine. Of course, then you'd have to call it Strong Coffee Rubbed Steak with Green Chile Pesto. Doesn't quite have the same ring to it, now does it?


Combine all of your spices...


Then stir in that shot of espresso.


Next, score the steak. Just make some shallow, diagonal cuts in a diamond pattern on both sides with a sharp knife.


Spoon the rub over the steak and well...rub it in. Flip the steak and rub the other side too.


I sent the steak out to the grill with my husband and set about making the green chile pesto. Here's whatcha need: 2 poblano peppers, cilantro, Cojita cheese, pine nuts, garlic cloves, crushed red pepper, olive oil, and salt and pepper.


The recipe suggests to make this in your food processor, which is how I've made my pestos in the past. However, now that I have an immersion blender, I just had to see if it would work for pesto as well as it has for smoothies, cream soups, and dressings. I had my fingers crossed because I really despise setting up my food processor and then taking it apart, washing, drying, and putting it away. No thank you. With high hopes, I placed two cloves of garlic, 1/4 teaspoon of red pepper flakes, pine nuts, salt, pepper, and 1/3-1/2 cup of cilantro in the bottom of the cup that came with my immersion blender.


Then I readied my poblano peppers. Here they are cleaned and removed of stems and seeds. I roughly chopped em' and tossed em' on top of my other ingredients in the mixing cup.


Now for 1/4 cup of Cojita cheese. I got mine at ALDI. I'm impressed by the variety (and the price) of cheese that I can find at this discount grocery. The recipe called for 1/4 cup crumbled Cojita, but I found that Cojita is more of a grating cheese. It really did grate and even slice perfectly, but it wouldn't crumble. I ended up chopping it up before tossing it into the mixing cup.


Now for the moment of truth...I attacked the mixture with my immersion blender. It worked beautifully! Have I mentioned that I LOVE my Cuisinart CSB-76 Smart Stick Hand Blender? Oh, I have? Well, just ignore my gushing and read on. This pesto is awesome! The recipe makes plenty. I'll be spreading it on sandwiches and dipping my bread in it and maybe even putting it on pizza this week. Yummy!


By now, our steaks had come off of the grill. These were some monster T-bones from my grandparent's farm.


I hacked them down to reasonable serving sizes and topped them with the pesto and more cilantro. I loved the pesto so much that I mashed a little into my potatoes too. Mmmm.


Espresso-Rubbed Steak with Green Chile Pesto adapted from Better Homes and Gardens
Ingredients
2 beef steaks, such as sirloin or T-bone
2 tsp. chili powder
2 tsp. kosher salt or salt
1 shot espresso, brewed then cooled
1/2 tsp. garlic powder
1/2 tsp. dried oregano, crushed
1/2 tsp. ground black pepper
1 recipe Green Chile Pesto, recipe below
Cilantro leaves (optional)
Directions
1. Score both sides of steak by making diagonal cuts in a diamond pattern. In small bowl combine chili powder, salt, espresso, garlic powder, oregano, and pepper. Sprinkle over steak; rub in.

2. Grill steak. For instructions to grill the perfect steak check out the Weber beef grilling guide.
3. To serve, thinly slice steak, top with Green Chile Pesto. Sprinkle with cilantro leaves. Makes 8 servings.

Green Chile Pesto: Halve 2 medium fresh Anaheim or poblano chile peppers lengthwise; remove stems, seeds, and veins. Coarsely chop peppers. In food processor combine peppers, 1/2 cup fresh cilantro, 1/4 cup crumbled Cotija cheese, 2 tablespoons pine nuts, 2 cloves garlic, 1/4 teaspoon crushed red pepper, and salt and black pepper to taste. Process to finely chop mixture. With processor running add 1/3 cup olive oil in steady stream through feed tube to combine into a coarse paste. Makes about 1-1/3 cups pesto.

Nutrition Facts
Calories 244, Total Fat (g) 17, Saturated Fat (g) 3, Monounsaturated Fat (g) 9, Polyunsaturated Fat (g) 2, Cholesterol (mg) 31, Sodium (mg) 335, Carbohydrate (g) 4, Fiber (g) 1, Protein (g) 20, Vitamin C (DV%) 1.31, Calcium (DV%) 7, Iron (DV%) 15, Percent Daily Values are based on a 2,000 calorie diet

Enjoy!
Related Posts with Thumbnails