Sunday, May 31, 2009

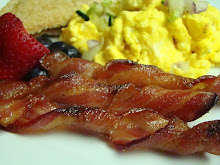
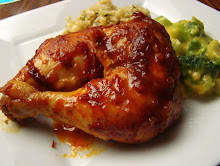
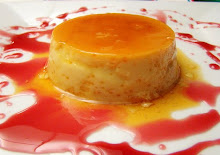
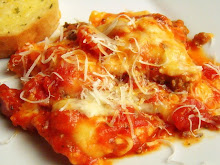
Meal Plan June 1-7

Hello everyone! You may have noticed that it was quiet here on Krista's Kitchen over the weekend. This is where I was:


We were in D.C. for a wedding over the weekend. We couldn't have asked for a more beautiful Saturday!

So, I'm back...for 2 days. Here's where I'm going next. My mom has put together a team for the Relay for Life, so I'm going home to support her team and feed some hungry relay participants.

Since I'll be away from my kitchen for most of the week, I'm posting the links below to some recipes you might want to try out in your kitchen. I'll still be posting throughout the week, including a report from the Relay for Life on Saturday. We have one full summer calendar, so look for lots of posts from the road through the month of August.

Monday June 1st

Inside Out Bacon Cheeseburgers
This time we're using the grill!

Tuesday June 2nd

Grillin' again...
Spicy Peanut Chicken Kabobs

Wednesday June 3rd

Grilled Egg and Cheese Sandwiches

Thursday June 4th

Spicy Tuna Linguine

Friday June 5th

New Mexico Style Pizza

Saturday June 6th

Let's grill out one more time!
Grilled Pork Tenderloin Sandwiches
Loved these!

Sunday June 7th

Italian Chopped Salad

Wednesday, May 27, 2009

Cashew Chicken


A few weeks ago I caught the end of the Rachael Ray Show. She was making "Take Out at Home" Cashew Chicken. I immediately thought, "why not?" We've ordered Cashew Chicken a number of times from our local strip mall Chinese joint. It's my father-in-law's favorite take-out dish. I've been sitting on the notion that I was going to make Cashew Chicken in my own kitchen until the right moment. Well, that moment has arrived! My in-laws are in the car as I type this, heading to our home for the weekend to watch our children while my husband and I and another couple leave for a wedding in Washington D.C. They aren't going to make it in time for dinner, but I know they'll appreciate the leftovers.

After reading Rachael Ray's recipe, I decided it wasn't quite what I was looking for. It was an Orange Cashew Chicken. Something I'd like to try later, but not what I wanted for tonight. I wanted to replicate, if possibly improve upon the dish we pick up from the place on the corner. So, the search began for the perfect Cashew Chicken recipe. I utilized the Food Blog Search found in the sidebar of my blog. That is how I found Rasa Malaysia blog with her fabulous pictures and authentic recipes for Asian cuisine. Boy am I glad I did. This blog offers many opportunities to create your favorite take out dishes at home or if you're feeling adventurous, to try some wonderful food outside of your comfort zone.

This first step was new to me. According to Rasa Malaysia, baking soda is the secret weapon used by many Chinese restaurants and chefs to make beef, chicken, or pork tender. I believe that she used the word "silky". I'd never thought of it that way, but it's a good description. You know what I'm talking about, right? I've pondered that silky texture when eating Chinese take out before. Now I know the secret. The recommendation was 1 teaspoon per 10 oz. of chicken. I ended up tripling the recipe, so that's 3 teaspoons. I stirred it up with my chicken and let it sit about 15-20 minutes.


You want to rinse off the baking soda so that none of it remains on the chicken. Drain and blot dry.


Then I marinated the chicken a second time in cornstarch and rice vinegar for another 15-20 minutes. The recipe called for rice wine, but my local grocery didn't have any in stock.


While the chicken marinated, I readied my vegetables for stir fry. The original recipe calls for green pepper, onion, ginger and cashews. I really like mushrooms in mine so I threw some of those in there. I also had some green onions on their way out, so I removed all of the slimy stuff and chopped them up too.


I also mixed up the sauce. You'll need oyster sauce, soy sauce, water, white pepper powder (I only had regular pepper), sugar, rice wine, sesame oil, and salt to taste.


Heat oil in a wok or skillet and stir fry the chicken until white or half done.


Remove the chicken from the skillet and keep warm.


Now add a little more oil to your wok or skillet and throw in the onion, pepper, ginger and green onion. Stir-fry until you smell the peppery aroma from the green peppers.


I added the mushroom in and stir fried for a minute longer.


Add the chicken back in.


And the cashews for a couple of quick stirs.


Then add in the sauce and and stir until the chicken meat is cooked completely and coated with the sauce. I'll make a confession here: I added in a couple of tablespoons of cornstarch mixed with water at the end. I can't help it. I like that gravy-like consistency in my take out food. Shame on me!


That's it. Serve it up over hot, steamed rice. I'm pretty proud of myself. This was really good. Better than take out and less greasy too! I'll have to try making my own take out more often. Of course, then it's not take out, is it? It's cooking at home, chopping, stirring, and dirty dishes. Okay, so I haven't completely written off take out.


Cashew Chicken from Rasa Malaysia

Ingredients:

1 boneless & skinless chicken breast, about 10 oz. (cut into small cubes)
1/2 cup cashew nuts
1 small green bell pepper, about 4 oz. (cut into small square pieces)
5 slices ginger
1/4 onion (cut into small square pieces)

Marinate:

1 teaspoon baking soda
1 teaspoon corn starch
1/2 teaspoon rice wine

Sauce:

1/2 tablespoon oyster sauce
3/4 teaspoon soy sauce
3 tablespoons water
3 dashes white pepper powder
1/2 teaspoon sugar
1/2 teaspoon rice wine
1/8 teaspoon sesame oil
Salt to taste

Method:

Marinate the chicken meat with the baking soda for 15-20 minutes and then rinse the chicken thoroughly. (Please make sure that the chicken is properly rinsed clean of the baking soda.)
Pat the chicken meat dry with paper towels and then marinate with the rest of the ingredients for 15 minutes.
Mix the sauce together and set aside.
Heat up a wok with 1 tablespoon of cooking oil and stir-fry the chicken meat until the color turns white or half-cooked. Dish out and set aside.
Add another 1 tablespoon of cooking oil into the wok and add in the ginger slices, bell peppers and onions.
Stir-fry until you smell the peppery aroma from the green peppers and add the chicken meat back in.
Add in the cashew nuts and do a few quick stirs.
Add in the sauce and stir continuously until the chicken meat is cooked and well coated with the sauce. Add salt to taste, dish out and serve the Cashew Chicken hot with steamed white rice.

* I tripled this and added mushrooms and green onions to the stir fry. I also added a couple of tablespoons of cornstarch + 2 tablespoons of water at the end.

Saltimbocca of Zucchini


AMAZING is an accurate description of this Saltimbocca of Zucchini! The literal Italian translation for saltimbocca means "jumps in the mouth". That is pretty darn accurate. Give this recipe a try, you'll see what I mean. Traditionally, Saltimbocca is a dish popular in southern Switzerland, Italy, Spain and Greece made of veal, chicken or pork, lined or topped with prosciutto and sage. I love the twist on this recipe, using zucchini instead of veal and basil in place of sage. Also, there's Fontina cheese in there! Where has this cheese been all my life?! I loved it. I've been eating the leftover cheese on my roast beef sandwiches all week. Good stuff!

I found this recipe at Elizabeth's Edible Experience. She has some seriously delicious food on her blog. She found and adapted the recipe from the Food Network courtesy of Michael Chiarello of Easy Entertaining with Michael Chiarello. After my dinner of Saltimbocca of Zucchini, I'd like to thank them both.

Cut each zucchini lengthwise into thin even 1/4-inch thick slices. According to Mr. Chiarello, this is most easily done on a mandolin. I don't have a mandolin. Do I look like Captain Corelli? Never mind, don't answer that. I need to put one on my wish list. The kitchen implement, that is, not the musical instrument. I used my chef's knife and my steady hand instead.


You're supposed to lay them out in pairs on paper towels or a clean tea towel and season lightly with salt and pepper. The towels soak up the extra water from the zucchini. I forgot the paper towel on bottom, but I did remember to blot out the moisture after my little zucchini stacks were assembled.


Arrange the prosciutto slices on half the zucchini slices so none hangs over the edges. Place some fresh chopped basil on top.


Now for the Fontina cheese. Somehow, I've misplaced my handy little adjustable cheese slicer. Luckily, my grater has a slot for slicing. Fontina is a soft cheese. It was tricky, but it worked.


Place the cheese slices on top, taking the same precautions you did with the prosciutto. Lay the remaining zucchini slices on top of each stack. Cover with paper towels or another clean tea towel, and press down firmly to extract moisture and firm the zucchini.


Pour the eggs into a deep plate. Pick up each zucchini stack by both ends and hold it securely closed as you dip it in the egg. You can see from the picture below that I follow directions to a "T".


I seasoned my flour liberally with some seasoning salt and pepper. Dredge the zucchini stacks in the flour until evenly coated.


In a skillet large enough to hold at least 5 zucchini stacks at a time, heat the olive oil over medium-high heat until hot. I used my electric griddle and cooked them all at once. I've been burning that griddle up lately. First with the fried mush, then corn cakes and now these. Love my griddle! Cook the zucchini, turning once, until golden brown on each side. Remove to a plate and keep warm until all are cooked. Add more oil by tablespoonfuls, if needed.


I had some extra egg and flour left after breading the zucchini, so I sliced an onion. Then I dipped the slices in the egg, dredged them in the flour, and tossed them onto my griddle as well. These onions made the perfect, tasty little nest for my Saltimbocca of Zucchini platter.


I arranged my onions on the platter, then the zucchini stacks, and topped it all off with some freshly grated parmigiano-reggiano cheese and more fresh chopped basil. Wow! Everyone loved this. Initially, my picky oldest child scooted her chair up to the table and turned up her nose, declaring, "I am NOT eating THAT! It's zucchini. Yuck." We practice the "one bite rule" in this house. You may not want to eat it, but you at least have to honestly try it. Chew and swallow. No drama please. Yeah, right. One bite, and her complaints stopped. She had seconds. I'm not going to say how many helpings found their way onto my plate. I will confess that they're also good hours later as a midnight snack, straight from the fridge.


Saltimbocca of Zucchini adapted from Elizabeth's Edible adapted from Michael Chiarello

2 pounds zucchini (each about 8 inches long and 1 1/2 inches in diameter work best)
Salt and freshly ground black pepper
8 thin slices prosciutto (about 1/4 pound)
Leaves from 1 bunch fresh basil, chopped
1/3 pound fontina cheese, thinly sliced
2 eggs, lightly beaten with a fork
1 cup all-purpose flour
seasoning salt and pepper, to taste
1/4 cup pure olive oil, plus more as needed
freshly grated parmigiano-reggiano cheese

Cut each zucchini lengthwise into thin, even 1/4-inch thick slices. (This is most easily done on a mandolin.) Lay them out in pairs on paper towels or a clean tea towel and season with salt and pepper.

Arrange the prosciutto slices on half the zucchini slices so none hangs over the edges. Place basil on top. Place the cheese slices on top, taking the same precautions you did with the prosciutto. Finally, lay the remaining zucchini slices on top of each stack. Cover with paper towels or another clean tea towel, and press down firmly to extract moisture and firm the zucchini.

Pour the eggs into a deep plate. Season the flour with season salt and pepper and put it on another plate. Pick up each zucchini stack by both ends and hold it securely closed as you dip it first in the egg and then dredge in the flour until evenly coated.

In a skillet large enough to hold at least 5 zucchini stacks at a time or an electric griddle, heat the olive oil over medium-high heat until hot. Cook the zucchini, turning once, until golden brown on each side. Remove to a plate and keep warm until all are cooked. Add more oil by tablespoonfuls, if needed.

Served on top of fried onions, if desired. Grate parmigianno-reggiano cheese over the top. Sprinkle with basil.

Tuesday, May 26, 2009

Out of This World Summer Cook Out Recipes!

Memorial Day marks the beginning of cook out season in these parts. The following recipes will be a hit at any summer cook out you attend, I promise! This year, we packed the family into our car and travelled to our home state of Indiana for the long weekend. Our agenda was packed with 2 family cookouts, a small baby shower brunch, the disassembly and transport of a large wooden playset, and some quality time boating and chilling on the beach. Needless to say my pictures are minimal. I kept getting distracted and I forgot to snap the steps and unfortunately even the finished product.

Indianapolis on race weekend is alive with 500 excitement. You'll find race parties on every block. Every year my husband's brother and his wife host a big race party. Our family, friends from college, and their neighborhood buddies gather for food and fun and pick their favorites for the race. This year the guest list topped out around 60 people. I emailed my sister-in-law a few days before the party in inquire what she'd like me to bring. She loves my Cheddar Beef Pull Apart Bread. She also voted for my famous Rotini Salad and my 7 Layer Dip. Excellent choices, Stacey! I ended up bringing a big batch of my Monster Cookies, the 7 Layer Dip, the rotini salad (recipe below) and a Jimmy Carter Cake(also shown below). When I emailed what I was bringing she replied back,"That's too much!" Considering that all of the guests were bringing a side dish, she was probably right. I tend to over-do it. I reasoned that whatever didn't get eaten at the cookout, we'd take back to my mother-in-law and father-in-law's home and eat it for the rest of the weekend. As it turns out, a few hours into the event, the Monster Cookies were gone, the 7 layer dip...gone, there were only a couple spoonfulls of the Rotini Salad remaining, and there were two tiny pieces of Jimmy Carter cake looking lonely in the big empty cake pan. It's always such a compliment to haul away your empty dishes from a pitch-in, don'tcha think?

Now let me show you how to make my all-time favorite pasta salad! If the setting for these pictures looks different to you, it is. I'm cooking in my mother-in-law's kitchen. Bless her heart! While we were trekking across the state to her house, she ran out and grabbed up all of the ingredients I'd need for the next two recipes. I don't know anyone who has tried this pasta salad and not liked it. If there's an ingredient you don't like, just leave it out OR throw it in for the sake of your guests and then push it aside when you're eating(that's what I do with the green peppers...one bite of a green pepper and I taste it all day. Eww.) My family has been making this perfect addition to any summer cookout for years. I'm not really sure who it came from, but I'm glad we found it!

For the dressing you need oil(plain old vegetable oil works best), vinegar, sugar, garlic salt, onion salt, basil, Accent, and black pepper. Combine them in a small sauce pan and bring to a boil. Then remove from heat to cool a little.


You also need 1 large onion, 2 carrots, 2 peppers (I use a green and a yellow), 2 tomatoes, and a handfull of pepperoni.


Chop em' all up and toss into a large bowl. This is my favorite bowl for this salad. It's a big, plastic, purple bowl. Nothing special, but it fits the salad perfectly and best of all it's got a nice, tight fitting lid that makes it great for transporting the salad to the cookout location.


Cook a package of rotini pasta according to package directions, then drain and rinse with cold water before you add it to the bowl and toss with the other ingredients.


Pour the dressing over the top and stir it up. I like to make mine the night before so the flavors have a chance to blend. Unfortunately, I didn't get a shot of the finished product. It's delicious and colorful. You'll make it again and again.


Rotini Salad

1 package rotini pasta, cooked according to package directions. Drain and rinse with cold water.

Dressing:

2/3 cup sugar
2/3 cup oil
2/3 cup vinegar
1 t. garlic salt
1 t. onion salt
1 t. basil
1 t. Accent
1 t. black pepper

Combine the ingredients. Bring to a boil. Cool while you chop the following ingredients:

1 large onion, diced
2 carrots, peeled and chopped
1 green pepper, chopped
1 red or yellow pepper, chopped
2 tomatoes, chopped
pepperoni, chopped

Combine the pasta, veggies, and pepperoni. Pour the dressing over the top and toss to combine. Cover and refrigerate until serving.


Now for dessert! I've been eyeing the Jimmy Carter Cake that Mary at My New 30 has pictured in the sidebar of her blog. I was excited for an excuse to try out this decadent looking recipe. So worth the wait! YUM! Unfortunately, Blogger was acting all crazy and I couldn't access her blog when it came time to print the recipe. Luckily, I googled Jimmy Carter Cake and came up with a number of results, all of them pretty similar.

I started out by chopping 2/3 cup of dry roasted peanuts.


Then I combined a stick of butter, some flour, and the peanuts and cut them all together. I know that's part of a mixer in the bowl. I looked high and low for my MIL's pastry cutter with no luck. I started out using the mixer attachment and resorted to using a fork in the end. Once the ingredients are combined, press them into the bottom of a buttered baking dish and bake for 15 minutes. Remove and cool.


While the crust baked, I combined powdered sugar, peanut butter, cream cheese, and Cool Whip for the first layer.


Spread it on the cooled crust.


Now mix two packages of instant pudding with milk. I ended up using two packages of chocolate, one chocolate fudge. Depending on the recipe, some prefer one vanilla and one chocolate. Beat the milk into the pudding until thick. It took me about 5 minutes. Spread the pudding layer over the peanut butter layer.


Finally, top it with Cool Whip and shave a chocolate bar over the top. I loved Mary's idea of topping the cake with cherries. It just makes it that much more cheery and irresistible with those pretty bright maraschino cherries carefully placed on top. Kind of like a peanut butter fudge sundae.


I really wish that I'd gotten a good picture of one perfectly sliced piece of this mouth-watering creation. But I forgot. Instead I snapped a picture of the leftovers the next morning. These two measly pieces were all that were left from the cookout. They were gone by noon the next day. I'm not saying who ate them : )


Jimmy Carter Cake

2/3 c. crushed peanuts
1 c. flour
1 stick of butter

Combine and press down in 9 x 13 inch pan. Bake at 350 degrees for 15 minutes.

2ND LAYER:

1 c. peanut butter
8 oz. cream cheese
1 c. powdered sugar
8 oz. Cool Whip

Blend first 3 ingredients until smooth, then fold in Cool Whip.

3RD LAYER:

1 sm. pkg. instant chocolate pudding
1 sm. pkg. instant chocolate fudge pudding
2 3/4 c. milk

Beat at high speed about 5 minutes until thick.

4TH LAYER:

More Cool Whip to cover
Shaved chocolate. I used a bar of Hershey's Special Dark
Maraschino cherries

Monday, May 25, 2009

Memorial Day Reflection and The Meal Plan for 5/26- 5/31

I apologize that I am a day late with my meal plan and grocery list this week. When I was throwing suitcases into the car for our long weekend with family and friends, I wasn't even thinking about the meal plan or how I would post away from home. I hope that you all had a wonderful and relaxing Memorial Day weekend.

I also hope that in the midst of cookouts and parades and racing that you were able to take a moment to reflect and honor the service men and women that sacrificed so much in the service of our country. I have a number of veterans in my own family and I have friends that are currently serving in the military. I'd like to take a moment to express my gratitude to all of them. I'd also like to honor a fallen soldier in this post. I attended elementary school and high school with Marine Lance Cpl. David K. Fribley. We went to different universities, but David pledged the same fraternity as my then boyfriend, now husband. Our paths crossed a occasionally in the college years. He was such a good person and it was always a pleasure to see him. The terror attacks of September 11th inspired David to quit his job at a southern Florida retirement home and sign up with the Marines. On March 23rd, 2003 he became the first Indiana native to die in the war. David was a true patriot. He wrote the following in a letter to co-workers prior to leaving for bootcamp,

"The greatest gift one can give to another is the gift of service. I do not know who said this but I’ve heard this saying before. The following is my gift to you; may I honor you and our fellow countrymen and women. I will earn the privilege to wear Eagle, Globe and Anchor for all those that cannot. With all the strength of my fellow Marines, we shall always provide you with the comforting feeling of safety that you have each day.”

In addition to starting the meal plan late this week, I'm taking off early. My husband and I will be attending an out of town wedding this weekend in our nation's capitol. As a matter of fact, the bride is one of my above mentioned friends serving our country. She's in the Navy. I am so proud of her!

Here is my abbreviated meal plan. No grocery list this week. I haven't quite decided which Cashew Chicken recipe I'm going to use yet. I'll also be posting a couple of cookout pitch-in recipes this week once I get my pictures downloaded from the weekend.

Tuesday May 26th

Texas Beef Barbecue

Wednesday May 27th

Saltimbocca of Zucchini
Don't miss this post! I may just have a new favorite food!

Thursday May 28th

Cashew Chicken

Friday May 29th

Dinner out in D.C.
Anyone have a suggestion?

Saturday May 30th

Petite Filet Mignon
Crab Stuffed Jumbo Shrimp
Wedding Cake
I'm serious. Are you jealous? I can't wait!

Sunday May 31st

Pizza Delivery!

Thursday, May 21, 2009

My Favorite Cookie

What's your favorite cookie? Peanut butter? Oatmeal? Chocolate Chip? Butterscotch? Maybe you share my perspective on cookies. They're all good. Enter the Monster Cookie! It's a little bit of everything all rolled into one. Alanis Morissette, anyone? In a sentence sweet...

Anyway, I just love these cookies. I've eaten them since I was a little girl and they still top my list. Peanut butter, oatmeal, chocolate chips, butterscotch chips, and to top it off...M&M's!


I rarely feature baked goods on this blog. Not because I don't love to bake...I do. I really do. Pies and cakes and cookies and brownies and muffins and bread and ...You see, I get so distracted when I think about sweets. But the fact is, I'm a consumer. That is, I consume large quantities of baked goods if I keep them around my house. I'm curvy by nature. And I love food. So, I exercise. Every. Single. Day. And I eat a balanced diet. But curvy trends toward pleasantly plump when I get on one of my baking jags. When I worked outside of the home, I could take my goodies to work and pawn them off on my co-workers. Now, no such luck. Lately I have resolved to bake only when there is an occasion. Like Memorial Day. It's a holiday for Heaven's sake. If that doesn't warrant baking, what does!? So I enlisted my daughter to help me whip up my favorite cookies. I thought they'd be a perfect snack for the road trip to our holiday destination and a hit at the pitch-in cook out we'll be attending when we arrive. I have to add that she was SO disappointed when she found that the cookies didn't actually look like monsters. I tried to explain, "Monster. Like giant. Huge. Larger than life. Like monter trucks..." My reasoning was lost on a 4 year old.

To make monster cookies I start by creaming a pound of butter with 2 pounds of brown sugar and 4 cups of white sugar. Oh yeah, and there's one whole tablespoon of corn syrup in there too. Is that weird to anyone else? Why do you think there's one tiny tablespoon of corn syrup in this massive amount of ingredients? No really, I'm serious. Does anyone know? Is that little tablespoon of corn syrup doing anything for the quality of my cookies? I mean, I know why I put it in...because that's the way we've always done it. But really, beyond that I'm not sure.


Next I break a dozen eggs into a bowl or large measuring cup. No shells allowed!


I beat the eggs a little and then had my trusty assistant add in 2 tablespoons of vanilla.


Mix the eggs into the butter and sugar. It'll look like this.


Then I measured out 18 cups of quick oats and combined them with 8 teaspoons of baking soda. Here is my big bowl of dry ingredients next to my big bowl of wet ingredients. Where on earth am I going to mix them together? Both my mom and grandma have giant bowls, like the size that I can wrap my arms around. Those giant bowls make combining and mixing these ingredients easy. I don't have one of those bowls. I could use a big roasting pan. Nope. I don't have one of those either. My wish list keeps growing... Luckily, I do have one more large bowl. I ended up dividing the "wet" ingredients in half and then adding half of the dry ingredients to each bowl, so that I had two large mixing bowls full of cookie dough in the end.


Oh wait, the peanut butter. We can't forget about the peanut butter. You need 3 lbs. I found this 4 lb. tub on sale at a local discount grocery last week. I wonder how many peanuts it takes to make 4 lbs. of peanut butter? Hmmm.


Mix the peanut butter into the "wet" ingredients.


Now we stir in the oatmeal mixture. The more you pour in, the harder it gets to stir.


Now for the chocolate chips, butterscotch chips, and M&M's.


At this point, we have to abandon our spoons and work the chips and candy into the dough with our clean hands.


Drop by 1/3 cupfulls onto an ungreased baking sheet. They bake for 13-15 minutes in a 350 degree oven. I like mine soft and chewy vs. crispy.


Cool.


Enjoy.


This recipe makes a ton of cookies. By a ton, I mean, I filled my cookie jar twice, took a plate to a friend's house, gave a few to the neighbors, I'll take to a tray to the Memorial Day cookout, and I still put 4 bags in my freezer. These freeze well. Perfect to pull out when company is coming or when you forgot to make something for the PTA bake sale. I have to store cookies in the garage freezer. That way I have to make a little extra effort if I'm tempted. I'm so bad that I actually try to justify eating these as a healthy breakfast. You know, because there's protein in the peanut butter and the oatmeal is a good source of dietary fiber.

I just put mine on a paper plate and then...


slide the plate into a labelled freezer bag.


Monster Cookies

1 lb. butter
2 lbs. brown sugar
4 cups granulated sugar
1 tablespoon corn syrup
1 dozen eggs, slightly beaten
2 tablespoons vanilla
3 lbs. creamy peanut butter
18 cups oatmeal
8 teaspoons baking soda
12 oz. pkg. of both butterscotch and chocolate chips
1 lb. M&M's candy

Cream butter and sugars. Add in eggs and vanilla. Mix well. Add in peanut butter. Mix well again. Combine dry ingredients. Dump the dry ingredients into the "wet" ingredients gradually. Stir until it becomes too difficult and then dump in the chips and candy and use your hands until all ingredients are combined. Drop by 1/3 cupfulls onto an ungreased cookie sheet and bake at 350 degrees for 13-15 minutes or until golden brown on top.
Related Posts with Thumbnails