Friday, July 31, 2009

Hoisin Chicken

Just thinking about this chicken makes my mouth water. So flavorful and juicy, it rivals Kentucky Grilled Chicken as my favorite grilled chicken recipe. Depending on my mood, it might even be the winner. I served this at a mid-day Saturday cookout with friends. Everyone, even the kids (mine and theirs) loved it. If you only try one chicken recipe this grilling season, choose this!


Here's what you need to make this delicious chicken: hoisin sauce, 3 scallions, garlic, ginger or ginger paste, a jalapeno pepper, 2 limes, rice vinegar, Kosher salt, freshly ground pepper, and 2 pounds skin-on chicken thighs and drumsticks.


I made this marinade in my food processor. The food processor can be a pain to clean, but I wasn't in the mood to chop for some reason. I added my scallions, garlic cloves, jalapeno pepper, and ginger to the bowl and pulsed until finely chopped. Apparently, I wasn't in the mood to take pictures either. Me and my moods. Geesh. This is the only picture I have of making the marinade, so let me just tell you what I did next. I squeezed the juice from two limes into the food processor, added the hoisin sauce, rice vinegar, salt, and pepper. Then I blended until it was all combined.


I cleaned and rinsed the drumsticks and thighs, patted dry, and then sprinkled with kosher salt and freshly ground pepper.


The chicken went into a large, resealable plastic bag, then I poured in the marinade and put the bag in the fridge. Be sure to save about 1/3 cup of marinade for basting while the chicken grills. My chicken marinated for a little more than 24 hours. When I began this recipe, I didn't even know that we'd be sharing it with company. I put the chicken in the fridge to thaw on Thursday night and made the marinade on Friday morning. I was going to have my husband grill it on Friday night for our dinner. As it turns out, my husband ended up going out with clients on Friday night, so the girls and I got Chinese take out for dinner. While I was waiting up for my husband to arrive home, I was talking to my friend on the phone and suggested they come over for lunch the next day and help us eat all of this chicken. Thank goodness that they accepted. I'd made way too much chicken for a small family of 4. Consequently, the chicken marinated a little longer than recommended. This was not a mistake. The chicken was "da bomb!"


I found this Hoisin Chicken recipe in the Food Network magazine. They paired the chicken with a cucumber salad. Since I already had my food processor out, I thought, "Why not?" It was a good excuse to see the slicing blade in action. I sliced up a cucumber and 1/2 of a red onion and made the rice vinegar-sugar dressing on my stove top. I made this the day before too so the veggies had plenty of time to soak up the dressing. A quick review of this cucumber salad: it wasn't that great. Not enough sugar and I didn't love it with the rice vinegar. I so love my grandma's creamy cucumbers and onions that no other version of this summer favorite really does much for me. I did appreciate the crisp textures and acidity of this salad to compliment the chicken, though. So, if you have your own favorite cukes and onions recipe, please try it with this chicken.


With our company on the way late Saturday morning, I turned the chicken over to my husband for grilling. Didn't he do a beautiful job? It smelled so good cooking that our stomachs were all growling and I'm pretty sure the kids ate half a watermelon while they waited.


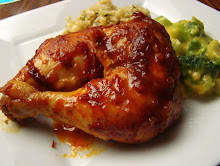
This was lunch. So good! I'm such a classy hostess. You want to know what I served with the chicken? We had a ton of leftover lo mein noodles from our take out Chinese the night before. I heated them in a saucepan with some broth and served them up with the chicken and cucumber salad. Shameless, I know. Hey, the Asian-style noodles paired up nicely and I moved some leftovers out of my fridge. What?!


Hoisin Chicken with Cucumber Salad
Recipe courtesy Food Network Magazine and adapted by me
Prep Time: 25 min Inactive Prep Time: hr min Cook Time: 25 min Level: Easy
Serves: 6-8

Ingredients

For the Chicken:
3/4 cup hoisin sauce
3 scallions, coarsely chopped
5 cloves garlic
1 2-inch piece fresh ginger, sliced or a teaspoon of ginger paste
1 jalapeno pepper, stemmed and halved (remove seeds for less heat)
Zest and juice of 2 limes, plus lime wedges for garnish
2 tablespoons rice vinegar
Kosher salt and freshly ground pepper
4-5 pounds skin-on chicken thighs and drumsticks (separate pieces)

For the Salad:
1/2 cup rice vinegar
3 tablespoons sugar
Kosher salt
1 seedless cucumber, thinly sliced
1/2 red onion, thinly sliced
Directions
Prepare the marinade: Combine the hoisin sauce, scallions, garlic, ginger, jalapeno, lime zest and juice, vinegar, and salt and pepper to taste in a mini food processor or blender; process until almost smooth. Reserve 1/3 cup of marinade for basting. Season the chicken with salt and pepper; toss with the hoisin mixture in a large resealable bag. Marinate in the refrigerator for 24 hours.

Make the salad: Bring the vinegar, sugar and 1 1/2 teaspoons salt to a boil in a small saucepan, stirring. Remove from the heat; stir in 1/4 cup ice cubes until melted. Toss the cucumber and red onion in a serving bowl with the vinegar mixture; place in the refrigerator.

Grill the chicken over direct heat until the skin is crisp, 5 minutes per side, basting with extra marinade. Transfer to the cooler side of the grill; cover and grill until cooked through. Serve with the cucumber salad and lime wedges.

Per serving: Calories 375; Fat 16 g (Saturated 4 g); Cholesterol 107 mg; Sodium 1,906 mg; Carbohydrate 30 g; Fiber 1 g; Protein 32 g

For a printable copy of this recipe, click here!
Keep reading to see what we had for dessert!

Chocolate Banana Cream Pie

This pie was a lucky, decadent, fly-by-the-seat-of-my-pants (or in this case, shorts) creation.


About two hours before my lunch company was set to arrive, I realized that I had nothing to serve for dessert. I started scrambling through my pantry for inspiration. I had a graham cracker pie crust, a box of vanilla cook n' serve pudding, and chocolate chips. In the fridge, I had a tub of Cool Whip and some heavy whipping cream. On my counter, ripening bananas. The idea quickly formed in my head (quickly because I still needed to shower, dress the kids, and straighten up the playroom!). Chocolate banana cream pie. Of course!


I began by pouring half a bag of semi sweet chocolate chips into a microwave safe bowl. Then I poured in a little juice from a jar of maraschino cherries and enough heavy whipping cream to fill in the spaces between the chips. The picture below has too much cream. I ended up pouring a little off. You don't want the chocolate layer to be to thin.


I microwaved the chocolate chips, cream, and cherry juice for 30 seconds. Then stirred until smooth. You don't want to overheat this into a gummy mess, however, if the chocolate chips aren't completely melted after about 20 seconds of stirring, then heat for another 10 seconds.


Spread the chocolate into the bottom of the graham cracker crust.


Next I sliced two bananas over the chocolate layer. I completely forgot to take a picture of this step. I was rushing! While I was making the chocolate and slicing bananas, I had my daughter stirring the vanilla pudding at the stove. When the pudding is finished cooking, cool and then pour over the bananas.


Top with Cool Whip and drizzle with chocolate syrup. I decorated mine with a few maraschino cherries too. Refrigerate until serving to allow the pie to set up. That's it! This was such a yummy dessert for our Saturday cookout. No leftovers!


Krista's Chocolate Banana Cream Pie

1 graham cracker pie crust
1/2 bag semi sweet chocolate chips
1/8 cup maraschino cherry syrup from the jar
1/4-1/2 cup heavy whipping cream
2 bananas
1 box cook n' serve vanilla pudding prepared according to package directions
milk (For pudding. It was 3-4 cups...I think)
1/2 tub of Cool Whip
chocolate syrup
maraschino cherries

Cook pudding according to package directions. Cool. In a microwave safe bowl, combine chocolate chips, cherry juice, and whipping cream. Microwave 30 seconds and stir until smooth. If chips have not melted after stirring, microwave for 10 more seconds and stir again. Spread chocolate into the bottom of a prepared graham cracker crust. Slice 2 bananas into the pie pan, over the chocolate layer. Pour cooled vanilla pudding over the bananas. Top with Cool Whip. Drizzle with chocolate syrup. Garnish with cherries. Chill until serving.

For a printable copy of this recipe, click here.

Thursday, July 30, 2009

Beer Brats and Fried Cabbage

Warning: this post is NOT heart healthy...but it sure is GOOD!


When I set out to make dinner tonight, I knew the focus of the post would be my fried cabbage. I can't even describe to you how good this fried cabbage tastes. I grew up eating fried cabbage in my grandma's and my mom's kitchen. Really, it should be called caramelized cabbage in cream, but I can't very well change the name of a dish that my family has been eating for decades, now can I? People would be confused. What're we having? Carmel cabbage? Nope. I'll leave the name alone. As I was saying, I knew I would focus on the side dish tonight. However, my husband grilled such a perfect, delicious beer brat that I have to mention those too. Dinner was awesome! Not healthy, but really good!

When my husband set out to light the grill, I heated 2-3 tablespoons of butter in a skillet. You want to give yourself enough time to make the cabbage, because it takes a bit to caramelize.


I added 1/2 head of chopped cabbage (because that's all I had left over from the baked spring rolls) and salt and pepper. Stir fry over medium high heat for a couple of minutes and then cover and reduce the heat to medium low. Stir occasionally over the next 40 minutes or so.


While the cabbage caramelizes, let's head out to the grill. Since trying our hand at charcoal grilling a few weeks ago, my husband has been consulting the Weber Owner's Guide. He's used this manual 4 times and all 4 times it has yielded a perfectly cooked product. Tonight he found a recipe for bratwurst with beer. He placed a pan with the contents of one beer in the center of the cooking grate. Then he browned the brats over the coals on the sides, turning until they were lightly browned.


Then he placed the brats in the beer pan and replaced the lid on the grill. These cooked in the beer for 25 minutes. They were hands down the best brats we've ever eaten! We'll definitely re-visit this method in the future.


Now back to the cabbage. You want your cabbage nice and golden brown. Caramelizing the cabbage adds a whole new dimension to the flavor, so please be patient and let it reach this point.


Before serving, add a little heavy whipping cream or half and half.


Oh, who am I kidding? If a little cream is good, then more cream is better! Cook and stir for a minute or two longer to heat through.


Have mercy, the fried cabbage is good!


And that's dinner. You know what would be really good as a side here? Some fresh sliced garden tomatoes with a little bit of salt. I used all of mine in the gnocchi last night. I have to remember to get some more for the weekend.


Fried Cabbage

2-3 tablespoons of butter
1/2 head green cabbage, chopped
salt
pepper
1/2 cream or half and half

Heat butter in a skillet. Add chopped cabbage. Salt and pepper to taste. Stir fry over medium high heat for 2-3 minutes. Cover and cook over low heat, stirring occasionally until cabbage caramelizes, 40-45 minutes. Pour cream over the cabbage and cook and stir until heated through.

* This made just enough for my husband and I to split and the kids to have a small helping. Perfect for a family of 4 with small children. There were no seconds. I'd recommend doubling this and using a whole head of cabbage.

Bratwurst and Beer from the Weber Owners Manual

1 package bratwurst
1 can beer
1" deep pan

Use indirect method. Place pan for beer in the center area of cooking grate; pour beer into pan. Brown bratwurst over coals on the sides. Use tongs to turn and watch closely until lightly browned. Place brats in beer and cook with the lid on the kettle for 25 minutes.

Wednesday, July 29, 2009

Basil Gnocchi


I have wanted to make gnocchi since February of 2007. Specific, aren't I? In the February/March 2007 issue of Light & Tasty, I read a three-page article titled, "no-fail gnocchi", complete with 4 mouth-watering gnocchi recipes. February 2007 was the same month that I turned 30 and that we moved from Indiana to Georgia. Before I got around to trying my hand at gnocchi, I needed to pack up our house and move hundreds of miles South. The magazine got packed too. Since that February, 2 years and 5 months ago, we've had another baby, moved again, Light and Tasty changed it's name to Healthy Cooking and I started this blog. Time flies, right? What I still have not done is make gnocchi. Until now... I found this recipe for basil gnocchi in the latest issue of Food Network Magazine. Chef Ashley Archer recommended using instant potatoes to reduce the prep time for these little green potato-based pastas. I'm all for a shortcut when it comes to the time consuming task of making my own pasta. The sauce is simple and traditional and I love that it uses fresh-from-the-garden tomatoes. This dish was so good that I know I'll make it again. So, 2 years and 5 months later, I have made my own gnocchi. It was worth the wait.


Here is what you need for the pasta: instant potatoes or real potatoes squeezed through a ricer, flour, egg, basil, grated pecorino cheese or in my case, Parmigiano-reggiano because that's what I had in the fridge, and some kosher salt.


Begin by putting a packed cup of basil leaves into your food processor or blender with 1/4 cup of cold water.


Puree.


Now combine the potatoes, egg, cheese, salt, and basil puree.


Place 3/4 cup of flour in a mound on a clean surface.


If you have not yet donned your apron, now is a good time. Kneading and forming pasta is a messy business. I obliterated my running shorts. Nice.


Combine the potato mixture with the flour.


Knead until smooth. Maybe 5 minutes. Add the rest of the flour gradually and knead until it is all incorporated. I used way more flour than recommended. Part of my problem is that I used 1 cup of leftover mashed potatoes complete with butter and milk mixed in. They had a higher moisture content than plain riced potatoes or the potato flakes mixed with the recommended amount of water. Form the dough into a ball.


Divide the dough into 3 pieces and roll into 1 inch diameter ropes. Cut the ropes into 1/2 inch pieces. You can cook them just like this. There is no law against it, I promise. I decided to go more traditional and add the grooves so that the yummy sauce could cling in each little indentation. I used a fork. Just roll the pieces of pasta over an upside-down fork. You can check out the gnocchi forming technique here in this informative little clip. Did you know that there is such a thing as a gnocchi board? I want one of these:V581 Gnocchi Board. It would make the process much easier! You can also find the link to a gnocchi board on Amazon.com in my left sidebar.


Place the formed gnocchi on a parchment lined baking sheet and refrigerate until you are ready to use them. You can also freeze them for up to a month. Making your own gnocchi does take a considerable amount of time. You could make these ahead and just pull them out when you're ready to make the recipe after work or on a busy night. OR...you can always buy gnocchi at the grocery and make this dish really quickly! I'm glad that I made my own and the basil gnocchi was amazing, but back when I was working or at home with a new baby, there is no way I would've pulled off taking an hour out of my day to make my own! So, if you buy the gnocchi rather than make your own, I won't think any less of your, I swear!

When the sauce is near ready, drop the gnocchi into boiling water and cook until they float to the top, plus 1 minute more. Drain.

Aren't these little gnocchi cute? I thought they looked kind of like chubby lil' green caterpillars. Okay, so I have an active imagination...


Now for the sauce! Here's what you'll need: olive oil, pine nuts, 2 lbs. of tomatoes, 3 shallots (I only had two), three cloves of garlic (I used 5), dry white wine (I used chicken broth...completely out of wine here),and kosher salt and fresh ground pepper (not pictured...oops!)


Heat the olive oil in a skillet over medium high heat and fry the pine nuts until toasted, swirling the pan.


With a slotted spoon, remove the pine nuts to drain on paper towel. Sprinkle with salt. Forget the gnocchi, these are delicious on their own!


Now sautee the garlic and shallots in the oil until tender. Then add the wine or broth and bring to a boil.


Add the tomatoes and cook and stir until the tomatoes are soft. Salt and pepper (if you're like me) generously.


Toss the gnocchi with the sauce and serve topped with the toasted pine nuts, additional basil and grated cheese. In our house we also had garlic bread. Actually, Texas Toast from the freezer. All that time making fresh pasta and I paired it with Texas Toast from a cardboard box? Oh well, the potatoes came from a box too. It was awesome! We all loved it.


Sidenote: I am watching Top Chef Masters while typing this. Whoa! I am SO slow at making gnocchi! I just watched Suzanne chop the gnocchi pieces in what looked like fast forward! Impressive.

Here is the recipe:

Ashley's Basil Gnocchi
Recipe courtesy Ashley Archer for Food Network Magazine

Prep Time: 25 min Inactive Cook Time: 20 min Level: Intermediate

Serves: 4 servings

Ingredients

For the Gnocchi:

1 1/2 cups instant mashed potatoes
1 cup packed fresh basil, plus more for garnish
1 large egg, beaten
1/4 cup grated pecorino cheese, plus more for garnish
Kosher salt
1 cup all-purpose flour, plus more for dusting

For the Sauce:

1/4 cup extra-virgin olive oil
1/4 cup pine nuts
Kosher salt
3 shallots, diced
3 cloves garlic, minced
1/4 cup dry white wine
2 pounds heirloom tomatoes, cut into pieces
Freshly ground pepper

Directions

Make the gnocchi: Mix the instant potatoes with 1 cup hot water in a bowl using a fork; set aside until the potatoes absorb the liquid, 3 minutes. Meanwhile, puree the basil and 1/4 cup cold water in a blender until smooth. Stir the basil puree, egg, pecorino and 1 tablespoon salt into the potato mixture.

Mound 3/4 cup flour on a surface; add the potato mixture and knead together until smooth, gradually adding the remaining 1/4 cup flour. Divide the dough into 3 portions; roll each into a 1-inch-diameter log (dust with flour, if needed). Cut each log into 1/2-inch pieces; place on a parchment-lined baking sheet and refrigerate while making the sauce (or freeze up to 1 month).

Make the sauce: Heat the olive oil in a large skillet over medium-high heat. Add the pine nuts; fry until toasted, swirling the pan. Transfer the nuts with a slotted spoon to paper towels and season with salt. Add the shallots and garlic to the pan and cook until soft, 3 minutes. Add the wine and bring to a boil. Add the tomatoes, season with salt and pepper and toss; cook until the tomatoes are just soft, 2 more minutes.

Cook the gnocchi in a large pot of salted boiling water until tender, about 1 minute after they float to the surface. Drain and toss with the sauce. Top with the toasted pine nuts and more basil and pecorino.

Sunday, July 26, 2009

Baked Spring Rolls


I am a sucker for strip mall Chinese food. I've had some good experiences and some not so good experiences, but I keep coming back for more. Since I have frequent cravings for this variety of Asian cuisine, I'm always on the look out for recipes that will allow me to re-create my favorite dishes in a healthier way at home. I've been successful just a few times at making restaurant worthy Chinese with Cashew Chicken, Beef and Onion Stir Fry, and Steamed Dumplings. And now I've got this egg roll recipe! I really enjoyed these little egg rolls. I liked that I could really taste the flavors of the filling; the ginger, the garlic, the heat of the chili paste, the freshness of the cilantro, the warmth of the toasted sesame oil, the crispy ham, and finally the crab. Rather than just biting into the strip mall version and tasting "fried" and the one-flavored-filling, I enjoyed recognizing the flavors in this baked version and tasted them working in harmony for a delicious result. Kudos to Lauren Kempees for a well-written recipe! That said, they are baked, not fried, so they are missing that greasy-fried element that makes an egg roll an egg roll. I can get past the absence of the fried texture because I love the idea that I can more healthfully enjoy an old favorite. My husband was not as big of a fan of the baked egg roll as I. If any of you make these, please let me know what you think.

Here's whatcha need for the filling: cabbage, a carrot, green onions, garlic, ham, cilantro, ginger, crab meat, sesame oil, soy sauce, Asian garlic-chili paste and rice vinegar.


Cook the ham in 2 teaspoons vegetable oil in a small nonstick skillet over medium heat until crisp, 2 to 4 minutes. Add the ginger, garlic and scallions; cook until fragrant, about 1 more minute.


Turn off the heat and stir in the chopped cabbage and shredded carrot.


Mix together the crab, cilantro, chili-garlic paste, 1 teaspoon sesame oil, the soy sauce and vinegar.


Stir the veggie-ham mixture into the crab mixture until combined. Put 1/3 cup of the filling onto each egg roll wrapper. The recipe instructs to fold in a narrow strip on each side of the wrapper before rolling up. This method makes a longer, skinnier roll. I made the first one according the the recipe instructions. It was a little tricky. The method that I used for rolling the remaining egg rolls came from Tyler Florence. I saw him on The View rolling egg rolls with Whoopi. He put the filling right in the middle and folded one corner up to the middle and tucked it in under the filling, then he tucked in the edges and rolled it the rest of the way up. This method was much easier. Don't forget to brush the edges of the wrapper with a little bit of water/egg white mixture to help it stick.


Place the egg rolls on an oven safe rack on a baking sheet and brush with a mixture of vegetable and sesame oil. Bake the rolls at 425 degrees until golden on top, about 15 minutes. Then, turn the rolls and bake until golden and crisp, 8 to 10 more minutes.


I served mine with Annie Chun's Pad Thai which is a kit for Pad Thai in a box. I added the limes, sesame seeds, cilantro, and a little egg. For Pad Thai from a box I was pretty impressed. It tastes good and costs a fraction of what I pay at my local Thai restaurant. I also made the egg roll dipping sauce included with the recipe below. I didn't care for it. I ended up just using some sweet and sour sauce leftover from our most recent Chinese take out. I was just as happy with this dinner as I would have been if I'd shelled out the big bucks for carry out.(Patting myself on the back.) Hope you all had a delicious dinner also!


Baked Spring Rolls

Recipe courtesy Lauren Kempees for Food Network Magazine
Prep Time: 25 min Inactive Prep Time: hr min Cook Time: 30 min Level: Easy
Serves: 14 servings

Ingredients

For the Spring Rolls:
1 2-ounce piece deli ham, finely diced
4 teaspoons vegetable oil, plus more for brushing
1 tablespoon chopped peeled ginger
2 cloves garlic, chopped
4 scallions, chopped
1 1/2 cups finely shredded green cabbage
1 medium carrot, shredded
1 pound lump crabmeat, picked over
1/4 cup chopped fresh cilantro
1 teaspoon Asian chili-garlic paste
1 1/2 teaspoons toasted sesame oil
1 tablespoon soy sauce
1 tablespoon rice vinegar
14 square spring roll wrappers
1 large egg white

For the Sauce:
2 tablespoons soy sauce
2 tablespoons rice vinegar
1 tablespoon mirin (sweet rice wine)
1 teaspoon chopped peeled ginger
1 scallion, finely chopped

Directions
Preheat the oven to 425 degrees. Make the spring rolls: Cook the ham in 2 teaspoons vegetable oil in a small nonstick skillet over medium heat until crisp, 2 to 4 minutes. Add the ginger, garlic and scallions; cook until fragrant, about 1 more minute.

Toss the cabbage and carrot with the hot ham mixture in a large bowl. Add the crab, cilantro, chili-garlic paste, 1 teaspoon sesame oil, the soy sauce and vinegar; toss.

Wrap the spring rolls. Pierce each roll with a skewer in a few places to prevent bursting. (I forgot to do this. No worries, mine did not burst.)

Place a rack in a baking dish and brush with vegetable oil. Mix the remaining 2 teaspoons vegetable oil and 1/2 teaspoon sesame oil; lightly brush on rolls. Place the rolls on the rack; bake until golden on top, about 15 minutes. Turn the rolls; bake until golden and crisp, 8 to 10 more minutes.

Meanwhile, mix all the sauce ingredients in a small bowl. Serve with the warm spring rolls.
Related Posts with Thumbnails