Saturday, November 6, 2010

Peanut Butter Cookie and Cream Cheese "Candy" Bars


If you've still got "tons" of leftover Halloween candy, this is the recipe for you! Jenny from Picky Palate came up with this decadent bar cookie to use up some of her family's leftover trick-or-treat candy. If you are in the market for other indulgent treats and some great give-aways, I highly recommend visiting Picky Palate.

We have enough Halloween candy for 5 recipes, so I jumped at the chance to try this one. I have to say, these were amazing! In the past, I have stated that there is no such thing as "too rich" when it comes to desserts. This one may actually toe the line. They are dense and sweet and gooey and SO rich! Sure to satisfy any sweet tooth.

Here's how they came together. First, I combined a cup of peanut butter with 1/2 cup each of granulated and brown sugars. Then, I beat in an egg and some vanilla.


Add in the combined dry ingredients to the peanut butter/sugar mixture.


Pour in tablespoons of hot water (about 4) until the dough is dampened enough to hold together.


Line a 9 X 9 inch baking pan with foil and then spray it with non-stick cooking spray.


Dump half of the peanut butter cookie dough into the pan. It will be a little crumbly.


Then press the dough into the bottom of the pan.


Now for the cream cheese layer. Combine 8 oz. of cream cheese with a few tablespoons of sugar, just to sweeten it a bit. Then mix together until smooth.


Spread the cream cheese evenly over the cookie dough in the pan.


Next, gather some leftover Halloween candy, the equivalent of 25 snack-sized pieces.


Roughly chop the candy and distribute the pieces over the cream cheese mixture. I also sprinkled on some Reese's pieces that I had leftover from the Owl Cupcakes that I made for our Halloween Party.


Top with the remaining cookie dough and press it down. Then bake at 350 degrees for 25-30 minutes until golden brown.


You want to let these cool completely before removing them from the pan so that they hold their shape and are easier to cut into neat squares. I first pulled them while still warm (I couldn't wait for a taste!) and they quickly began to spread out, so I returned them to the pan until they had cooled completely.


Check out this ooey-gooey, peanut buttery, chocolaty, caramel-drenched, cream cheesy cookie bar! Mmmm.


I ate half of a bar just to satisfy my curiousity (that's my story and I'm stickin' to it!) after I cut them and then took a break. I came back a couple of hours later to finish off the other half. It was so rich that I have to admit feeling a little sick afterward...but not so sick that I wasn't glancing at them from across the room, contemplating another, a mere hour later. Instead of giving in to temptation, I decided that they were far too dangerous to keep around. I promptly wrapped up 5 of them to give away to a friend and cut the rest into smaller pieces for my husband to take to work and share. As you can tell from the picture below, due to the gooey, chunky texture of these cookies, they look nicer when cut into larger squares. My husband's co-workers didn't seem to mind the messy cookies. They cleaned the plate!


Here's the recipe:

Peanut Butter Cookie and Cream Cheese “Candy” Bars from Picky Palate

1 Cup creamy peanut butter

1/2 Cup granulated sugar

1/2 Cup packed light brown sugar

1 large egg

1 teaspoon pure vanilla extract

1 1/4 Cups all purpose flour

1/2 teaspoon baking powder

3/4 teaspoon baking soda

1/4 teaspoon salt

3-4 Tablespoons hot water (enough to dampen the dough)

8 oz softened cream cheese

3 Tablespoons granulated sugar

25 pieces favorite leftover Halloween chocolates

1. Preheat oven to 350 degrees F. In stand mixer, beat peanut butter and sugars until well combined. Add egg and vanilla to combine.

2. In mixing bowl, mix flour, baking powder, baking soda and salt to combine. Slowly add to wet ingredients then pour in hot water. Press half of dough into an 8×8 inch baking pan lined with foil and sprayed with cooking spray.

3. In another bowl mix the softened cream cheese and sugar until smooth then layer over peanut butter dough. Cut up chocolates and layer over cream cheese then top with remaining peanut butter cookie dough. Bake for 25-30 minutes or until cookie turns golden brown. Remove and let cool completely then cut into squares.

9 large bars

Thursday, November 4, 2010

Nutty Coffee Ring aka Funeral Cake


I was fortunate to grow up in a place where people care about each other. Where they take care of one another during tough times. When a family suffers a loss, neighbors show up to offer condolences, help, and food. My mom is one of these neighbors that delivers food to the grieving. When I was growing up, she had a signature "funeral cake" that she would make to take to the family when someone in our community died. I think that the recipe was called Date Nut Coffee Ring. Since mom always seemed to make the cake for the same reason, my sisters and I re-named it "Funeral Cake". I can remember a number of afternoons that my sisters and I hopped down the school bus steps, ran up our long lane, crested the hill, burst through the front door to our house, and were encompassed in the warm, inviting smell of this cake baking away in the oven or cooling on the countertop. A little of that afterschool exuberance would go out of us as we put down our book bags and proceeded into our gaudy bright orange and dark brown 70's-style kitchen. Then one of us would ask, "Who died?" Because we knew. The comforting smell of that cake always preceded bad news. It might seem that I should dislike the smell of funeral cake- for what it represents. But the truth is, to this day it reminds me of a happy childhood in a place where people cared about one another and offered comfort to those dealing with a difficult time.

Yesterday, I found out that a friend from the parenting group I attend lost his mother-in-law. Emails fired between the members of our small group- trying to establish what everyone would make, who would deliver the food, and who was available to attend the viewing and funeral. In the 15 years of life that I have lived away from the small town community where I grew up and after numerous moves (even across the country), I have realized that a sense of community and desire to take care of each other is not unique to my hometown. I am proud to observe that people in every community take care of their neighbors. After being on both the giving and receiving end of this kindness, I just want to say, "Keep it up!"

I was still thinking about what to bake for my friend and his family when I arrived at our church last night, where I teach the 6th graders every Thursday. The topic this week: The ways that we are blessed and in turn, how we can be a blessing to others. After watching the first part of "It's a Wonderful Life", that old black and white Jimmy Stewart film (which just happens to be one of my all-time favorite movies), we talked about how even the smallest acts in our lives can impact others around us. When asked how they might be a blessing to others in only their day-to-day interactions, these smart 6th graders cited acts like holding back when they have something un-kind to say, smiling at or even standing up for another kid that gets picked on, taking the time to listen to someone, and showing respect to their parents or teachers so that they might have a better day...to name a few. We talked about what a big difference our actions (good and bad) can make in the lives of others. We concluded that no matter your orientation toward religion, being a blessing to others is just good practice. Some might call it being a good citizen. As we wrapped up, I gave them homework. They have to realize a person who is a blessing to them or an act that someone does for them that is a blessing AND they have to consciously "be a blessing" to someone else this week. In other words, they have to "pay it forward." I'm excited to hear what they report back to the class next Thursday.

I don't often issue non-cooking challenges to my readers, but here's some food for thought this weekend: How can YOU be a blessing to others? It can start with a gesture as small as opening a door for someone or giving the lady who is jamming up the self-checkout line at the supermarket (the one slowly and obliviously sorting though her coupons and THEN attempting to write an out-of-state check for her huge haul of groceries) a smile rather than an annoyed sigh or a dirty look, or even letting that goofball that just flew by everyone stopped on the interstate back into the flow of traffic. Hey, I've been the idiot that didn't change lanes when I was supposed to.

Sometimes, attempting to be a blessing to others is more uncomfortable, like talking to that "annoying" co-worker in the office (the one who everyone else rolls their eyes at and tries to dodge at the copy machine), then actually showing genuine interest in what he or she has to say. And sometimes being a blessing requires just a little bit of time and effort, like raking the lawn of a sick neighbor or throwing together a cake or casserole when someone has suffered a loss.

And that's where I found myself late last night, making THE funeral cake....


As I searched my mind and pantry for what I would make for my friend's family during this time of loss, I kept thinking about mom's funeral cake. The idea stuck with me throughout the day, and as soon as I finished teaching my class, I dialed my parent's house for the recipe. This recipe comes together very quickly, which worked to my advantage since I had a full evening and the designated delivery person from our parenting group would be calling to pick up my contribution in the morning. I wrote the recipe down via phone conversation with my dad. He pointed out that finding the Date Nut Bread that my mom used for the recipe had become increasingly difficult. He even wondered if Pillsbury still made the mix. When my mom called me a couple of hours later, she confirmed his claim that the bread mix was nearly non-existent on local grocery store shelves. With 30 minutes between the class I taught and pick-up time for my oldest daughter from her choir practice, I hit 2 stores...and struck out at both. I finally went with a Pillsbury nut bread mix, since the Date Nut Bread mix was nowhere to be found. I hope that it's still as good. : ) I will say that the house smelled like funeral cake as this baked, so hopefully, it's close. Here's what I did:

To begin, I greased and floured a bundt cake pan.


Then I melted a stick of butter in a saucepan and stirred in 1/2 cup of brown sugar until dissolved.


Now for some pecans...chop enough to yield 1/2 cup.


Add the pecans and a teaspoon of vanilla to the mix.


Then pour the butter mixture into the bundt cake pan.


Grab your bread mix. If you can find the date bread mix....go for it! I used this nut bread mix.


Ignore the directions on the box and mix it up with an egg and 1 cup of water. Beat for 75 strokes.


Pour the batter over the butter mixture. Then bake at 350 degrees for 25-30 minutes, until a cake tester comes out clean.


Let the cake cool for a couple of minutes...but NO MORE THAN 5 MINUTES! Then invert it onto your serving plate.


It's not the prettiest cake in the world, but on the two occasions that my mom didn't give this cake away (or maybe something went wrong with it and we got a taste), I remember it being absolutely delicious. Best of all, it's so easy!


Here's the recipe:

Nutty Coffee Ring

1 stick butter
1/2 cup light brown sugar, packed
1/2 cup chopped pecans
1 tsp. vanilla
1 box Pillsbury Date Nut Bread mix or Nut Bread Mix
1 cup water
1 egg

Preheat oven to 350 degrees. Grease and flour a bundt cake or tube pan. In a small sauce pan, melt a stick of butter. Add the brown sugar and stir until dissolved. Stir in pecans and vanilla. Pour the mixture into the cake pan. Combine the bread mix, water, and egg. Beat 75 strokes with a whisk. Pour the batter over the butter mixture. Bake for 25-30 minutes until the cake tests done. Remove from oven. Do not let the cake cool for more than 5 minutes before inverting onto a serving plate.

Now, to quote one of my former high school teachers who said the same thing every single day as he dismissed us from class:

"Go. Be nice to each other."

Have a wonderful weekend everyone!

Tuesday, November 2, 2010

Pumpkin-Spiced Whoopie Pies with Fluffy Maple Filling


These are THE BEST whoopie pies that I have ever tasted or for that matter, baked in my kitchen. I am seriously impressed with this recipe! They were so light and airy, that the first taste was like biting into a sweet, pumpkin-spiced maple cloud. After that taste, I just knew that these would be a hit at the Election Day bake sale that the PTA at my daughter's school held outside of the polls. I was right! When I walked in to vote late this afternoon, I noticed that my whoopie pies had all sold. One of the young ladies directing voters overheard me talking to the mom who was working the bake sale table. She asked, "You made those? Those were amazing! I had one this morning. Oh. My. Gosh."(or something like that. I was slightly distracted by the list of my preferred candidates running through my head) I'd like to say that I was humble, but I wasn't. She was right on the money. And so I answered, "Yep. I know. They were amazing." As a matter of fact, I wish that I hadn't given them all away to the bake sale. I only ate half of a whoopie pie, splitting it with my husband. I could definitely go for another Pumpkin Spiced Whoopie Pie right now.

I found this recipe on La Bella Cook. The preparation method did include 2 steps that I found different from other whoopie pie recipes I have prepared. First of all, it calls for the batter to be refrigerated for an hour before scooping it up and dropping it onto the baking sheets. Then, once on the sheets, it needs to sit for another 10 minutes before going into the oven. I wonder if these steps are partly responsible for the airy texture of these whoopie pies...

Here's what I did:

First, I creamed the butter and two sugars together until fluffy. I think I beat mine for more than 2 minutes.


Mix in vegetable oil. Then add 3 eggs to the batter, one at a time. Beat after each addition, until incorporated.


Dump in a can of pumpkin and mix that in too.


Measure all of the dry ingredients: flour, baking soda, baking powder, salt, ground cloves, cinnamon, and nutmeg....


then sift them together.


Add the dry ingredients to the batter alternately


with the milk.


Beat until all ingredients are combined and then...stop! Don't overmix. Now cover the batter and pop it into the fridge for an hour.


The recipe called to line my baking sheets with parchment paper and then spray them with non-stick cooking spray. I didn't have any parchment paper, so I just sprayed the baking sheets directly. Luckily, this worked well. No sticking. I didn't measure out the batter, I just used my medium cookie scoop and plopped the batter down onto the baking sheets (12 per sheet). I ended up with 48 cakes, or 24 whoopie pies, which meant that I had to bake them in 2 shifts. Once the batter sits on the sheets for 10 minutes, put them into the oven and bake. The recipe called to bake them for 20 minutes, rotating the baking sheets halfway through. When I checked mine at 10 minutes to rotate, they were nearly done. I ended up baking them for 12 minutes total.


Remove the cakes to cooling racks and cool completely.


While the cakes cooled, I mixed up the filling. Sift 1-1/2 cups of powdered sugar and add it to two sticks of room temperature butter.


Mix until fluffy, about 2 minutes.


Then add in 7 oz of marshmallow fluff and 2 teaspoons of maple flavoring. Beat until combined.


It will look something like this:


Now spread or pipe the filling onto half of the pumpkin spiced cakes. Tip: Don't spread the filling too close to the edges. Once you place the tops on, the filling will "smoosh" out a bit. If you keep the filling toward the center when you put it on, then it's less likely to ooze over the edges, causing a case of messy fingers when enjoying this treat.


Top em' off, turning them into beautiful examples of sweet sandwich perfection...


Enjoy!


Pumpkin Whoopie Pies with Maple Marshmallow Cream
Adapted from Bon Appetit by La Bella Cook and then by me

FILLING
1-1/2 cups powdered sugar, sifted
1 cup (2 sticks) unsalted butter, room temperature
1 7-ounce jar marshmallow creme
2 teaspoons maple extract

CAKE
3 cups all purpose flour
2 teaspoons ground cinnamon
1 1/2 teaspoons baking powder
1 1/2 teaspoons baking soda
3/4 teaspoon salt
3/4 teaspoon ground nutmeg
3/4 teaspoon ground cloves
6 tablespoons (3/4 stick) unsalted butter, room temperature
3/4 cup (packed) light brown sugar
3/4 cup sugar
1/2 cup vegetable oil
3 large eggs
1 15-ounce can pure pumpkin
1/2 cup milk
Nonstick vegetable oil spray

FILLING
Using electric mixer, beat sugar and butter in large bowl until fluffy, about 2 minutes. Add marshmallow creme and maple extract; beat until blended and smooth. DO AHEAD Can be made 2 hours ahead. Let stand at room temperature.

CAKE
Sift first 7 ingredients into large bowl. Using electric mixer, beat butter and both sugars in another large bowl until fluffy. Gradually beat in oil. Add eggs 1 at a time, beating to blend between additions. Beat in pumpkin. Add dry ingredients in 2 additions alternately with milk in 1 addition, beating to blend between additions and occasionally scraping down sides of bowl. Cover and chill batter 1 hour.

Arrange 1 rack in bottom third of oven and 1 rack in top third of oven; preheat to 350°F. Line 2 baking sheets with parchment; spray lightly with nonstick spray. Spoon batter onto baking sheet to form cakes; about 12 per baking sheet, spacing apart. Let stand 10 minutes.

Bake cakes until tester inserted into centers comes out clean, about 12 minutes, rotating sheets halfway through baking. Cool cakes completely on baking sheets on rack. Using metal spatula, remove cakes from parchment.
Line cooled baking sheets with clean parchment; spray with nonstick spray, and repeat baking with remaining batter.

Spoon about 2 tablespoons filling on flat side of 1 cake. Top with another cake, flat side down. Repeat with remaining cakes and filling. DO AHEAD Can be made 8 hours ahead. Store in single layer in airtight container at room temperature.

Notes: Be sure to spray or grease your baking sheets. I didn't use parchment paper and it worked fine.

I used my medium cookie scoop for the batter and the recipe yielded about 48 cakes or 24 whoopie pies.

I must have used more filling than recommended per whoopie pie, because I only had enough filling for 19. Next time I will multiply the recipe times 1.5

Did I mention that Whoopie Pies freeze well? They do! Double or triple this recipe and then freeze to enjoy through the fall or winter!


For more Whoopie Pies, check out my post about Peanut Butter-Filled Chocolate Whoopie Pies and Red Velvet Whoopie Pies HERE.

Monday, November 1, 2010

Catching Up and The Meal Plan and Grocery List 11/1- 11/7

I'm obviously behind on with my meal plan post, but only because we had such a Happy Halloween, that I ran out of time!

Yesterday, before the neighborhood trick-or-treat, we hosted a pizza party at our house. I spied these cute owl cupcakes at Sinful Southern Sweets and just knew that I needed an excuse to make them! They served as dessert for the 18 kiddos in attendance at our party, all of whom were dressed to impress and nearly crazy with anticipation for THE BIGGEST SUGAR HIGH OF THE YEAR!


These are so easy to make. Just bake and frost chocolate cupcakes, separate Oreos (we used double-stuffed), place brown M&M's or Reese's pieces in the center of each Oreo, stick them on the cupcakes, place an orange one between the "eyes" for a beak, and pipe on some brows. Here's the original post on Sinful Southern Sweets.


This is a perfect project to do with young children. I assigned my oldest daughter the task of sorting out the brown and orange Reese's Pieces and pressing the brown pieces into the Oreos for the eyes.


This picture makes me laugh. My daughter took a break from her "job" to enhance her costume.


While we worked on our project for the party, my husband came up with a project of his own. Check out his pumpkin beer cooler! As one of our neighbors noted, "Give a man beer, and he can be incredibly creative."


Just as the party was in full swing and my house was consumed by complete chaos, I stepped out to the quiet of our garage to fry up my annual batch of Halloween donuts for the trick or treaters. You can find the recipes for both Pumpkin Spice Donuts and Apple Cider Fritters HERE. I served up over 200 donuts and countless cups of cider this year. Super fun!


Today, I emptied my daughters' pillow cases full of candy into a great big bowl. Holy cow! The residents of this neighborhood are not stingy with their candy. I feel a batch of Compost Cookies coming on. Compost Cookies are an excellent way to use up extra candy and some of the leftover chips and pretzels from your Halloween parties. Consequently, November is my family's month to send a care package to our troops in Afghanistan for The Cookie Task Force. I bet Compost Cookies would travel well. If you're interested, you can learn more about The Cookie Task Force and how to get involved in THIS POST from last April.


We had a wonderful Halloween weekend...and now it's November! It's actually calling for snow here this week. Ugh. Tomorrow is Election Day. Where did the time go? While I'm on the subject of Election Day, I want to discuss this important day as it relates to this blog. So here goes....

I should begin by saying that one of the ways that I attempt to supplement our family's income is through the advertising that appears on this blog. While this blog is a passion of mine and I wrestled with the decision to "monetize", the bottom line is... a girl's gotta make a living. Well, over the weekend, my dad (an avid reader of Krista's Kitchen...imagine that), called me in a state that I can only describe as infuriated as a result of one of the campaign advertisements that appeared on this site. I quickly explained that I had not seen the ad that he was referring to. I have noticed the advertisements that appear under my daily posts are regionally tailored to hit the "target audience" from that area. After my dear ol' Dad called, I started paying more attention to the ads featured on my blog, and lo and behold, as Election Day draws nearer, the ads appearing have become more political in nature. With the realization that a number of campaign ads are appearing on this site, I want to state that the political ads selected for this blog in NO WAY receive my endorsement. Even though I personally have definite political views...as a "food blogger", I remain neutral on politics and a number of other issues when writing this blog. Regardless of politics, race, religion, child-rearing philosophy, where you call home, fashion sense, sports team affiliation, cable provider preference, your stance on the great debate of where the first sheet on every roll of toilet paper should begin (over the top of the roll or underneath), whether you erect a real or artifical Christmas tree (or no Christmas tree at all), and on many other issues... I don't judge or discriminate here. Here, people are just people and "people" need to eat! I have no way of telling which candidate is paying for advertising at any given moment on my blog. In the same way that "a girl's gotta make a living", it turns out that, "a girl's gotta sleep sometime" too. I don't get to pick and choose which ads appear on this site and I have no idea what ad is appearing in your corner of the world when you stop in to see what I'm cookin' up in this part of the Midwest. I only recognize one "Omni-presence" and it's certainly not me. : )

That said, I hope that all of you who are able DO go out and VOTE tomorrow. I hope that you show up at the polls, make educated decisions, and exercise your right to vote!

As a special Election Day treat, I will feature Pumpkin-Spiced Whoopie Pies with Maple Fluff Filling tomorrow- my contribution to the PTA bake sale for my daughter's school and set up right outside the polls where I will cast my very own votes.

In the meantime, here is this week's meal plan!

We've had 2 busy weeks/weekends in a row, and with no chance to sit down and plan, I am recycling a MP from last February. I did change out one dish, substituting Easy Weeknight Ravioli Bake for Stuffed Shells with Vodka Tomato Cream Sauce. I'm all about saving time these days! Sorry about Crock Pot Chicken Soft Tacos for the second week in a row, but that recipe is SO good and freezes very well, so I'll be pulling the leftovers from our freezer for another round of tacos this week.

Tuesday November 2nd

Bacon Tomato Cheese Toasts
(if you haven't tried these yet, you're missing out!)

Wednesday November 3rd

Garden Vegetable Soup and Grilled Cheese Sandwiches

Thursday November 4th

Crock Pot Chicken Soft Tacos

Friday November 5th

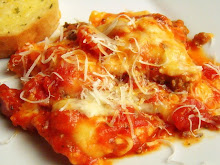
Weeknight Ravioli Bake

Saturday November 6th

Leftovers

Sunday November 7th

Skillet Cincinnati Chili with Spaghetti


Grocery List

Produce
tomato
1 bunch scallions
fresh parsley
zucchini
red onion
lettuce
carrots
3 onions
garlic
cabbage
green beans


Meat
Bacon
Chicken breast halves
1 lb. ground beef

Dairy
shredded cheddar
shredded mozzarella
sour cream
tortillas
grated Parmesan
pepper jack cheese
1 pkg. (8 oz.) shredded Italian cheese blend

Canned Goods
light mayonnaise
1 jar salsa
3 cups broth
tomato paste
cider vinegar
1 can tomato sauce
1 jar spaghetti sauce
1 can diced tomatoes

Dry Goods
1 pkg taco seasoning
chili powder
cocoa powder
cinnamon
allspice
brown sugar
spaghetti

Freezer
Lite Texas Toast
2 lbs. frozen cheese ravioli

Have a great week!
Related Posts with Thumbnails