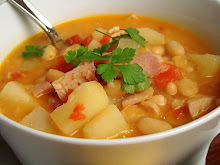
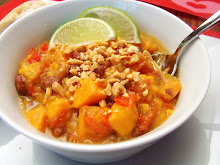
After packing our suitcases, preparing a large part of two Thanksgiving dinners, visiting with friends and family, spending a total of 12 hours on the road, and planning ahead for upcoming holiday company, cookie baking, parties, and school programs all over the course of the past week, I was really in no mood to meal plan. I'm tired. I must be beat. I never nap and today I did. After church, my sweet husband offered to watch the kids so that I could get out for a bit. These opportunities to claim a moment for myself are few and far between. Normally I jump at the opportunity and sprint for the door, grabbing my keys and cell phone off of the counter and kissing everyone good-bye in 30 seconds or less. Not today. Today I said, "Naw. I don't feel like going out. But I would love to chill upstairs for a bit." This in itself was strange. I don't "chill". Not during the day while the kids are awake and there's a to-do list in my head. I'm a flurry of constant motion. My husband probably thought that I was going upstairs to "chill" by putting away laundry or scrubbing toilets. But I didn't accomplish a thing. And I didn't chill, I napped. I climbed the stairs, fell onto my bed, pulled up the covers, curled up with a book, and fell asleep! Afterward, instead of feeling refreshed and ready to tackle the week, I found myself glaring at my meal planning notebook this evening. Thoughts of Hamburger Helper and freezer pizza filled my mind. Not that anything is wrong with HH and freezer pizza. I integrate those into our meal plan from time to time. But I know myself. I know that my motivation to cook and plan will return after we fall back into our at-home routine. Or at least I really hope it does. So I made the meal plan with a few easy meals to ease me back into the routine and then a few meals that are a little more involved when my "kitchen mojo" returns. Here it is...
Monday November 30th
Build Your Own Baked Potato
Tuesday December 1st
Turkey Poblano Casserole
Wednesday December 2nd
Spaghetti (sauce from a jar)
Garlic Bread (from the freezer)
Thursday December 3rd
Big Batch O' Meatballs (to freeze)
Meatball Sliders
Friday December 4th
Buffalo Chicken Pizza
Saturday December 5th
Leftovers
Sunday December 6th
Crock Pot Cube Steak with Mushroom Gravy
Grocery List
Produce
baking potatoes
3 poblano peppers
1 red bell pepper
red onion
cilantro
green onions
onion
garlic
parsley
celery
Meat
3 3/4 cups cooked turkey, chopped
1 lb. each ground beef, veal, pork
2 cups shredded cooked chicken
2 lbs. cube steak
Dairy
sour cream
butter
milk
12 oz. shredded 4 cheese Mexican blend
eggs
18 white corn tortillas
1 tube refrigerated pizza crust
8 oz. shredded mozzarella or provolone
Dry Goods
spaghetti
flour
Italian bread crumbs
1 pkg dinner rolls
corn meal
cumin
garlic
chili powder
Canned Goods
1 jar spaghetti sauce
vegetable oil
Louisiana style hot sauce
barbecue sauce
ranch dressing
cream of mushroom soup
Freezer
Garlic bread or Texas toast
Southwestern style corn
Hope you all have a wonderful week!
Sunday, November 29, 2009
Saturday, November 28, 2009
Mashed Potato Pancakes

Late yesterday afternoon, we pulled into our driveway at the end of a 5 and 1/2 hour drive. Ahh, home. My sigh of relief lasted for a fraction of a second. My mind was racing, making a mental to-do list of the most efficient way to get everything unpacked and back to "normal" before bedtime. My 5 year old couldn't open the car door fast enough. It wasn't just the enthusiasm of being back on her own turf or the fact that she drank a full root beer at our lunchtime stop. You see, while we were away, the first snow had fallen and she could not wait to put her little footprints on it. Her "own turf" was covered in a blanket of glittery white and she wanted to explore the magically transformed landscape. We convinced her to come inside with the promise that we could go out and play once we'd all changed into warmer attire and the car was unloaded. I set about transferring our share of the Thanksgiving leftovers from cooler to refrigerator while my husband lugged the suitcases in from the car. I noticed that there was plenty of room for those leftovers. After all, we'd been away for a week and I hadn't gone to the grocery before we left. I briefly wondered what I'd make for dinner. Briefly, because before I could think too long and hard about dinner, my daughters were hopping around me, "Mommy! Mommy! Is it time to go out yet? Is it? Is it?!" "Look, mommy! I already got out the snow clothes!" It was true. They had dragged out snow pants, gloves, hats, scarves, and the boxes containing the brand spanking-new snow boots from their closets. All of this snow gear was piled in the middle of my family room floor with the kids running around it, yelling for me to help. It was at this moment that my husband appeared to lean down and kiss each of us goodbye. "Car's unloaded. I have to run into the office for a while." He really did need to run to work, that was the whole reason that we made the trip back a couple of days early rather than stay through the weekend. As my husband exited to the garage, I turned my attention back to stuffing tiny feet into boots and little fingers into gloves. While wrestling everyone into their snow clothes, my phone kept ringing with calls to make sure that we made it home intact and the Black Friday shoppers inquiring about our Christmas lists. Once everyone was sufficiently clothed against the elements and I had referred my dad to my husband's work phone for a conversation about "sweet deals" on flat screen televisions, we all ran out into the snow/mud (most of the snow had melted) to work out the pent up energy from nearly 6 hours in the car. I completely forgot to think about what to make for dinner...until about an hour later when my oldest looked up at me, her cheeks bright pink from the cold, and declared, "I'm hungry!" My toddler chimed in, "Yeah, eat! Eat!" Apparently, she wasn't full enough from all of the snow she'd been shovelling into her mouth.


What is it they say? Necessity is the mother of invention? Well, I certainly didn't invent the potato pancake...I think that most of us have a version of this recipe... but I did come up with this version from the few ingredients that I found in my pantry and fridge. I used leftover mashed potatoes from Thanksgiving dinner (I used this recipe for Make Ahead Mashed Potatoes found at My Tasty Treasures. They were awesome!), finely chopped onion, Mexican 4-cheese blend shredded cheese (it's all that I had), an egg, flour, milk, salt and pepper. The next time that I make these I'd love to try them with some fresh chives and crispy bacon mixed in or even sprinkled on top. Maybe with some smoked Gouda or sharp white cheddar? As far as we girls were concerned, they were the perfect dinner, crisp from being fried in butter on the outside, soft and cheesy on the inside, topped with sour cream and served with steaming hot cocoa to warm us from our romp in the first snow of the season.
Potato Pancakes
2 cups cold leftover mashed potatoes
1/4 cup onion, finely chopped or grated
1/4 to 1/3 cup all purpose flour
1/2 cup shredded cheese of your choice
1 egg
2 tablespoons milk
seasoned salt or kosher salt and pepper, to taste
butter or oil for frying
sour cream for topping
Combine all ingredients in a medium-sized mixing bowl. Heat 2 tablespoons of butter or oil in griddle pan or large skillet over medium to medium high heat. Drop potato cakes by heaping 1/4 cupfuls onto skillet. Flatten slightly with spatula. Cook until golden brown on bottom and then flip and cook until golden brown on the other side. Remove from skillet and keep warm while you fry the next batch. Serve with sour cream.
A couple of notes:
I had to live and learn a little with this one. First, I had to adjust the amount of flour. I began with 2 tablespoons, but my cakes didn't really hold together well and were difficult to flip. This is probably because the potatoes weren't super stiff to begin with. They were prepared with butter and whipping cream and cream cheese for a yummy Thanksgiving dinner mashed potato. If you find this to be the case, add a little more flour. Second, I started out with way too much butter in the pan. I guess I was still coming off of my Thanksgiving butter high and thought "the more butter, the better". You really want just enough butter on the griddle to keep those cakes from sticking. My first cakes were swimming in butter, making them a) difficult to flip because they were just soaking up that butter and gettin' gooey and b) greasy! I had to soak up the excess butter with a paper towel. So this is finally an instance when it comes to butter (the perspective of a healthy eater aside)where less IS more.
Once I got all of the kinks worked out, they were really a quick and easy meal. Totally delicious and satisfying.
Thursday, November 26, 2009
Turkey, Turkey, Turkey!
Happy Thanksgiving, everyone! I sit here writing about what to do with the leftovers and the turkey isn't even out of the oven yet. What can I say? I'm a planner. Okay so, only two of these recipes were actually written for turkey. The rest of them were made with chicken when I originally posted them, put turkey will work just as well. I plan to freeze some leftover turkey into one pound portions for use in soups and casseroles for future meals. Cooked turkey will keep well in the freezer for up to 4 months. Here are my recommendations (and the links to recipes) for leftover turkey:
Turkey Alfredo Pizza
Turkey Tetrazzini
Turkey Divan
Turkey and Dumpling Bake
Turkey Pot Pie
Turkey Enchiladas
Turkey Noodle Soup
Southwestern Turkey Soup
Turkey Poblano Casserole
Oh, and if you've got leftover mashed potatoes, here are a couple of recipes for those too!
Potato Pancakes
Easy Shepherd's Pie
Sunday, November 22, 2009
Six Week Muffins

This one is a quickie. I'm visiting my in-laws and as soon as my mother-in-law finishes reading my daughter her bedtime stories we have a date with a glass of wine and Dancing with the Stars. Tomorrow, we will spend the day preparing for Thanksgiving, but tonight we are couch potatoes. So, I've got 15 minutes here. How about some muffins?
I usually make these 6 week muffins a couple of times a year. The batter keeps for up to 6 weeks in the fridge (hence the name), so I bake a half dozen or dozen at a time and then throw them into the cookie jar or a cupcake keeper. When I run out, I just scoop more batter into my muffin tins and tah-dah ... fresh baked muffins in 15 minutes! They're perfect to grab on the way out the door to work or school for a healthy breakfast. They're full of bran and flaxseed, so they keep you feeling full (um, and regular). They may be healthy, but they taste good too. I like to warm mine up in the microwave while my kids put on their shoes in the morning and then I sit nibbling it in the pre-school drop off line between sips of strong, hot coffee.
You begin by beating the eggs and sugar.

Then you stir in all of the other ingredients until combined.

It looks like this when you're finished stirring. This may be the most unappetizing picture I've ever posted. The batter isn't exactly pretty to begin with, but the color is strange here too. Hmmm. Weird. Well anyway, after you finish stirring everything together you should cover it and refrigerate for at least 6 hours before you bake any muffins. I'm guessing it's to let the wet ingredients soak into the bran flakes.

Okay, so pretend that 6 hours have passed by (I have a 5 year old, I get a lot of "just pretend" scenarios at my house)...
Alright, now we're ready. Fill the muffin cups 3/4 of the way full and bake these puppies at 400 degrees for 15-20 minutes. If you're awake just 25 minutes before the rest of your family in the morning, try this: Heat the oven while you start your pot o' coffee. Fill the muffin cups and pop them into the oven after you pour your first cup of coffee. Now run and jump into the shower, dry off, throw on your robe, and run back to the kitchen. Next, pull the muffins out of the oven as your hair air-dries and your family shuffles into the kitchen in their pajamas, still rubbing the sleep from their eyes. Before they snap out of their groggy state and actually look at you, put on your best June Cleaver smile, happy "Good morning voice" (and pearls if you've got em'). Now, serve the warm muffins with a pat of butter melting on the inside and a cold cup of OJ. That's how it's done. Domestic goddess. Welcome to my world. LOL. As if.

Last week, I put the muffins pictured here into the oven as I was getting ready for the day. Then I took them, still warm, to my Monday morning parenting group. See, despite all of the bran and flaxseed they still taste good enough to share with friends.

Six Week Bran Muffins
4 eggs
3 cups sugar
6 cups Raisin Bran cereal
4 1/2 cups flour
1/2 cup flaxseed
5 teaspoons baking soda
1 teaspoon salt
1 cup vegetable oil
1 quart lowfat buttermilk
Beat eggs and sugar until combined. Stir dry ingredients together. Add to eggs and sugar. Pour in oil and buttermilk. Stir until combined. Refrigerate at least 6 hours before baking. Bake at 400 degrees for 15-20 minutes.
*Batter will keep in the refrigerator for up to 6 weeks
Yield: 5-6 dozen muffins
Coming soon: What to do with all of that leftover turkey!?
Apricot Pecan Bars

This recipe is straight from my "Favorites" notebook. I've been blogging for a little over a year and somehow there are a few favorites that I haven't shared with all of you...yet. I keep getting distracted and trying new ones. So many recipes, so little time! These apricot pecan bars are so yummy (that's why they're in the favorites notebook!) and really easy to make. They'd be a hit at a holiday pitch-in or a welcome addition to your Christmas cookie line up. Heck, they're good just to keep on your kitchen counter and give yourself a break in the afternoon. Pour a cup of coffee or tea and grab one of these for an excellent pick me up on these steely gray November days. They just make me happy. (Emotional eater...what? Who!?) This recipe makes a 9 X 13 pan, so it's probably a good idea to share the love rather than eat them all on your own. From this batch, I took a plateful, still warm from the oven, to a friend on her birthday. The next morning I took a dozen or so to share with the parenting group I attend. I sent the rest to work with my husband. Apparently they were a hit. He called mid morning to ask, "What're these things called?" Inquiring minds wanted to know.
The love begins here...just unroll a tube of refrigerated crescent rolls into the bottom of a 9 X 13 inch baking dish. Press to fit the bottom of the pan, sealing the seams.

Mix together finely chopped pecans, powdered sugar, cinnamon, and nutmeg. Sprinkle over the crescent roll dough.

Now drop apricot preserves evenly over the top of the powdered sugar mixture.

In a bowl, combine the flour and brown sugar. Cut in a stick of butter. Then stir in some coconut and more pecans.

Top the apricot layer with this buttery, coconutty, pecan-riddled goodness.

And bake.

Cut. Eat. Share.

Spectacular!

Apricot Pecan Bars (I have no idea who deserves credit for this recipe. I hand wrote it into my notebook years back and I've been making it ever since. Whoever came up with this one, they deserve a pat on the back.)
8 oz. refrigerated crescent rolls
1-1/2 cups finely chopped pecans (divided)
3/4 cup powdered sugar
1/2 teaspoon cinnamon
1/4 teaspoon nutmeg
12 oz. jar apricot preserves
3/4 cup flour
1/2 cup brown sugar
1/2 cup cold butter
1 cup sweetened coconut
Preheat oven to 375 degrees. Press crescent roll dough into a greased 13 X 9 X 2 inch pan. Combine 1 cup of pecans, powdered sugar, cinnamon, and nutmeg. Sprinkle over the crescent roll dough. Drop preserves over the top. Combine flour and brown sugar. Cut in butter until crumbly. Stir in coconut and remaining 1/2 cup of pecans. Sprinkle evenly over preserves. Bake for 30-35 minutes until golden brown.
To get a printable copy of this recipe, please click here!
Wednesday, November 18, 2009
Wild Turkey, 3 Ways and My Thanksgiving Recipes
Wild turkeys are indigenous to this area. Despite that the town where I live is rather urban/suburban, it is not uncommon to see one of these large birds darting across the street or wandering through your backyard, especially if your lot backs up to a wooded area. I'd guess this is because of our wonderful metropark system. There is quite a bit of forest interspersed in between all of the commercial and residential areas. It's one of the reasons that I like it here, and I'd bet that the turkeys agree! (I'm sure proximity to a mall and Starbuck's in addition to great hiking are tip top of the turkey's list when shopping for real estate.) Wild turkeys are most likely the variety that graced the tables on those early Thanksgivings in the 1600's. It's also probable that the pilgrims ate other wild fowl like goose and duck and wild game such as deer. Lobster, seal, eel, and cod may have also been on the menu. Remember, the original settlements and eventually the colonies were largely coastal (Pennsylvania being the exception).

These days most of us stick to the farm-raised, domestic type bird (think Butterball) that we purchase from the grocery. But there are still those that bring home their Thanksgiving bird fresh from the field or woods. From what I understand, wild turkeys are somewhat plentiful. They inhabit every state in the union, however, are the most prevalent in the Eastern half of the country.

There are whole magazines published about turkey hunting.

While turkeys are rumored to be fairly unintelligent, the hunters could probably still use a few tips...my research shows that wild turkeys can run up to 25 mph and fly at speeds of 50-55 mph.
I personally have never tasted wild turkey. I did once try a wild goose that my grandpa shot. It was beyond awful. That single experience kind of turned me off on wild birds altogether. However, if any of you adventurous readers are of the mind to stalk a turkey in the wild and bring him home over your shoulder for the Thanksgiving feast, here are a couple of links to recipes that might interest you: Wild Turkey Recipes and these recipes from the National Wild Turkey Federation.
Last week, while visiting the Lake Erie Nature and Science Center I finally got close enough to a real, live, wild turkey to snap a picture.

Check out this one! We had a staring contest. Who are you lookin' at, lady!?

Of course, some of you may be familiar with this type of Wild Turkey at your holiday gathering. For cooking purposes, of course. It certainly wouldn't be on hand to ease the stress of large family gatherings with crazy Aunt Bethany (remember her from National Lampoon's Christmas Family Vacation? "Is this the airport, Clark?"), dozens of lively young children running wild and touching your "breakables", and heated political debates with cousin Eddie. Right?

You really can cook with this stuff. A few of my favorites are Pecan Pie, Sweet Potato Casserole, and Warm Vanilla Cider. Click here for recipes. Hey, if you sneak a nip in between all of that chopping and mixing, who am I to judge?
Here are MY wild turkeys...absolutely essential for all of my holiday gatherings. They are one of the things in life I am very most thankful for. They may look innocent, but trust me, they're WILD! It's genetic.

This year my daughter's class got to be the turkeys for Thanksgiving Chapel. Last year she was a Native American or a warrior or something like that (I'm pretty sure they're not allowed to call them Indians). The chapel was also filled with classes of Mayflower ships (they sported sails on their heads), Pilgrims, and the young Warriors among other Thanksgiving mascots. They were so cute!

And now the countdown is on! Thanksgiving is one week away. Time to finalize the menu, make the grocery list, press the linens, polish the silver, and shine that crystal! Last year I hosted Thanksgiving at my house. This year we're travelling (insert sigh of relief). Don't get me wrong. I loved it. I can't wait to host it again, but it's also nice to go home for the holidays. Here are some of my favorite Thanksgiving recipes, as documented in my kitchen last year. I was a baby blogger back then, plus I was knee deep in holiday preparation and celebration so please excuse the photography and sketchy directions. Whatcha really need though, the recipes, are there.
Herb Turkey Rub
Grandma Shirley's Bread Dressing
Sweet Potato Casserole
Green Bean Casserole
Baked Irish Corn
And for dessert:
Pumpkin Swirl Cheesecake
French Apple Pie
Grandma Bailey's Apple Dumplings
Grandma Kathleen's Cherry Pie
Peanut Butter Pie
Happy cooking, happy eating and most of all, Happy Thanksgiving!
Stay tuned next week for ways to utilize that leftover turkey!

These days most of us stick to the farm-raised, domestic type bird (think Butterball) that we purchase from the grocery. But there are still those that bring home their Thanksgiving bird fresh from the field or woods. From what I understand, wild turkeys are somewhat plentiful. They inhabit every state in the union, however, are the most prevalent in the Eastern half of the country.

There are whole magazines published about turkey hunting.

While turkeys are rumored to be fairly unintelligent, the hunters could probably still use a few tips...my research shows that wild turkeys can run up to 25 mph and fly at speeds of 50-55 mph.
I personally have never tasted wild turkey. I did once try a wild goose that my grandpa shot. It was beyond awful. That single experience kind of turned me off on wild birds altogether. However, if any of you adventurous readers are of the mind to stalk a turkey in the wild and bring him home over your shoulder for the Thanksgiving feast, here are a couple of links to recipes that might interest you: Wild Turkey Recipes and these recipes from the National Wild Turkey Federation.
Last week, while visiting the Lake Erie Nature and Science Center I finally got close enough to a real, live, wild turkey to snap a picture.

Check out this one! We had a staring contest. Who are you lookin' at, lady!?

Of course, some of you may be familiar with this type of Wild Turkey at your holiday gathering. For cooking purposes, of course. It certainly wouldn't be on hand to ease the stress of large family gatherings with crazy Aunt Bethany (remember her from National Lampoon's Christmas Family Vacation? "Is this the airport, Clark?"), dozens of lively young children running wild and touching your "breakables", and heated political debates with cousin Eddie. Right?

You really can cook with this stuff. A few of my favorites are Pecan Pie, Sweet Potato Casserole, and Warm Vanilla Cider. Click here for recipes. Hey, if you sneak a nip in between all of that chopping and mixing, who am I to judge?
Here are MY wild turkeys...absolutely essential for all of my holiday gatherings. They are one of the things in life I am very most thankful for. They may look innocent, but trust me, they're WILD! It's genetic.

This year my daughter's class got to be the turkeys for Thanksgiving Chapel. Last year she was a Native American or a warrior or something like that (I'm pretty sure they're not allowed to call them Indians). The chapel was also filled with classes of Mayflower ships (they sported sails on their heads), Pilgrims, and the young Warriors among other Thanksgiving mascots. They were so cute!

And now the countdown is on! Thanksgiving is one week away. Time to finalize the menu, make the grocery list, press the linens, polish the silver, and shine that crystal! Last year I hosted Thanksgiving at my house. This year we're travelling (insert sigh of relief). Don't get me wrong. I loved it. I can't wait to host it again, but it's also nice to go home for the holidays. Here are some of my favorite Thanksgiving recipes, as documented in my kitchen last year. I was a baby blogger back then, plus I was knee deep in holiday preparation and celebration so please excuse the photography and sketchy directions. Whatcha really need though, the recipes, are there.
Herb Turkey Rub
Grandma Shirley's Bread Dressing
Sweet Potato Casserole
Green Bean Casserole
Baked Irish Corn
And for dessert:
Pumpkin Swirl Cheesecake
French Apple Pie
Grandma Bailey's Apple Dumplings
Grandma Kathleen's Cherry Pie
Peanut Butter Pie
Happy cooking, happy eating and most of all, Happy Thanksgiving!
Stay tuned next week for ways to utilize that leftover turkey!
Tuesday, November 17, 2009
Creamy Roasted Tomato and Garlic Soup with Mini Focaccias

The inspiration for this meal began with the mini focaccia. I was thumbing through one of the Taste of Home Annual Recipe cookbooks when I came across this recipe for little focaccia rounds made from a tube of refrigerated breadsticks. I loved the idea of it and I knew that my family would eat them up! I wanted to serve them with soup, so I began searching recipes, looking for the perfect soup pairing for these bread-from-a-tube focaccia. The bread was easy and good, but the soup is what I really want to talk about here. I arrived at Tasty Kitchen and eventually found this recipe for Creamy Tomato Soup Florentine. The recipe reminded me of something that I've had before. Have any of you been to The Paradise Cafe and Bakery? This chain of bakery-cafe combos is only found in 10 states, most of them in the West/Southwest, but lucky for me(a frequent visitor to the greater Indianapolis area) and the other Hoosiers, there are 5 locations in my native Indiana. The Paradise Cafe makes this delicious Fire Roasted Garlic Tomato Soup. It's so popular that it's always on the menu. Their signature soup. For me, it was love at first bite. Impressive, because I've never been a big fan of tomato soup. I mean, it's good enough to dip my grilled cheese into, but that's about it for me. After trying the Fire Roasted Garlic Tomato Soup at Paradise I have realized that there's tomato soup...

and then there's Tomato Soup! This is an actual picture of the Fire Roasted Garlic Tomato Soup served at Paradise Cafe and Bakery.

And so, when I read the recipe for Creamy Tomato Soup Florentine, I knew that it would be the perfect soup in which to dip the mini focaccia. Just a few minor adjustments to the recipe and the finished product was pretty darn close to that Fire Roasted Garlic Tomato Soup that I love.
Now here's the thing, the Mini Focaccia are perfect for a quick weeknight dinner. But the soup, well, there's nothin' quick about it. There's chopping and roasting and caramelizing, and simmering involved. This is more of a weekend or a company-is-coming soup, in my opinion. Of course, I made it on a weeknight because 1)I really wanted to try it like, NOW and 2) I didn't realize how labor intensive it would be. Not difficult to execute, just time consuming. I started it early and dinner was still late.
Here's how it went:
I began with 3 lbs. of tomatoes (Not really in season now, but at least they were on sale at the grocery.) and 3 heads of garlic.

Cut the tomatoes into large chunks and toss with olive oil, salt, and pepper.

Now transfer the tomatoes to a baking sheet lined with foil. Put them in a 450 degree oven for about 30 minutes, until the tomatoes are soft and have begun to caramelize.

Cut the heads of garlic in half and place them on a large sheet of foil with the cut side up. Drizzle with 1 tablespoon of olive oil and sprinkle with salt and pepper. Seal up the foil and roast in the oven with the tomatoes until the garlic is soft.

While you roast and then cool the tomatoes and garlic, you'll want to start caramelizing your onions in a couple of tablespoons of olive oil. It takes a bit to get em' good and deep golden brown.

Stir in thyme, black pepper, and tomato paste. I think I'll nix the thyme next time. Ha. Thyme...time. No seriously, I didn't like it in here and I only added half the amount suggested in the recipe. The next time I make this, I'll probably try oregano instead.

Next, add 2 cans of diced tomatoes with all the liquid and simmer for 10 minutes, stirring occasionally.

By now the tomatoes and garlic are probably roasted and the garlic has cooled enough to remove the cloves from the paper.

Add them to the soup pot with the chicken broth and simmer for another 30 minutes.

Now when all of that simmering is finished, you need to blend this a little. See how it's all nice and chunky? A little blending will help to refine any tomato skins or too-large cloves of garlic.

You can use an immersion blender. I don't have one of these, but it is on my wish list. There's one featured in my left sidebar. Oh, Santa... You can also use a regular blender, or do what I did, which is to blend it in batches in my 30 year old hand-me-down food processor. I bet an immersion blender is much easier to clean than all of those pieces on my dinosaur of a food processor. You can make this as smooth or chunky as you like. Personally, I like a little more texture to this soup, so I didn't process excessively.

Now return the blended soup to the pot and stir in a can of evaporated milk. Heat through.

Finally, stir in the chopped basil before serving.

I garnished mine with a swirl of sour cream and some more basil.

Dig in!

While all of that simmering that I describe above was happening, I started on the mini focaccias. This is sooo simple. Just grab a tube of refrigerated breadsticks.

Remove the packaging, but don't un-roll them.

Cut the dough into 8 pieces.

Place them on a greased baking sheet (I needed 2 sheets) and press them into 4-1/2" circles, just like the one pictured here at the bottom left.

Now brush with a little oil and sprinkle with Italian seasoning mix and parmesan cheese.

And that's it! Just bake for 10-15 minutes and serve...

with soup!

Perfect for dipping!

Creamy Roasted Tomato and Garlic Soup adapted from Tasty Kitchen
•6 Tablespoons Olive Oil, Divided
•3 pounds Plum Tomatoes Quartered
•Salt
•Fresh Ground Pepper
•3 heads Garlic Cut In Half To Expose The Cloves
•12 ounces, weight Onion - Diced
•1/2-1 teaspoon oregano
•6 ounces, weight Tomato Paste
•32 ounces, weight (two 16 Oz. Cans) Canned Diced Tomatoes
•8 cups Chicken Broth
•12 ounces, fluid Evaporated Milk
•12 whole Basil Leaves, Minced
Sour cream for garnish
Preparation Instructions
Preheat oven to 450F. In a large bowl, lightly toss together the quartered tomatoes, 3 tablespoons olive oil, salt and pepper. Pour out onto a foil-lined baking pan and roast for 25 to 30 minutes until tomatoes are soft and have started to caramelize. Remove from oven and set aside.
Place halved heads of garlic on a large sheet of foil with cut side up. Drizzle with 1 tablespoon olive oil and sprinkle with salt and pepper. Seal up the foil and roast in the oven with the tomatoes until the garlic is soft. Set aside and allow to cool so that it can be handled.
In a large pot heat remaining 2 tablespoons olive oil over medium heat. Add onion and cook until caramelized. Add oregano, black pepper and tomato paste. Cook, stirring constantly for one minute. Add the diced tomatoes with all the liquid, simmer for 10 minutes stirring occasionally. Add the chicken broth and roasted tomatoes to the soup. Squeeze the garlic from its paper, discard the paper and add the soft garlic to the soup. Simmer for 30 minutes, stirring occasionally. Using an immersion blender or in small batches in a blender, blend until smooth. Stir in the evaporated milk and bring soup to a simmer. Add the fresh basil. Garnish with sour cream.
Mini Focaccia from Taste of Home
8 Servings Prep/Total Time: 25 min.
Ingredients
1 tube (11 ounces) refrigerated breadsticks
2 teaspoons Olive Oil or Canola Oil
1 teaspoon Italian seasoning
2 tablespoons grated Parmesan cheese
Directions
•Remove dough from tube; do not unroll breadsticks. Cut dough into
eight slices. Press into 4-1/2-in. circles on greased baking sheets.
Brush with oil; sprinkle with Italian seasoning and Parmesan cheese.
•Bake at 375° for 10-15 minutes or until golden brown. Yield: 8
focaccia.
Nutrition Facts: 1 serving (1 each) equals 126 calories, 4 g fat (trace saturated fat), 1 mg cholesterol, 313 mg sodium, 19 g carbohydrate, 1 g fiber, 4 g protein.
Subscribe to:
Comments (Atom)


