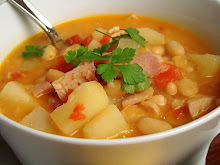
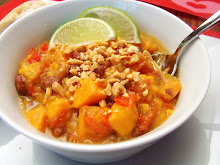
I has been nearly a week since my last post. It sure feels like a lot longer! I hadn't intended to go on such a long Christmas break, but we have been sick, sick, sick in this house. I'd really like a Christmas "do-over" but since that's not possible, I'm just hoping that we're all healthy for the new year. I haven't done much cooking at all...but I do have these to show you:
Crispy Southern Fried Hot Wings with Spicy Dipping Sauce
and Buffalo Style Hot Wings with Ranch and Celery
On Christmas night, during what we didn't yet realize was to be a calm in the "sickie storm", I made these for my husband after the kiddos were tucked all snug in their beds. It was my Christmas surprise to him. For months, he has been campaigning for the addition of a fryer to our ensemble of small kitchen appliances. Usually the reason I avoid purchase of more kitchen appliances is 1. That they don't get enough use to justify the space they take up in the kitchen and 2. I can often acheive the same result that these gadgets boast with the tools I already own and a little extra effort. For instance, a quesadilla maker. Do I really need a whole appliance so that my quesadillas can come out pre-portioned into little triangles? Probably not. However, this time I denied his request for a fryer on the grounds that if we have a fryer, we will be likely to use it. Maybe even often. And really, who needs more fried food in their diet? Definitely not us!
All through football season I have heard about how if we had a fryer, we could make our own wings...and then we could make our own wing sauce...and then....and then... More than once, my husband threatened that one day he would come home with a fryer and make this hot wing dream come true. But he didn't. So, as Christmas shopping season rolled around, I knew exactly what I was getting him for Christmas. This: Euro-Pro F1052 Professional 2-Liter Stainless-Steel Deep Fryer! With the fryer purchased and in the mail, I began research on how to make wings. I ended up on one of my all time favorite food blogs, Deep South Dish. I figured that Mary knew how to fry up some wings! She did not disappoint. I found a number of wing recipes to choose from after clicking on the Appetizers and Party Food category on Deep South Dish. After choosing two recipes, I made my grocery list, picked up the ingredients to make the wings, grabbed a gallon of canola oil for the fryer, and planned a trip to the West Side Market to obtain fresh wings the day before Christmas. Because after all, what fun is it to get a gift if you can't use it right away? It's like giving a kid a remote control car with no batteries when all of the stores are closed on Christmas day. SO not fair!
I have to say that now that we have a fryer in our lives, I do not regret it. Let's face it, fried food is just good. Not good for you...but good! The wings were amazing! I expected them to be pretty good, but I never dreamed that they would turn out every bit as good as the wings from our favorite wing restaurant. And seriously, they were really easy to make.
Let's begin with the easiest of the two recipes that we made, Buffalo-Style Hot Wings. I started by making the sauce. Just melt a stick of butter and stir in a cup of hot sauce. I used Frank's Red Hot. Remove from heat.
And now for the wings. You can purchase whole chicken wings and disjoint them yourself. Mary explains the whole process here in her post about these hot wings. I purchased mine already cut up into wingettes (or flats) and drumettes. One of my favorite places to shop in my city is the West Side Market. I love the energy, the variety, the fresh produce, meat, and pasta, and the competitive prices! I got these cut-up wings for $2.99/lb. My cousin happened to be visiting from Atlanta and ventured out to the market with me. According to him, he recently paid $7/lb. for wings at the grocery, so I was feeling pretty good about $2.99. I bought about 4 1/2 pounds. For our Christmas night wingfest, we only fried 2 dozen wings. I froze the rest. I'm thinking hot wings for New Year's Eve...
I preheated my husband's brand-spanking-new fryer to 350 degrees, put the wings in the basket, dropped them into the oil, and fried them for 8-10 minutes. You'll want them golden brown and crisp.
Here they are, all ready for a dip in the hot tub.
Once the wings were fried, I tranferred them to a plate lined with paper towel and salted them. Then, I put them into a resealable container, poured the sauce over top, put the lid onto the container, and gave them a good shake.
And that's all there is to it. I made some ranch dressing (my husband prefers ranch to bleu cheese) and plated them up with some celery sticks. YUM! To get the detailed recipes for these Buffalo Style Hot Wings and Mary's Bleu Cheese Dipping Sauce click HERE.
Now for those Crispy Southern Fried Hot Wings...
This recipe was a little more involved. First, you make a rub with 2 teaspoons of Cajun seasoning, 2 teaspoons of black pepper, 2 teaspoons of poultry seasoning, 1 tablespoon seasoned salt, 1 tablespoon of crushed red pepper, 1 teaspoon of lemon pepper, 1 teaspoon garlic powder, and 1 teaspoon onion powder. Toss the wings in the rub, then cover and refrigerate for an hour. Because of my husband's aversion to lemon flavored anything and the fact that I think the lemon pepper seasoning that I used in this may have been old (therefore really strong and offensive)...I'll probably leave that out the next time I make this recipe. Otherwise, the flavor was delicious and packed just the right amount of spicy kick.
Before frying, I made an egg wash with eggs(duh!), hot sauce, red pepper flakes, cayenne pepper, and black pepper.
Dip the wings in the egg wash.
Then dredge in flour. Fry em' up...
and serve them with this Spicy Dipping Sauce. Just mix together sour cream, horseradish, chili sauce, and cayenne pepper.
I'd like to fry up a whole chicken this way. Buffalo style is still my favorite way to eat wings, but if I were making fried chicken, I really loved this Crispy Fried Southern Chicken recipe, which you can find at Deep South Dish. Just click HERE for the wing and Spicy Dipping Sauce recipe.
Now dust off your fryers and go get some wings! You won't be sorry!
Sunday, December 27, 2009
Thursday, December 24, 2009
Christmas Morning Breakfast
One of the most memorable Christmas traditions from my childhood is the huge breakfast that my mom and dad put out every year on Christmas morning. Egg Casserole, Oven Baked French Toast, Coffee Cakes, Streudels, platters of bacon and sausage, dad's Buttermilk Blueberry Pancakes, grapefruit halves topped with candied cherries, and bowls of fresh fruit were all served on crystal and china as my mom's parents, my dad's parents, and even my great grandparents gathered around the candle-lit table with my mom and dad, my sisters, and me. Every time I picture the scene I get a warm, fuzzy feeling. I can almost smell the bacon frying and the Christmas coffee dripping into the pot. I can hear the hum of voices, of conversations running together, and the swells of laughter, shocking me out of my food coma. Ahhh, the Christmas breakfast.
To this day, I still love Christmas morning breakfast. I had planned to share some of my favorite breakfast recipes earlier in the week, however the flu has hit our home and put me behind in my posting. I'm sure that most of you have your menus in place. Your groceries are purchased and put away, just waiting to be whipped into those cherished breakfast recipes. But if you happen to still be looking for that perfect Christmas morning dish, then here are some of my all-time favorite breakfast recipes. Starting with pancakes...
As I mentioned above, my dad always made the Christmas pancakes. Blueberry. Sometimes in the shape of Mickey Mouse. I don't think that he has a recipe, he just dumps. In addition to blueberry pancakes, I'm also fan of these Pumpkin Spice Pancakes.
Then there's the french toast. In August, I tried a new recipe. This Bananas Foster French Toast Casserole was dee-licious!
I also have two tried and true favorite oven french toast recipes, that I alternate every year. Just click on the links to get the recipes for the recipes for Blueberry French Toast and this awesome Oven French Toast with Nut Topping . Why "oven"? Because you can make the casserole the night before, stick it in the fridge, then just pop it into the oven on Christmas morning, freeing up that griddle space for the pancakes, bacon, and sausage.
Speaking of bacon, I guess you don't have to fry it up on the griddle. You could bake the bacon. This year I made these Bacon Twists for the first time. Love them!
I usually just make a basic Sausage, Egg and Cheese Casserole. I haven't written about my egg casserole here yet, but I found this recipe on allrecipes.com. It's exactly the same as the recipe that I use. It's always big hit with my family.
If you're looking for a quiche, this Onion Pie
or this Spinach Bacon Quiche are SO good!
If you prefer to give a nod to some down-home, old-fashioned, breakfast cuisine like I do, then try this Fried Mush. It's still one of my favorites!
If you're looking for baked goods, I'm a big fan of these Banana Streusel Muffins with Caramel Glaze.
And these Cranberry Orange Scones.
Oh, and also this One Egg Blueberry Cake!
I can't believe that I've never posted about my family's breakfast streudel on this blog! I'll definitely be writing about that one next year!
With all of the breakfast recipes that I've just posted, you might expect that I would be very busy today, cooking up a storm. Not so. This year we're keeping it simple. It'll just be our little family of 4 home on Christmas day. We're travelling the day after (hopefully we'll get a little Christmas miracle of our own and everyone will be healthy...or at least healthier.) I asked my husband and children what they would like for Christmas breakfast...anything that they wanted...sky was the limit. Do you know what they picked?
Yep. Biscuits and sausage gravy. It's their favorite. It sure is making my job easy this year.
Whatever you're making for breakfast, wherever you are...I wish you all the happiest of holidays, filled with peace and joy and love!
Monday, December 21, 2009
A Busy Holiday Weekend and The Ruby Anniversary Party
We had one whirlwind of a pre-Christmas weekend! On Thursday after my daughter's pre-K Christmas party we departed for my husband's parent's home to kick off our Christmas festivities. By the time that we pulled into my in-law's driveway about 5- 1/2 hours later I knew that something was wrong with my oldest daughter. She was quiet for the drive (very unusual) except to say, "I just need to go to bed, Mommy. I need to sleep and save my energy." Very odd considering that usually when we arrive at grandma and grandpa's she is usually a ball of energy and excitement with a to-do list a mile long (she is her mother's child!) Instead of running in for bear hugs and raiding grandma's pantry for her favorite snacks, she curled up on their sofa with the chills. Sure enough, she had a fever of 102! A good dose of Motrin and she was off to bed where she stayed off and on for the whole weekend. Poor kid! My husband and I still managed to attend 4 holiday parties over the weekend while she was under the careful care of grandma and grandpa.
On Saturday night, we celebrated my wonderful in-law's 40th anniversary. I sound like I'm kissing up with words like "wonderful"...but they really are. They are caring, supportive parents to my husband and his siblings AND doting, involved grandparents to their 4 grandchildren (ages 1-5 years).
One of the best things about technology is that it allows you to assist in party planning from miles away. I made the design for the anniversary party invitations on my home computer and then emailed it straight to the print shop where my husband's sister picked them up and then mailed them out. Check out that wedding picture... Don't they just look so young and happy?!
We planned the party as a kind of relaxed, holiday cocktail party where family and friends could get together and share good food, drinks, and of course, memories while celebrating the couple's 40 years together. A Christmas wedding, and consequently a Christmastime 40th Anniversary lends itself to a beautiful, festive environment. That magic Christmas glow is cast over the celebration with the lights, music, decorations, food, and the whole spirit of the holiday. My mother-in-law still reminisces about how beautiful the church looked, all decorated for Christmas, on that December day in 1969.
I decided that the perfect cake for the occasion was Red Velvet Cake with Cream Cheese Frosting. YUM! I just did 3 concentric layers, frosted with cream cheese frosting, sprinkled with decorative red sugar, added borders, and embellished it with sugar snowflakes purchased at my local candy making store. I ordered a flower topper from the local grocery. This topper did arrive much larger and heavier than I anticipated it would be. I cut it in half and re-arranged the flowers before adding it to my cake. It's still pretty big, but the flowers were beautiful and luckily the cake withstood the weight.
Here is a view of the back of the cake and those sweet (literally and figuratively) sugar snowflakes.
Even sweeter than the snowflakes were the guests of honor. Here they are cutting into the cake, just like they did 40 years ago.
You can't go wrong with Red Velvet Cake at the holidays...or anytime for that matter. They cocoa in the cake paired with cream cheese frosting is fab-U-lous! Just one word of warning: this cake stains! As I was mixing up the batter, there was a mixer mishap and it flew everywhere! I thought that I'd cleaned it all up, and then later found that I'd stepped in some and tracked it all over the tile floor. The kitchen sort of looked like a crime scene. I sure had a fun time scrubbing. NOT! So be careful. : )
In addition to Red Velvet Cake and lots of yummy appetizers, the signature drink of the evening was the Pomtini. I got this recipe from my Aunt Lili. She's famous for her Pomegranate Martinis. After sampling one (or two...), I know why. These are so good!
To make these you need pomegranate juice, Citrus Vodka, Orange liqueur, limes (for the juice and slices to garnish),ice, and a pomegranate. Mix together the juice, vodka, and orange liqueur. I quadrupled this recipe and kept the mixture in a pitcher to pour into the shaker for each batch.
I garnished each glass with lime and dropped some pomegranate arils into the bottom. Then squeeze a little fresh lime juice into each.
When you're ready to serve, pour the juice-vodka-orange liqueur mixture into a shaker with ice and shake, shake, shake! You want it really cold, so shake it good! Then pour into the glasses and serve!
Aunt Lili's Pomtini's
1 1/2 cups pomegranate juice
4 shots Absolute Citron
2 oz. Cointreau
freshly squeezed lime juice
pomegranate arils (for garnish)
ice
Combine pomegranate juice, vodka, Cointreau (or Triple Sec). To prepare glasses: sprinkle in some pomegranate arils. Squeeze a little lime juice over. Add the POM-Citron-Cointreau mixture to a shaker with ice. Shake it like you mean it! (until good and cold). Pour over pomegranate arils and lime juice. Garnish with lime, if desired.
It was such a fun party! Happy 40th Anniversary to Nick and Pam!
Thursday, December 17, 2009
Hot Dip And Other Holiday Appetizer Favorites
Hello friends! I know that haven't posted in a few days. I'm away from home...and my laptop! I spent the weekend throwing a 40th anniversary party for my father and mother-in-law and celebrating Christmas a couple of days early with my husband's side of the family. Hopefully, weather and travel permitting, I'll post the pictures of the red velvet anniversary cake and the pomegranate martinis that we served at the party. In the meantime, check out this hot dip! Such a fancy name, isn't it? Hot. Dip. Well, the name might not have much of a "wow" factor, but once your friends and family get a bite of this you will actually hear the word "Wow!" Usually followed "Mmmmm." and then a question, such as, "who brought this?" or "what's in it?" You might as well print out a couple of copies of this recipe before you take this dip to a party, because chances are, someone will ask you for a copy. My husband is hooked on this stuff. He sort of hovers around me in the kitchen as I'm mixing it up. Unfortunately, he had to miss a party that we were supposed to attend together on the night that I made this. He actually said, "I'm really sorry that I have to miss the party, but I'm even more sorry that I'm going to miss the hot dip!"
It's really simple to make. It kind of reminds me of that cheese ball made with cream cheese and chipped beef and green onions and then rolled in ground pecans. Only you don't have to form this into a ball and it's served all hot and gooey. An improvement, if you ask me. Well, okay. You didn't ask me, but I have the keyboard here. You just mix together cream cheese, sour cream, onion flakes, garlic salt, finely chopped green pepper, and dried or chipped beef (whatever you wanna call it, it's that cheap stuff that I usually find in 2 oz packages by the bologna in the grocery).
Spread the mixture into a baking dish. I like to choose one that's attractive enough to take to a party, since the dish that I bake this in is also the dish that it is served in.
Melt half a stick of butter and pour it over the top of the dip.
Top with 1/4 to 1/2 cups of finely chopped pecans and bake at 350 degrees for 25 minutes.
It should be bubbly around the edges when it's finished. Okay, so in addition to having a lackluster name, it isn't pretty either.
But it sure is good! Within a few hours of taking it out of the oven, here is my casserole dish...nearly scraped clean!
Hot Dip (for Triscuits)
8 oz. cream cheese
1 cup sour cream
2 tablespoons onion flakes (dried onions)
1/2 teaspoon garlic salt
1/4 cup green pepper, finely chopped
2 oz. dried beef, chopped
4 tablespoons butter, melted
1/4- 1/2 cup pecans, finely chopped
Add first 6 ingredients to a bowl. Mix until combined. Spread into a baking dish. Pour melted butter over the top of the cream cheese mixture. Sprinkle with pecans. Bake at 350 degrees for 25 minutes. Serve with Triscuit crackers.
Here are some more of my favorite appetizer recipes to serve during the holidays:
Spicy Cheeseburger Dip
Bacon and Tomato Cheese Toasts
Cajun Seafood Garlic Bread
Bacon Wrapped Water Chestnuts
Cheddar Beef Pull Apart Bread
Prosciutto Pinwheels
Ham and Cheese Crescents
Hope everyone had a lovely weekend!
Wednesday, December 16, 2009
Caramel Corn
When I was a kid, caramel corn didn't just make an appearance at the holidays. Yes, year after year it was bagged up and sent out with the rest of our holiday treats, but it wasn't a recipe that was just pulled out of the box in the month of December. I always knew that there was about to be "an occasion" when I saw my mom popping enough popcorn to supply a matinee. My mom made this caramel corn when we were going on a road trip, going camping, and for fair week too (we spent a good deal of time in the barns with our livestock at the county fair, hence the need for snacks at the ready to keep us from spending $4 for an elephant ear every time we got hungry.) It truly is addictive. So much so that a friend yelled at me from across my kitchen last weekend, "Get this stuff away from me!" There's something so much better about this caramel corn than the varieties I have tried from the store or carnival stands. Maybe I'm just biased. Guess you'll just have to try this out for yourself.
Here's whatcha do...
Combine brown sugar, light corn syrup, butter, and salt in a saucepan.
Bring it to a boil, stirring constantly. Many caramel corn recipes recommend keeping the caramel at a certain temperature, measured on a candy thermometer. Once mine boils, I just turn down the heat enough so that I keep it boiling and then I stir it while it boils for 5 minutes.
Now here's the magic step. Stir in 1/2 teaspoon of baking soda.
A reaction occurs causing the caramel to foam and grow. My 5 year old daughter was both amazed and frightened. You see, she was stirring at this point and she was convinced that it was going to spill over the top. It didn't. I knew that it wouldn't. I've made caramel in this sauce pan before. If you're trying this out for the first time, I do suggest that you use a saucepan with enough room for the caramel to expand after the addition of the baking soda. After the caramel foams up, I add in a teaspoon of vanilla too.
So now, it's time to pour the caramel over the popcorn. Pictured below are 3 regular-sized bags worth of plain (not butter flavored) air-popped popcorn, spread out over two large baking sheets. A large roasting pan would work well for this too. Unfortunately, I don't have one. Bummer.
Give the popcorn a good stir to evenly distribute the caramel, but don't stress if it's not perfect. We're going to stir this 3 times during the baking time...every 15 minutes for an hour! That caramel will coat the popcorn eventually, I promise. Now you're all ready to bake.
When you've finished with an hour of baking and stirring, put down some waxed paper on your countertop and spread the caramel corn out to cool. Go ahead and taste it...you know you want to! Just be careful, it's HOT!
I put a big ol' bowl of this out at my daughter's cookie decorating party, then bagged the rest. I added a couple of bags to our teacher gift and delivered the rest to my neighbors with tins of fudge and gingerbread cookies.
Caramel Corn
3 bags of plain air-popped popcorn
2 cups brown sugar
1/2 cup light corn syrup
1 teaspoon salt
1 cup butter
1/2 teaspoon baking soda
1 teaspoon vanilla extract
Directions
1.Place the popped popcorn into two shallow greased baking pans. You may use roasting pans, jelly roll pans, or disposable roasting pans. Set aside.
2.Preheat the oven to 250 degrees. Combine the brown sugar, corn syrup, butter and salt in a saucepan. Bring to a boil over medium heat, stirring enough to blend. Once the mixture begins to boil, boil for 5 minutes while stirring constantly.
3.Remove from the heat, and stir in the baking soda and vanilla. The mixture will be light and foamy. Immediately pour over the popcorn in the pans, and stir to coat. Don't worry too much at this point about getting all of the corn coated.
4.Bake for 1 hour, removing the pans, and giving them each a good stir every 15 minutes. Line the counter top with waxed paper. Dump the corn out onto the waxed paper. Allow to cool completely, then store in airtight containers or resealable bags.
_______________________________________________
Speaking of holiday gifts and goodies, just look at this beautiful (and delicious) box of Christmas cookies that my neighbor delivered to our door tonight.
But the cookies weren't all...there was also a good-sized bag of homemade Chex mix. YUM!
Man, I just love this time of year!
Subscribe to:
Posts (Atom)