Thursday, March 24, 2011

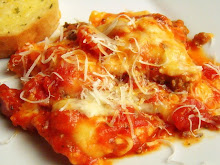
Southwestern Pasta and Cheese


I found this recipe in the February/March 2009 issue of Healthy Cooking. I was searching for recipes in Healthy Cooking because I was recently forced to face an ugly truth when planning my Spring Break wardrobe. As I tried on clothes that fit perfectly fine last summer, I realized that even my "fat day" shorts were fitting kind of tight.  A quick trip to the bathroom scale confirmed that I have packed on a good 12 pounds of winter "insulation" since Halloween. I was mortified. To add insult to injury, when I checked the fit of these clothes in the mirror, I was nearly blinded by the translusent white hue that my legs have taken on under months of heavy denim. Yikes! While it's a little late in the game to shape up in time for Spring Break (although believe me, I've logged some time with my workout DVD's this week in a last ditch effort), I realize that summer is just around the corner. I resolved to start counting calories again (Immediately!)...and to stop in for the cheapest spray-on tan I can find before we depart for The Sunshine State on Saturday. Because I'm "keeping track" again, I was ecstatic when I found this delicious pasta recipe in Healthy Cooking. First of all, it's a flavorful, cheesy pasta. It's not like I was going to nibble lettuce through dinner (too late for that anyhow.)Second, because the nutritional information was included, I knew just how many calories/fat grams were present in a serving size. For that matter, I knew what the serving size those statistics were based upon. For the record, it's 3/4 of a cup. Good thing that I really want my shorts to fit comfortably again, because I really, really, wanted more than 3/4 of a cup of this pasta!

I knew that it was going to be good because the recipe begins with bacon. I fried up 4 strips in my cast iron skillet and then removed them to drain.(No picture of this step) After removing the bacon, I poured off the excess grease, leaving about a tablespoon, but did not wipe out the skillet. Then I added diced red pepper and chopped green onion to the skillet. Saute until tender.


While the onions and pepper saute, mix together flour, chili powder, cumin, and salt.


Stir the flour into the pepper and onions with a teaspoon of chipotle pepper in adobo sauce until blended.


Then gradually stir in skim milk. Bring to a boil and cook until thickened.


Once thickened, I stirred in 1/4 cup of cheddar cheese until melted and then I added the crumbled bacon and 2 tablespoons of chopped cilantro. Stir to combine.


Next add the cooked bow tie pasta. Toss with the sauce until the pasta is coated.


Top with more cheddar cheese and bake at 400 degrees....


until the cheese is melted and bubbly.


This was a welcomed twist on good old mac n' cheese and not too bad for you either!


Southwestern Pasta and Cheese from Healthy Cooking Magazine February/March 2009
8 ServingsPrep: 30 min. Bake: 20 min.
Ingredients
3-1/3 cups uncooked bow tie pasta
1 medium sweet red pepper, chopped
8 green onions, chopped
1 tablespoon olive oil or reserve 1 tablespoon bacon fat
1/4 cup all-purpose flour
1 teaspoon chili powder
1 teaspoon minced chipotle pepper in adobo sauce
1/2 teaspoon salt
1/2 teaspoon ground cumin
2-1/4 cups fat-free milk
1 cup (4 ounces) shredded sharp cheddar cheese, divided
4 center-cut bacon strips, cooked and crumbled
2 tablespoons minced fresh cilantro
Directions
•Cook pasta according to package directions.

•Meanwhile, in a large skillet, saute pepper and onions in oil until
tender. Stir in the flour, chili powder, chipotle pepper, salt and
cumin until blended. Gradually stir in milk. Bring to a boil; cook
and stir for 2 minutes or until thickened. Stir in 1/4 cup cheese
until melted.

•Drain pasta; toss with sauce. Stir in bacon and cilantro. Transfer to
a 2-qt. baking dish coated with cooking spray. Sprinkle with
remaining cheese. Bake, uncovered, at 400° for 20-25 minutes or until bubbly.

Nutrition Facts: 3/4 cup equals 240 calories, 8 g fat (4 g saturated fat), 20 mg cholesterol, 327 mg sodium, 32 g carbohydrate, 2 g fiber, 12 g protein. Diabetic Exchanges: 2 starch, 1 medium-fat meat, 1/2 fat.

Notes: I made this in my cast iron skillet so that I didn't need to transfer the pasta into a baking dish for the oven. Less dishes!

To make this even lighter, you could substitute a reduced-fat cheddar and use turkey bacon.

Tuesday, March 22, 2011

Chicken and Artichokes in White Wine Sauce


Admittedly, chicken and artichokes in white wine sauce sounds pretty fancy for Tuesday night dinner for the family. Judging from the picture above, it even looks restaurant-worthy. That's the beauty of this recipe....it's so versatile! Elegant enough for a romantic date or a dinner party with friends, but quick and easy enough for a 30-minute dinner after a busy day. I was crazy about this recipe! The flavors were wonderful and as I just said (um, typed) it came together easily.

To start I mixed together flour, poultry seasoning, salt and pepper in a shallow dish. Then I pounded the chicken breast so that they were a uniform 1/2"(approximately) thickness to insure quick and even cooking. I sprinkled the chicken breasts with a bit of salt before dredgeding in the flour and seasoning mixture.


While I coated the chicken, I heated some oil in a large skillet. Then I transferred the chicken to the hot oil and cooked for about 10 minutes, flipping them a couple of times until the juices ran clear and they were no longer pink. Transfer the chicken to a serving dish and keep warm.


Next, I tossed a tablespoon of butter into the same skillet and heated until just bubbly. Then add in artichokes (I used canned marinated artichoke hearts, slightly chopped) and sliced mushrooms. Saute, stirring frequently, until everything starts to brown up a bit.


While the artichokes and mushrooms saute, mix the wine and chicken broth together with a tablespoon of the flour mixture that you used to coat the chicken. Whisk until smooth- as in NO LUMPS! Note: I didn't have any white wine on hand, so I just doubled the amount of chicken broth.


Slowly stir the liquid into the skillet and cook and stir some more until thickened and bubbly. I actually added a bit more of the flour mixture than called for, so I ended up pouring in additional chicken broth to thin the sauce. This worked out just fine, because the end result was more of that delicious sauce to top the chicken!


To serve, just pour the artichoke/mushroom sauce over the cooked chicken and sprinkle with parmesan and fresh chopped parsley. Mmmmmm!


Now some of you are probably thinking, "Gee Krista, that looks great...but my kids would never eat that."  Well, my kids wouldn't eat it either. At least, not with the sauce. Both seem to have an aversion to mushrooms and artichokes. But they LOVED the plain breaded chicken breast. I set aside a portion for them before I added the sauce and served it up with a side of broccoli. It was a grown up dinner and a kid dinner all in one!

Here's the recipe, slightly altered from my Better Homes and Gardens Cookbook.

Chicken and Artichokes in Wine Sauce

1/4 cup flour
1/2 teaspoon poultry seasoning
salt and pepper, to taste
4 boneless, skinless chicken breast halves
2 tablespoons cooking oil
2 cups sliced fresh mushrooms
1 8 or 9 ounce package frozen artichoke hearts or 1 jar canned artichoke hearts, drained
1 tablespoon butter
1/3 cup dry white wine
1/3 cup chicken broth
2 tablespoons grated Parmesan or Romano cheese
2 tablespoons snipped fresh parsley

1. In a shallow dish, stir together flour, poultry seasoning,salt,and pepper; reserve one tablespoon of flour mixture. Coat chicken in remaining flour mixture.

2. In a large skillet cook chicken in hot oil over medium-high heat for 8 to 10 minutes or until no longer pink (170 degrees F), turning once. Remove chicken from skillet; cover and keep warm.

3. In the same skillet, cook mushrooms and artichoke hearts in hot butter over medium heat until artichokes are tender and slightly browned.

4. In a small bowl stir together reserved flour mixture, wine, broth, and salt until smooth. Add wine mixture to skillet. Cook and stir until thickened and bubbly. Cook and stir for 1 minute more. Pour sauce over chicken. Sprinkle with parsley and cheese.

Notes: I pounded my chicken breasts to flatten them into a more uniform, quicker-cooking thickness. Also, I doubled the amount of chicken broth to 2/3 cups and omitted the wine completely. Finally, I added a little more of the flour mixture than called for, which meant that I needed to thin the sauce with broth, but ultimately yielded a larger amount of the sauce. I loved this sauce, so I was glad to have more!

Sunday, March 20, 2011

Individual Bacon Cheddar Meatloaves with Baked Onion Rings PLUS the Meal Plan and Grocery List 3/21-3/27


I will sing the praises of these yummy lil' meatloaves in a moment, but first this scene from my kitchen:

"What's for dinner?" my husband asked. "Meatloaf!" I sang out enthusiastically. Disregarding my exuberance, he gave me a wary look from across the kitchen and responded with one of those questions that isn't really a question, "I'm supposed to be excited about meatloaf?" (He might as well have added a nice juvenile "Ewwww" before he asked it and threw in  a "YUCK!" after his "question".)

Since it wasn't really a question anyhow, I ignored it and continued gathering my ingredients. Oh, you'll eat it, buddy. And you're gonna like it too....

Seriously, why does meatloaf get such a bad rap? It's good!

These individual-size meatloaves are especially good. Full of cheese and topped with bacon, these may just change the opinion of even the most adamant meat-loaf "haters". I had to laugh when I overhead my husband bragging to some friends later that evening, urging them to try the leftover meatloaf.

If you've never made meatloaf before, it's really simple. You just dump everything together and mix well. This was a pretty basic meatloaf recipe. I used ground beef, eggs, cracker crumbs, onion, salt, and pepper. The special ingredient here was shredded cheddar. I like to use my pastry cutter to blend the ingredients, but your hands work great too! Squish, squish!


Divide the mixture into 4 parts and shape into mini-loaves with your hands. Place in the bottom of a 11 X 7 inch baking dish.


Brush with equal parts of ketchup and barbecue sauce. (I left one plain for my anti-condiment kiddo). Top with bacon.


Then, to put these over-the-top I gave them a final sprinkle of cheese before popping the dish into the oven.


While the meatloaves baked, I set to work on the baked onion ring recipe that was featured with the meatloaves in Light and Tasty magazine. Just slice a large sweet onion into rings. Then, dip the onion rings in egg (or egg substitute) until coated.


Toss them with bread crumbs seasoned with salt and pepper. Arrange the onion rings on a baking sheet sprayed with non-stick cooking spray and bake for 15-18 minutes, turning halfway through.


The meatloaf was a big hit. The onion rings were okay. No surprise... they tasted like baked onion rings. Not nearly as good as the fried version, but if you're trying to cut back on the fat and calories and you need to satisfy that onion ring craving, these might do the trick.


Bacon Cheddar Meatloaves inspired by Light & Tasty magazine April/May 2007
4 Servings Prep: 20 min. Bake: 40 min.
Ingredients
2 eggs
1/2 cup crushed butter crackers (about 13 crackers)
1/3 cup plus 8 teaspoons shredded cheddar cheese, divided
1/4 cup chopped onion
1/2 teaspoon salt
1/4 teaspoon pepper
1 pound lean ground beef
2-3 tablespoons barbecue sauce
2-3 tablespoons ketchup
2-3 bacon strips, cut into smaller strips
Directions
•In a large bowl, combine the eggs, crackers, 1/3 cup cheese,
onion, salt and pepper. Crumble beef over mixture and mix well.
Shape into four small loaves; place in an ungreased 11-in. x 7-in.
baking dish. Combine barbecue sauce and ketchup, brush over the top of each meatloaf. Top each with a half-strip of bacon.

•Bake at 350° for 35-40 minutes or until no pink remains and a
meat thermometer reads 160°. Sprinkle with remaining cheese;
bake 2-3 minutes longer or until cheese is melted. Yield: 4
servings.

Notes: The original recipe was a lightened up version of meatloaf. It called for 4 egg whites instead of 2 eggs, reduced fat crackers and cheese, turkey bacon, and did not call for a sauce on top. These are great ideas to lighten up this recipe!

Baked Sweet Onion Rings published in Light & Tasty April/May 2007

4 Servings Prep/Total Time: 30 min.

Ingredients
1/2 cup egg substitute
2/3 cup dry bread crumbs
1/2 teaspoon salt
1/4 teaspoon pepper
1 sweet onion, sliced and separated into rings
Directions
•Place egg substitute in a shallow dish. In another shallow dish,
combine the bread crumbs, salt and pepper. Dip onion rings into egg,
then roll in crumb mixture.

•Place on a baking sheet coated with cooking spray. Bake at 425°
for 15-18 minutes or until golden brown, turning once. Yield: 4
servings.

Nutrition Facts: 1 serving equals 66 calories, 1 g fat (trace saturated fat), 0 cholesterol, 312 mg sodium, 12 g carbohydrate, 1 g fiber, 3 g protein. Diabetic Exchange: 1 starch.

_____________________

And now for the meal plan and grocery list...

Monday March 21st

Cauliflower Cheese Soup and BLT Sandwiches

Tuesday March March 22nd

Chicken and Artichokes with Wine Sauce

Wednesday March 23rd

Cheesy Southwestern Pasta

Thursday March 24th

Leftovers

Friday March 25th

Tomato Gnocchi with Broccoli Pesto Cream Sauce

Saturday and Sunday March 26th and 27th

Road Trip! I'll be packing a basket of snacks, but no cooking for me this weekend.

Grocery List

Produce

onion
carrots
celery
1 whole cauliflower
parsley
lettuce
tomato
mushrooms
sweet red pepper
green onions
cilantro
1 head broccoli
garlic
pine nuts

Meat

bacon
4 boneless skinless chicken breast halves

Dairy

butter
milk
1 cup half and half
shredded cheddar
Parmesan cheese
eggs

Canned Goods

2 quarts + 1/3 cup chicken broth
1/3 cup dry white wine
cooking oil
chipotle peppers in adobo sauce
olive oil
tomato paste
1 cup prepared alfredo sauce

Dry Goods

bread for sandwiches
crushed sage
flour
bowtie pasta
cumin
chili powder
basil

Freezer

8-9 oz package frozen artichoke hearts

To download or for a printable copy of this meal plan and grocery list, click HERE!

Thursday, March 17, 2011

Crock Pot Irish Stew and Soda Bread


Happy St. Patrick's Day! This savory, slow-cooked traditional Irish stew accompanied by a crusty Irish soda bread makes for a delicious way to observe the feast day honoring the life of Saint Patrick.

While there are countless recipes for Irish Stew, many of them resembled my regular beef stew recipe: meat, carrots, potatoes, broth, spices. For this St. Patty's day I decided to go for more traditional Irish "peasant" feel and use lamb. I once read that back in the days of St. Patrick that only the rich could afford to raise/purchase beef.

We raised sheep on our farm when I was growing up, and it's fair to say that I ate enough lamb to counter any cravings that I would have later in life. Still, I've seen so many great lamb recipes out there lately that I decided to re-visit lamb for this stew. I ordered a lamb shoulder roast from the butcher at my local supermarket and picked it up a couple of days later. The package said that the lamb was "free range".

Well, well, well. Now we've struck a nerve in my little Irish temper. Here's the deal: I've never seen a lamb that wasn't free range. They don't fare well on feed lots. From americanlamb.com: "American Lambs are raised on natural grasses in lush pastures across the country and are free of artificial growth hormones. Most lamb produced east of the Mississippi River is not grain fed, because producers have access to high-quality natural resources. Some western American Lambs are big enough right off the range, but most lamb produced west of the Mississippi River is finished on a high quality diet of corn and alfalfa. The grain finishing creates a consistent and delicious flavor that American consumers prefer."

I suspect that labelling lamb as "free range" is much like labelling chicken as "hormone free" to give the product a marketing edge. What am I talking about? Well, we ALL eat hormone free chicken here in the U.S. Did you know that USDA regulations prohibit poultry growers from giving hormones and steroids to their birds, so all chicken is hormone-free?

So yeah, when you read labels boasting "hormone free" or "steroid free" there IS truth in the advertising...but only because they are just following the law, not because they are doing anything that sets them apart from other growers.

Okay, sorry for the mini-rant. I should clarify before I continue, I don't fault anyone for trying to better market their product to increase sales. More power to them! I just wanted ya'll to know. : ) Sometimes I start typing about things like stew and bread and my fingers take over and do a little free association de-bunking. : )

So back to this fancy free-range lamb. All $14 worth. So much for "peasant" pricing...

I cut the roast into pieces and sprinkled with a little sea salt to begin.


I heated a little oil in my skillet to brown the lamb. You just want to get the meat a nice brown color on the outside for flavor, you're not actually trying to cook the meat.


Then chop up potatoes and carrots and onions and season with salt and other spices and place everything in the bottom of your crock pot.


Place the browned lamb over the veggies and then pour on some broth.


Cook on LOW for 8 hours or until the meat is fall apart tender. At this point it was really late at night and I stopped taking pictures. I removed the lamb and separated the incredibly tender meat from fat and bone before shredding it and returning it to the stew. Then I put the crock pot into the fridge overnight. A couple of hours before dinner, I brought the crock pot out of the fridge and removed the layer of fat that had formed on top. Then I re-heated the crock pot until the stew was simmering.


Once the stew was bubbling away, I stirred in a cup of peas (barley would be good here too) because 1. I have an abundance of peas in my freezer and 2. I thought that a St. Patrick's Day stew should have something green in it.

Mix 6 tablespoons of flour into 1/2 cup of cold water and stir the slurry into the stew to thicken it up. Then cover and cook for another 20 minutes or until you are ready to eat.


This really did make a lovely stew. It was delicious, but I have to be truthful; as I scooped bites of the stew into my mouth, I found myself wishing that I'd used beef instead. The lamb did lend itself to an incredibly tender protein, but I'm still partial to beef. Maybe the amount of lamb consumed in my formative years has scarred me for life? Probably not. I did have an amazing rack of lamb on my honeymoon, so I haven't completely written it off. I may just stick to dry preparation methods from here on out. For the record, our daughters loved this. My oldest kept sopping it up with her soda bread, exclaiming, "Mom, this gravy is SO good!" Of course, I didn't mention that "the gravy" was actually lamb stew.


The perfect pair for the stew was Irish Soda Bread. I found the recipe on a website titled, "Society for the Preservation of Irish Soda Bread". The author of this site had some definite opinions on what should qualify as "traditional". Maybe they inspired my free-range lamb rant? Anyway, here are some excerpts from the site, found HERE.

"If your "soda bread" has raisins, it's not "soda bread! It's called "Spotted Dog" or "Railway Cake"! If it contains raisins, eggs, baking powder, sugar or shortening, it's called "cake", not "bread." All are tasty, but not traditional Irish Soda Bread!"

"If one searches the internet using the term "Traditional Irish Soda Bread" about 63,500 sites are listed. 98% of them aren't even close to being traditional. Google "Irish Soda Bread" and you will find 126,000 sites.

Would "French Bread" (15th century) still be "French Bread" if whiskey, raisins, or other random ingredients were added to the mix? Would Jewish Matzo (unleavened bread) used to remember the passage of the Israelites out of Egypt still be Matzo if we add raisins, butter, sugar, eggs, and even orange zest? So why is traditional "Irish Soda Bread" (19th century) turned into a dessert and labeled "Traditional Irish Soda Bread?" OK, maybe you don't like the analogy, but you get the point!"


"The basic soda bread is made with flour, baking soda, salt, and soured milk (or buttermilk). That's it!"

There is quite a bit of additional information supporting the author's claims about "traditional" Irish soda bread on the site. I encourage you to check out The Society for the Preservation of Irish Soda Bread to read more!

Truthfully, I just liked this approach to soda bread because it was easy to prepare and I knew that my family would probably reject the versions containing raisins and caraway seeds. Plus, I thought that the crusty white bread would be awesome for sopping the stew.

Here's how it came together:

First sift together flour, baking soda, and salt. Then pour in buttermilk. Stir until you form a soft dough.


Then turn the dough onto a floured surface and lightly knead. Only knead long enough that the dough absorbs a bit more flour and will hold it's shape. Too much kneading will cause the "gas" to escape and makes for a tougher loaf of bread.


Pat the dough into a round shape and drop it into a lightly greased and floured round cake pan. Using a sharp knife, cut a cross shape onto the top.


Top with another pan and bake for 30 minutes at 425 degrees. Then, remove the top pan and bake for another 15 minutes.


Truth be told, I baked mine a couple of minutes too long. I heard the timer go off, but continued typing an article I was working on. A few minutes later, I snapped back to reality and dashed across the kitchen just in time to rescue the bread. Whew!


We loved, loved, LOVED this bread. I'll definitely be making it again and I won't wait for next St. Patty's Day to do so. This recipe made for a nice, crusty bread with a dense, tender crumb that was ideal for soaking up the stew, but is also good on it's own with butter or honey.


One last shot of our "traditional" Irish meal.


Slow-Cooker Irish Stew

2 lb. lamb shoulder roast - cut into 4 or 5 pieces
2 chopped onions
3 carrots, peeled and sliced
3 medium potatoes - peeled and cubed
1-2 tbsps. oil
6 c. beef broth
1 tbsp. minced garlic
1 tsp. crushed rosemary
1/4 tsp. celery seed or a teaspoon of celery salt
1/4 tsp. marjoram
1/8 tsp. crushed dry thyme
1 cup peas, thawed
6 tbsp. all-purpose flour
1/2 c. cold water
salt and pepper to taste
chopped parsley for garnish

Brown meat in shortening in a large skillet, over medium-high to high heat. Don't cook the meat; just get it brown.Combine browned meat in Crock-Pot with onion, broth, potato, salt, pepper, rosemary, garlic, celery seed, marjoram, thyme and carrot.

Cover and cook on low for 8 to 10 hours or until meat is fall apart tender and potatoes are done. Remove the meat and cut up or shred. Return to crock pot. If possible, refrigerate the stew overnight. Skim fat and return the stew to a simmer.

Dissolve flour in 1/2 c. cold water and add to Crock-Pot with the peas. Cover Crock-Pot, turn to high and cook 15 to 20 minutes until the stew is thickened.

Serve with Irish Soda Bread.

Notes: I read someplace that garlic and rosemary are not traditional Irish flavors. I added them anyway because when preparing lamb, I can't resist adding garlic and rosemary. It's just habit.

Also, this recipe would make a wonderful BEEF stew. Just substitute the same amount of beef roast and follow the recipe above.


White Soda Bread from Society for the Preservation of Irish Soda Bread

4 cups (16 oz) of all purpose flour.
1 Teaspoon baking soda
1 Teaspoon salt
14 oz of buttermilk

Method:

Preheat the oven to 425 F. degrees. Lightly crease and flour a cake pan.

In a large bowl sieve and combine all the dry ingredients.

Add the buttermilk to form a sticky dough. Place on floured surface and lightly knead (too much allows the gas to escape)

Shape into a round flat shape in a round cake pan and cut a cross in the top of the dough.

Cover the pan with another pan and bake for 30 minutes (this simulates the bastible pot). Remove cover and bake for an additional 15 minutes.

The bottom of the bread will have a hollow sound when tapped so show it is done.

Cover the bread in a tea towel and lightly sprinkle water on the cloth to keep the bread moist.

I hope that you all enjoy the holiday!

Monday, March 14, 2011

White Bean Fennel Soup


This light and healthy fennel soup was absolutely delicious. It's packed with vitamins, antioxidants, and fiber and was a huge hit alongside our grilled cheese sandwiches at dinner tonight. My kids even loved it!

I found this fennel bulb labelled as anise in my local supermarket's produce section. Since I have never purchased or cooked with fennel before, I was hesitant to pick it up. It looked like what I was looking for, but it said, "Anise" not "Fennel". This was definitely a produce dilemma. I needed guidance. I tracked down a young man working in the department and politely waited for him to conclude the conversation he was having with a co-worker. After a period of time that I would describe as awkward, I finally cleared my throat "Ahem" and asked if they had any fennel. He promptly led me to the stuff labelled, "Anise". Ah-ha! Just as I suspected! "But it SAYS anise," I pointed out. You know, just in case he didn't notice the improperly placed sign. He just shrugged and replied, "It's the same thing." Now go away lady, I want to get back to flirting with this cute cashier...

His answer wasn't good enough for me. Anise? Like the stuff they make black licorice out of?! No way was I making soup with that! I despise black licorice...although, surprisingly I don't mind those cookies with the anise seed that we get around Christmas-time. Still, I couldn't imagine that flavor in this soup recipe. Good ol' Google. I checked it out.

On a site called "The World's Healthiest Foods" I found this information:

"Although they share a similar taste profile—reminiscent of black licorice—fennel and anise are two different plants. The botanical name of anise is Pimpinella anisum while the botanical name of fennel is Foeniculum vulgare. Both anise and fennel belong to the Apiaceae family.

In addition to the fact that they share a similar flavor, what often creates confusion among these two plants/foods is that fennel is often referred to as anise. Since the whole plant (bulb, stalks, fronds) of fennel is consumed while it is usually just the seeds from the anise plant that are eaten, if you see a vegetable-like plant called "anise," chances are that it is actually fennel."


"The Gilded Fork" confirmed the claims of "The World's Healthiest Foods" stating, "In fact, many American supermarkets mislabel fennel as “anise”, perhaps because both have at their base the aromatic compound anethole (also found in chinese star anise)."

Here is a picture of the FENNEL that I used.


As directed by the recipe, I thinly sliced it. It did smell slightly like anise, but luckily the taste was super subtle- not like black licorice at all.


I sauteed the fennel with a chopped onion in olive oil until both were tender.


Then I stirred in the spices, a can of diced tomatoes, a can of butter beans (the recipe called for white kidney or cannellini, but I had butter beans, so I improvised), and chicken broth. Bring the soup to a boil, then cover and simmer for 30 minutes.


To finish, stir in 3 cups of chopped baby spinach and cook a few minutes longer until the spinach wilts.


Salt and pepper to taste and serve! This really is a simple and delicious vegetable soup. We ate ours with grilled cheese sandwiches, but it would also be great with a nice, rustic bread.


Here's the recipe from the February/March 2003 edition of Light and Tasty magazine:

White Bean Fennel Soup adapted slightly by me

1 large onion, chopped
1 fennel bulb, thinly sliced
1 tablespoon olive oil
6 cups reduced-sodium chicken broth or vegetable broth
1 can (15 ounces) white kidney or cannellini beans, rinsed and drained
1 can (14-1/2 ounces)Diced Italian Tomatoes, undrained
1/2 teaspoon dried thyme
1/4 teaspoon pepper
1 bay leaf
3 cups chopped fresh spinach
Directions
•In a large saucepan, saute onion and fennel in oil until tender. Add
the broth, beans, tomatoes, thyme, pepper and bay leaf; bring to a
boil. Reduce heat; cover and simmer for 30 minutes or until fennel
is tender.
•Discard bay leaf. Add spinach; cook 3-4 minutes longer or until
spinach is wilted. Yield: 5 servings.

Nutrition Facts: One serving (1-1/2 cups) equals 152 calories, 3 g fat (trace saturated fat), 0 cholesterol, 976 mg sodium, 23 g carbohydrate, 7 g fiber, 8 g protein. Diabetic Exchanges: 1 starch, 1 vegetable,
Related Posts with Thumbnails