Tuesday, February 8, 2011

Duck Fajitas and A GIVEAWAY!


Duck Fajitas! We actually prefer them to beef fajitas in this household. The meat is so tender and flavorful, yet leaner and lower in calories. These duck fajitas made for an easy, delicious weeknight dinner.

To begin, I just sliced some boneless, skinless Maple Leaf Farms duck breast filets into 1/2 inch strips. Then I tossed the meat with garlic, cumin, chili powder, salt, and cayenne pepper.


Heat a tablespoon of oil in a skillet over medium high heat until hot. Add the duck strips and stir-fry until barely pink in the center. Remove duck from the skillet and set aside.


Heat another tablespoon of oil in the same skillet and add peppers and onions. Stir-fry until tender.


Return the duck to the skillet and stir-fry for another 2 minutes.


I assembled a build-your-own fajita bar on my kitchen counter with cilantro, lettuce, chopped avocado, cheese, salsa, and sour cream for topping.


And that's dinner. So good!


Duck Fajitas from Maple Leaf Farms Meals to Remember cookbook

4 (6 oz) Maple Leaf Farms boneless, skinless duck breast filets
3 cloves garlic, minced
2 teaspoons ground cumin
2 teaspoons chili powder
1 teaspoon salt
1/4 teaspoon cayenne pepper
2 tablespoons vegetable oil, divided
1 each red, yellow, and green bell pepper, cut into long strips
1 medium red onion, thinly sliced
12 (6-inch) flour tortillas, warmed according to package directions
Optional toppings: salsa, sour cream, diced avocado, chopped cilantro

Cut duck crosswise into 1/2 inch thin strips; place in a medium bowl. Add garlic, cumin, chili powder, salt, and cayenne pepper; mix well.

Heat 1 tablespoon of the oil in a 12-inch skillet over medium-high heat until hot. Add duck strips; stir fry until barely pink in the center, 6 to 8 minutes. Transfer to a bowl; set aside.

Heat remaining oil in the same skillet; add peppers and onion; stir-fry until tender, about 5 minutes. Return duck with any accumulated juices to skillet. Stir-fry 2 minutes. Serve in tortillas with toppings as desired.
Makes 6 servings
_________________________________________________

And now for THE GIVEAWAY!!!!

It's no secret that I'm a big fan of Maple Leaf Farms duck. You just have to read THESE POSTS  on my blog to know how much I love their products.

Some of you have commented on past posts that you also enjoy duck and some of you have written that you'd really like to try it. Well, for my fellow duck enthusiasts and for those of you who are just itching to try, this contest is for you!

The good folks at Maple Leaf Farms are sponsoring a GIVEAWAY here on Krista's Kitchen!

The prize pack includes:


4 Boneless, Skinless Duck Breast Filets


The Appetizer Sampler Pack featuring 5 pieces of each: Duck and Black Bean Quesadillas, Duck Springrolls, and Duck Potstickers. I have tried all three and loved them all! Delicious!


And finally, a copy of Maple Leaf Farms 25th Anniversary special edition cookbook Meals to Remember: A Celebration of Duck. This thematic, hard-bound cookbook valued at $35 features colorful pictures of mouth-watering appetizers, sides, salads, main dishes, AND desserts!

This is some serious duck swag!

To Enter:

Go to to the Maple Leaf Farms RECIPE PAGE and click the RECIPE pull-down in the bar at the top of the page. View the recipes; choosing from categories such as appetizers, entrees, soups, salads, (and more!) then come back here and leave a comment on this post stating which duck recipe you would most like to try.

For Additional Entries:

1. Become a fan of Maple Leaf Farms on Facebook.(1 bonus entry)

2. Follow this blog, Krista's Kitchen. (1 bonus entry)

3. Follow Maple Leaf Farms on Twitter, then comment here. (1 bonus entry)

4. Post about this contest on your blog, Facebook page, or Twitter and comment back here. (1 bonus entry for each post- limit 3)

The Rules:

* Giveaway closes on Sunday, February 13th at midnight EST.

* Open to residents of the United States only, please.

* You must leave an email address in your comment, be linked to a public profile containing your email address, or provide some way for me to contact you, in case you win. If you don't want to post your email here, you can email it to krista@kristaskitchen.com

* The winner will be announced in this post and notified by email and will have 48 hours from the time of that email to reply and claim their win before an alternate winner will be selected.

Good Luck!

This Contest is NOW CLOSED! Thank you for entering.

Monday, February 7, 2011

Stewed Garlicky Sausage and Peppers


I had a pot of this Stewed Garlicky Sausage and Peppers simmering to perfection on my countertop all afternoon before the Super Bowl yesterday. Taken from my autographed copy of The Deen Family Cookbook, this recipe is sure to please!

This one is great for a crowd or perfect for an easy weeknight dinner. To start, just chop red and green bell peppers, onions, and mix with 4 cloves of minced garlic.


Then take out 1-3/4 lbs of Italian sausage (or more if you're expecting company).


Cut the sausage up and brown in a large skillet, then stir in red pepper flakes and oregano.


Add in tomato paste and stir to combine, followed by a can of diced tomatoes and some dry white wine.


Arrange half of the onion-pepper-garlic mixture in a crockpot.


Top with the sausage mixture.


Then pour the rest of the onions and peppers over the top.


Cover and cook on high for 4 hours or low for 2 hours.


You can serve this as a stew with crusty bread for dipping OR do what I did and make it a sandwich. This was pretty amazing topped with a slice of provolone!


Stewed Garlicky Sausage and Peppers from The Deen Family Cookbook

2 large onions, chopped
2 large green bell pepper, seeded and cut into chunks
1 large red bell pepper, seeded and cut into chunks
4 clove garlic, minced
3 tbsp olive oil
1 3/4 lbs sweet or hot Italian sausage, cut into chunks
1 tsp dried oregano
Pinch red pepper flakes
2 tbsp tomato paste
1 (14 oz) can diced tomatoes, undrained
1/2 cup dry white wine
1/4 tsp salt

Toss vegetables and garlic in a bowl. Heat oil in a skillet and add sausages and brown them, turning occasionally. Stir in seasonings and cook for 30 minutes more. Stir in paste and cook another minute. Add diced tomatoes with their juices, wine and salt; simmer for 2 minutes.

Arrange half the onion and pepper mixture in the bottom of the crock pot. Cover with half the sausage mixture. Repeat layers and cover. Cook on LOW for 4 hours or on HIGH for 2 hours. Serves 4.

Hot Wing Face Off and The Meal Plan 2/7- 2/13


Football season has been busier than usual in our household. As a result, I didn't follow either of the teams competing in tonight's Super Bowl on their journey to XLV. So, for a little added excitement, since I didn't particularly care about the outcome of the game (and because I'm a bit of a food geek), I decided to stage a competition of my own during the game. I carried out the "Hot Wing Face Off" as I watched the Super Bowl from my kitchen. The contenders: Oven Baked Wings vs. Traditional Fried Wings.

We're big fans of  traditional hot wings, fried to a crisp and tossed with hot sauce. But last week, I came across THIS recipe for Unbelievable Baked Buffalo Wings on Food.com. Would they really be "Unbelievable"? Better than the fried version, even? I had to find out.

Wings were already on the menu for our Super Bowl snacks, so I set just 6 wings aside to make the Unbelievable Baked Wings.

Here's how it went:

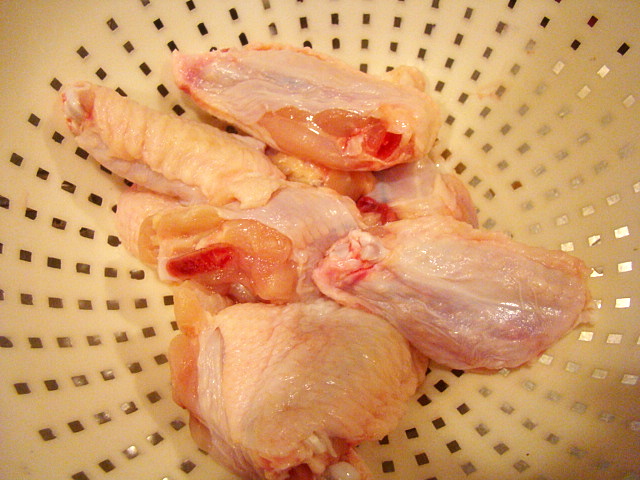
All wings started out the same, separated into flats and mini drummies with my kitchen shears (for a tutorial on how to do this, see HERE) and rinsed.


Put the wings in a pot with water (to cover) and red pepper flakes, cayenne pepper, and salt. Bring to a boil and then cook for an additional 15 minutes.


Transfer the wings to a baking sheet coated with cooking spray.


The recipe instructed: "Bake wings on "Broil" (high) for 15 minutes on each side.(For crispier wings, cook longer on each side, maybe 20 minutes per side)."

20 minutes per side!? This much broiling for itty bitty chicken wings seemed excessive to me, but I just shrugged and followed the instructions, but not before moving my oven rack further away from the broiler so the wings would not be so close to the intensity of the heat. About 10 minutes into the broiling time, I smelled something burning. Uh-oh. Luckily, I was able to salvage the wings...barely. No worries about them being crisp enough. I did turn them over and broil for another 2 minutes on the other side just to insure even crispness before removing them from the oven.


To finish, I tossed the wings in my go-to classic wing sauce: equal parts of butter (melted) and Frank's Red Hot. So simple, but it always turns out perfectly.

*For 1 dozen wings, I used 1/2 cup of butter and 1/2 cup of Red Hot.


Now for the fried wings: I just dropped the wings into the basket in my fryer (pre-heated to 350 degrees).


Send them for an 8-10 minute dip in the hot tub.


Then remove the perfectly crispy wings. Drain on paper towels, sprinkle with a little salt, and toss with sauce.

*To sauce, I like to put the wings in a plastic container filled with sauce, top with a lid, and shake the container until the wings are coated.


The verdict:

Side by side on the serving plate you can't tell the difference between baked and fried. Despite the fact that the baked wings were boiled with spices, there was no discernible difference in taste, either. But the texture...well, here's where the fried wings had the edge. Both preparation methods yielded a crispy outside, but the meat of the baked wings was a bit chewier-slightly rubbery, even. Not so much that it was repulsive, but enough that I definitely preferred the fried wings to the baked. And so, THE WINNER: the fried wings! That said, if you're really trying to cut fried food out of your diet...and you've got a hankerin' for hot wings, the Unbelievable Baked Buffalo Wings would be a good substitute. But me, I'd skip lunch just to splurge on the fried wings!

YUM!


And now, for a meal plan!

Monday February 7th

Stewed Garlicky Sausage and Peppers

Tuesday February 8th

Duck Fajitas

Wednesday February 9th

Zippy Chicken Soup

Thursday February 10th

Leftovers

Friday February 11th

Chicago Deep-Dish Pizza

Saturday February 12th

Saturday night appetizer: Spinach in Onion Shells

Sunday February 13th

Brunch: Croque-Madame Casserole


Grocery List

Produce
3 large onions
1 large "flat" sweet onion
1 red onion
3 green bell peppers
2 red bell peppers
1 yellow bell pepper
garlic
avocado
cilantro
jalapeno pepper
basil
mushrooms

Meat
1-3/4 lbs. sweet or hot Italian sausage
4- 6 oz. boneless, skinless duck breast filets
1/2 lb. boneless, skinless chicken breast
6 oz. turkey or chicken Italian sausage
8 oz. deli ham

Dairy
sour cream
shredded Mexican blend cheese
8 oz. mozzarella
Parmesan cheese
cream cheese
7 eggs
milk
butter
6 oz. shredded Gruyere cheese

Dry Goods
oregano
red pepper flakes
12- 6 in. flour tortillas
cumin
chili powder
cayenne pepper
cornstarch
tortilla chips
sugar
1 package active dry yeast
cornmeal
crushed rosemary
garlic salt
1/2 cup soft bread crumbs
10 slices white bread
nutmeg
flour

Canned Goods
olive oil
vegetable oil
tomato paste
14 oz. can diced tomatoes
dry white wine
salsa
32 oz. reduced sodium chicken broth
1 can black beans
1 can diced tomatoes with green chilies
28 oz. can whole tomatoes

Freezer
2 cups whole kernel corn
10 oz. package chopped spinach

PRINT IT! For a printable copy of this meal plan AND grocery list click HERE!

Thursday, February 3, 2011

Roasted Duck Sandwiches on Ciabatta


Some people think of duck as a "fancy" dinner, but in our house, it's the basis for a number of easy weeknight meals. Nothing pretentious- we grill it, stir-fry it, pile it on tacos, and for the purpose of dinner this past Tuesday, make it into sandwiches. My daughters call it "duck steak" and gobble it up without complaint. Duck Steak is a good way to describe duck breast, because it eats like a steak. The White Pekin Duck yields a gloriously flavorful and tender red meat, but per 3 oz. portion, it has 7 grams less fat than a trimmed filet mignon and 55 less calories! Not only is duck leaner than beef, a skinless duck breast has less fat and calories than a skinless chicken breast. No joke!

I found this recipe for Roasted Garlic Duck Sandwiches in the Maple Leaf Farms "Meals to Remember" cookbook. Maple Leaf Farms is where I get all of my duck. They provide such a quality product! If you're interested in trying duck for the first time OR if you're shopping because you love duck as much as we do, I bet you can find MLF duck in a supermarket near you. If not...you can buy online. Check out their consumer website HERE. There are lots of tips and recipes on the site too!

To begin, just preheat your oven to 375 degrees. Then, score the fat on the duck breast. For an indepth tutorial on how to score a duck breast and render the fat, you can check out THIS VIDEO about how to cook a duck breast on the MLF website.


Place the duck breast in a skillet, skin side down in a skillet heated over medium heat. Cook for 8 minutes or until the skin is crisp and golden.


My skillet got a little hot, charring the skin. No biggie...I was going to discard the skin anyhow. The meat was still a-okay, when I sliced up the meat for the sandwiches.


After 8 minutes, turn the breasts and cook for another 3 minutes, then transfer the skillet to your pre-heated oven and bake for another 8-10 minutes or until the internal temperature of the meat reaches 155 degrees. Remove from the oven and let cool for 10-15 minutes.

While the duck cools you can ready the sandwich. I went with a loaf of ciabatta bread, sliced in half and then cut to size for these sandwiches. Italian bread or any type of sandwich rolls would work well here too.


Gather the remaining ingredients: mayonnaise and stone ground mustard, tomato, salad greens, and red onion.


Stir 2 tablespoons each of mayo and mustard together to spread on the bread.


Remove the skin and cut the duck into thin slices.


Arrange the duck slices on the mayo-mustard spread bread.


Top with onion,


and tomato. This Heirloom tomato (picked up at my local supermarket) was the best tomato I've eaten in months. Just look how red and juicy!


Finally, heap on some salad greens.


Spectacular! While my husband and I enjoyed the duck sandwiches, our daughters shared a plate of cut- up duck breast, grapes, and ciabatta cubes, with a side of olive oil for dipping. No leftovers on this night!


Roasted Duck Sandwiches from Maple Leaf Farms Meals to Remember cookbook and adapted by me

2- 7.5 oz. marinated boneless duck breast fillets, thawed if frozen
2 tablespoons stone-ground mustard
2 tablespoons mayonnaise (I used light)
1/2 frisee or gourmet salad greens
4 slices Italian or rustic bread (I used ciabatta)
Red onion and tomato, sliced

Heat oven to 375 degrees. Score the skin of the duck breast, taking care not to puncture the meat. Heat an ovenproof skillet over medium heat until hot. Place duck in skillet, skin side down. Cook 8 minutes or until skin is crisp and golden brown. Turn duck; continue cooking 3 minutes. Pour off drippings. Transfer skillet to pre-heated oven and bake for 8-10 minutes or until the internal temperature of the duck reaches 155 degrees. Transfer duck to a carving board and let stand for 10-15 minutes. Remove skin and cut duck lengthwise into thin slices.

Combine mustard and mayonnaise in a small bowl. Spread mixture over bread. Arrange slices of duck over the bread. Top with red onion and tomato slices and salad greens or frisee. Close with remaining bread. Serve immediately or wrap in foil and refrigerate until serving time. Makes 2 servings.

Tuesday, February 1, 2011

Cilantro Noodles, Moving Update AND a Meal Plan (Sort Of)


Finally, a dinner cooked in my new kitchen! Granted, it was dinner for 1.  Just me.

It's been nearly a month since my last "big" shopping trip. We've had a lot of quick runs to the store for milk and bread and all of the convenience and junk food that have fueled this cleaning, painting, packing, moving effort but yesterday it was time to pick up some "real" food-  kitchen staples and ingredients for the meals I have planned for the next two weeks. While it was difficult to lose a day of work on the new house as I shopped and put everything away, it does feel good to have a "stocked" pantry and fridge again.

By the time that I had finished shopping at the second store last night (it always takes longer when you are learning a new store, doesn't it?), it was past dinner-time. My daughters claimed that they were "starving" and couldn't go another minute without food. They begged for a drive-thru. At first, I tried to to talk them out of fast food. You see, when I set out for the store, I had planned to provide a home-cooked dinner (FINALLY!) with the newly purchased groceries. We've eaten far too much fast food during this move... But, reality was setting in. The idea of driving home, unloading the groceries, and THEN cooking dinner before wading into the bedtime hour was more than daunting.

And so, I caved. It certainly helped their case that they were growing crankier by the minute and the whining that resulted from this cranky-hungry-tired combination was grating against my very last nerve. This impending severance of the last nerve was also being accelerated by the to-do list running through my mind. The very to-do list that was on hold for the moment to allow for the surprisingly lengthy grocery shopping trip. Addressing the whining was distracting me from said "to-do" list.  In this moment, after waiting in the long grocery lines and now sitting in rush hour traffic with tired, hungry children, I didn't want to be distracted. Not even a little bit. I was suddenly aware of my fingernails digging into the steering wheel and my knuckles growing white from the pressure I had unconsciously asserted on the poor, faultless navigational device. Fortunately, I happen to understand that this famed last nerve can make me meaner than a wet hen if it snaps. I mean, things can get UGLY. I knew that I was about to become a real "jerk" and possible a poor role model to my children. I didn't desire to be a jerk any more than I desired to be distracted from my extensive mental to-do list. And soo, my kiddos soon found themselves happily devouring Arby's in the backseat haven of our mini-van and watching a Scooby Doo DVD on the glorious pull-down LCD screen as I inched toward home, braving the traffic and relishing the peace in my cluttered cockpit.

While the girls were giddy about another round of fast food, I couldn't stand that thought of another paper or foil wrapped dinner. Then I remembered THIS Cilantro Noodle recipe that I'd seen at Noble Pig. A quick, comforting bowl of noodles turned out to be just what the doctor ordered for my rumbling tummy and damaged last nerve. After I'd put away the groceries and sent the kiddos upstairs to change into their p.j.'s, I gathered the minimal ingredients needed to create this easy bowl of noodles: Ramen noodles, canola and sesame oils, soy sauce, shallot, and cilantro.


You may notice that there is joint compound smeared along the wall on the left-hand side of the above ingredient picture. This stuff is everywhere in the new house! Lots of holes and cracks that needed to be filled, sanded down, and finally painted over. I have been doing a ton of "spackling" and painting lately.


Speaking of which, sometime last week I arrived at the conclusion that spackling a wall is not un-like attempting to make the icing perfectly smooth on a birthday cake. So while I haven't been cooking or baking lately, I HAVE been brushing up on my kitchen skills!

Here's another realization for all of you DIYers: Having a radio or iPod in your possession while smoothing on joint compound or even painting for hours on end is equally as essential as any of the fancy equipment you may purchase at the home improvement store. In my opinion, "The Sound of Silence" is a dreadful soundtrack for extensive home renovation. Too much quiet time when rushing to bring the walls of your home up to par before the movers place your furniture lends itself to either being consumed by the to-do list in your mind OR WORSE, 3 nights into your project, you might find yourself sitting up straight in your bed in the wee hours, drenched in a cold sweat and gasping for breath with the ominous sound of a 3/8" contractor grade paint roller smacking color onto your walls echoing in your ears. Not that this happened to me, of course. I'm just saying that it could happen.

While I'm sharing my realizations, here's one more: Over the weekend, it occurred to me that the last time I purchased and painted a house, I was 25. That's 9 years younger than I am now (my 34th birthday is tomorrow). Back then I didn't have 2 children. That house was a little ranch on a slab and brand-spanking-new. NOW there are 4 of us, with so much more "stuff" to move. This house is much bigger, older (a very charming 73 years old), and in need of a bit of TLC. No wonder I feel as if I've been run over by a truck at the end of each day!

Okay, enough with these "realizations" and back to the Cilantro Noodles...

They were easy to prepare....just boil ramen noodles for 3 minutes, then rinse with cold water and drain.

I wish I had known about this recipe in college when I was just eating them with the included flavor packet stirred in!


Heat up the canola and sesame oils in a saucepan or skillet (I used the saucepan that I cooked the noodles in so that I didn't have to wash an extra pan), then add some finely chopped shallot and saute for a minute or two until tender. Don't walk away from the stove during this step! Shallots have a tendency to burn quickly and then you'll have to start all over, diminishing one of the qualities that I loved about this recipe: It's speedy. Like, dinner-in-10-minutes speedy!


Okay, now deglaze the pan with soy sauce.


And toss in the noodles and cilantro.


And that's it!


Mmm. Dinner! These noodles were perfect for a quick dinner, but they would also make an excellent side dish. For the recipe click HERE. I should note that I followed the sauce recipe exactly, using the recommended amounts of oils, shallots, soy sauce, and cilantro BUT I only added ONE package of ramen rather than the recommended 3 packages. So, if you decide to make this for your family, I'd recommend tripling the sauce ingredients provided in the recipe.


These almost made me forget about my to-do list.

Almost.

But there are still lots of boxes to unpack. Our whole garage is full of boxes right now!


And then, there is the painting. We'll probably pick a painting project every weekend for a while and then save a few for the summer.

AND there are more repairs to make. On the day we moved in, a contractor found a huge block of ice inside of our family room wall. (Yes, we had an inspection. No, the inspector did not catch this problem.) It turns out that the new roof installed by the previous owners was missing some necessary sheathing, which created a lack of water drainage. When the water froze this winter, the shingles were pushed up, allowing water to leak into the wall.  The water that was leaking down eventually froze, creating an ice dam inside of the wall. 

Now, we could leave the ice inside of the wall and pretend that everything is fine, ignoring the signs of impending doom (loose drywall tape and water marks down the wall)...but in the Spring, disaster would be imminent. Better to deal with the problem now with a more "controlled" melt. And so, as the ice melted, a steady stream of water ran down into the house, bubbling the dry wall and creating an overall mess. Ugh. More spackle and paint...plus a roof repair. Oh the joys of home ownership! A large part of last Sunday morning was spent with my husband on the roof and me handing him tools through an open bathroom window in an attempt to keep the roof de-iced. Fun times.

But still, it's all good. We love this house. Really and truly. It already feels like home.

On a positive note, I want to brag a little before I wrap up the moving update. The kiddos have been VERY patient through this process. Here's a pic that I snapped on one of our workdays. No furniture in the house, just a couple of bean bag chairs and mommy's laptop for movies. Now that's the life!


So, that's the story behind where I have been and how the move to the new place is going. Thanks for hanging in there while I've been away and for sticking with me as I whined and complained through this post. I DO realize how blessed we are to be able to purchase and fix up a home and raise our children here. And I want to add that we haven't done this all on our own. We are very thankful for all of our family members and friends who have shown up to help. Yep. Definitely feeling grateful as I sit here on my cozy couch, looking into my new kitchen...our babies nestled snugly in their new rooms, safe and warm from this nasty winter storm that is currently pelting ice against the windows. Definitely.  

And now, an attempt to return to normalcy. While most everything is still boxed up in our garage, this kitchen is up and running! I've got meals planned! I've got groceries! I've got ample space to work! Hooray!

Nothing specific with this meal plan. No grocery list for the week. Although, I promise to have the grocery list up again next week. But what I DO have is a list of recipes that I will be posting in the coming days.

Here goes:

Roasted Garlic Duck Sandwiches

Duck Fajitas (because I thawed too much duck)

Stewed Italian Sausage with Peppers

Croque Madame Casserole


I hope that all of you are having a good week and staying warm and safe in this weather!
Related Posts with Thumbnails