Tuesday, February 1, 2011

Cilantro Noodles, Moving Update AND a Meal Plan (Sort Of)


Finally, a dinner cooked in my new kitchen! Granted, it was dinner for 1.  Just me.

It's been nearly a month since my last "big" shopping trip. We've had a lot of quick runs to the store for milk and bread and all of the convenience and junk food that have fueled this cleaning, painting, packing, moving effort but yesterday it was time to pick up some "real" food-  kitchen staples and ingredients for the meals I have planned for the next two weeks. While it was difficult to lose a day of work on the new house as I shopped and put everything away, it does feel good to have a "stocked" pantry and fridge again.

By the time that I had finished shopping at the second store last night (it always takes longer when you are learning a new store, doesn't it?), it was past dinner-time. My daughters claimed that they were "starving" and couldn't go another minute without food. They begged for a drive-thru. At first, I tried to to talk them out of fast food. You see, when I set out for the store, I had planned to provide a home-cooked dinner (FINALLY!) with the newly purchased groceries. We've eaten far too much fast food during this move... But, reality was setting in. The idea of driving home, unloading the groceries, and THEN cooking dinner before wading into the bedtime hour was more than daunting.

And so, I caved. It certainly helped their case that they were growing crankier by the minute and the whining that resulted from this cranky-hungry-tired combination was grating against my very last nerve. This impending severance of the last nerve was also being accelerated by the to-do list running through my mind. The very to-do list that was on hold for the moment to allow for the surprisingly lengthy grocery shopping trip. Addressing the whining was distracting me from said "to-do" list.  In this moment, after waiting in the long grocery lines and now sitting in rush hour traffic with tired, hungry children, I didn't want to be distracted. Not even a little bit. I was suddenly aware of my fingernails digging into the steering wheel and my knuckles growing white from the pressure I had unconsciously asserted on the poor, faultless navigational device. Fortunately, I happen to understand that this famed last nerve can make me meaner than a wet hen if it snaps. I mean, things can get UGLY. I knew that I was about to become a real "jerk" and possible a poor role model to my children. I didn't desire to be a jerk any more than I desired to be distracted from my extensive mental to-do list. And soo, my kiddos soon found themselves happily devouring Arby's in the backseat haven of our mini-van and watching a Scooby Doo DVD on the glorious pull-down LCD screen as I inched toward home, braving the traffic and relishing the peace in my cluttered cockpit.

While the girls were giddy about another round of fast food, I couldn't stand that thought of another paper or foil wrapped dinner. Then I remembered THIS Cilantro Noodle recipe that I'd seen at Noble Pig. A quick, comforting bowl of noodles turned out to be just what the doctor ordered for my rumbling tummy and damaged last nerve. After I'd put away the groceries and sent the kiddos upstairs to change into their p.j.'s, I gathered the minimal ingredients needed to create this easy bowl of noodles: Ramen noodles, canola and sesame oils, soy sauce, shallot, and cilantro.


You may notice that there is joint compound smeared along the wall on the left-hand side of the above ingredient picture. This stuff is everywhere in the new house! Lots of holes and cracks that needed to be filled, sanded down, and finally painted over. I have been doing a ton of "spackling" and painting lately.


Speaking of which, sometime last week I arrived at the conclusion that spackling a wall is not un-like attempting to make the icing perfectly smooth on a birthday cake. So while I haven't been cooking or baking lately, I HAVE been brushing up on my kitchen skills!

Here's another realization for all of you DIYers: Having a radio or iPod in your possession while smoothing on joint compound or even painting for hours on end is equally as essential as any of the fancy equipment you may purchase at the home improvement store. In my opinion, "The Sound of Silence" is a dreadful soundtrack for extensive home renovation. Too much quiet time when rushing to bring the walls of your home up to par before the movers place your furniture lends itself to either being consumed by the to-do list in your mind OR WORSE, 3 nights into your project, you might find yourself sitting up straight in your bed in the wee hours, drenched in a cold sweat and gasping for breath with the ominous sound of a 3/8" contractor grade paint roller smacking color onto your walls echoing in your ears. Not that this happened to me, of course. I'm just saying that it could happen.

While I'm sharing my realizations, here's one more: Over the weekend, it occurred to me that the last time I purchased and painted a house, I was 25. That's 9 years younger than I am now (my 34th birthday is tomorrow). Back then I didn't have 2 children. That house was a little ranch on a slab and brand-spanking-new. NOW there are 4 of us, with so much more "stuff" to move. This house is much bigger, older (a very charming 73 years old), and in need of a bit of TLC. No wonder I feel as if I've been run over by a truck at the end of each day!

Okay, enough with these "realizations" and back to the Cilantro Noodles...

They were easy to prepare....just boil ramen noodles for 3 minutes, then rinse with cold water and drain.

I wish I had known about this recipe in college when I was just eating them with the included flavor packet stirred in!


Heat up the canola and sesame oils in a saucepan or skillet (I used the saucepan that I cooked the noodles in so that I didn't have to wash an extra pan), then add some finely chopped shallot and saute for a minute or two until tender. Don't walk away from the stove during this step! Shallots have a tendency to burn quickly and then you'll have to start all over, diminishing one of the qualities that I loved about this recipe: It's speedy. Like, dinner-in-10-minutes speedy!


Okay, now deglaze the pan with soy sauce.


And toss in the noodles and cilantro.


And that's it!


Mmm. Dinner! These noodles were perfect for a quick dinner, but they would also make an excellent side dish. For the recipe click HERE. I should note that I followed the sauce recipe exactly, using the recommended amounts of oils, shallots, soy sauce, and cilantro BUT I only added ONE package of ramen rather than the recommended 3 packages. So, if you decide to make this for your family, I'd recommend tripling the sauce ingredients provided in the recipe.


These almost made me forget about my to-do list.

Almost.

But there are still lots of boxes to unpack. Our whole garage is full of boxes right now!


And then, there is the painting. We'll probably pick a painting project every weekend for a while and then save a few for the summer.

AND there are more repairs to make. On the day we moved in, a contractor found a huge block of ice inside of our family room wall. (Yes, we had an inspection. No, the inspector did not catch this problem.) It turns out that the new roof installed by the previous owners was missing some necessary sheathing, which created a lack of water drainage. When the water froze this winter, the shingles were pushed up, allowing water to leak into the wall.  The water that was leaking down eventually froze, creating an ice dam inside of the wall. 

Now, we could leave the ice inside of the wall and pretend that everything is fine, ignoring the signs of impending doom (loose drywall tape and water marks down the wall)...but in the Spring, disaster would be imminent. Better to deal with the problem now with a more "controlled" melt. And so, as the ice melted, a steady stream of water ran down into the house, bubbling the dry wall and creating an overall mess. Ugh. More spackle and paint...plus a roof repair. Oh the joys of home ownership! A large part of last Sunday morning was spent with my husband on the roof and me handing him tools through an open bathroom window in an attempt to keep the roof de-iced. Fun times.

But still, it's all good. We love this house. Really and truly. It already feels like home.

On a positive note, I want to brag a little before I wrap up the moving update. The kiddos have been VERY patient through this process. Here's a pic that I snapped on one of our workdays. No furniture in the house, just a couple of bean bag chairs and mommy's laptop for movies. Now that's the life!


So, that's the story behind where I have been and how the move to the new place is going. Thanks for hanging in there while I've been away and for sticking with me as I whined and complained through this post. I DO realize how blessed we are to be able to purchase and fix up a home and raise our children here. And I want to add that we haven't done this all on our own. We are very thankful for all of our family members and friends who have shown up to help. Yep. Definitely feeling grateful as I sit here on my cozy couch, looking into my new kitchen...our babies nestled snugly in their new rooms, safe and warm from this nasty winter storm that is currently pelting ice against the windows. Definitely.  

And now, an attempt to return to normalcy. While most everything is still boxed up in our garage, this kitchen is up and running! I've got meals planned! I've got groceries! I've got ample space to work! Hooray!

Nothing specific with this meal plan. No grocery list for the week. Although, I promise to have the grocery list up again next week. But what I DO have is a list of recipes that I will be posting in the coming days.

Here goes:

Roasted Garlic Duck Sandwiches

Duck Fajitas (because I thawed too much duck)

Stewed Italian Sausage with Peppers

Croque Madame Casserole


I hope that all of you are having a good week and staying warm and safe in this weather!

Wednesday, January 19, 2011

Disappearing Act...

I've been away from my kitchen lately. Too busy to cook and certainly no time to blog! Anyone want to guess what I've been up to?


That's right!

I've been PAINTING...and cleaning....and packing. Last Friday we got the keys to our new house! We spent the weekend doing some repairs, priming, painting, and scrubbing.

Check out the new kitchen! (I should note that these were taken before the previous owners moved out. This is their furniture and "stuff" in the pics)


I'm gonna do some serious damage in here! With all of the room to move around and the increased work space...it makes me want to do a little "happy dance" every time I look at it. I'm sure that this exuberance may wear off once I start cleaning and polishing all of this extra space...

Here's the view into the family room from the kitchen. Please pardon the photo, this one came from a real estate site advertising the home.


I'm diggin' the countertops!


So that's where I have been. We will be moved completely in less than 2 weeks so I'll be pretty busy making preparations this week and next. Plus, I have to pack up and then UN-pack my whole kitchen. YIKES! Until we get settled in, my crock pot is my new best friend. Well, my crock pot AND the Chinese take out place on the corner! I'll try to pop in with a post from time to time as I am able, but the meal plans are going on hold until February. If you're looking for ideas, just click the Meal Planning icon in my right sidebar and you'll have access to lots of previous meal plans featured on this blog.

Hope you are all having a great week!

Friday, January 14, 2011

BBQ Bacon Ranch Chicken Salad Wraps...Or A Dip!


Yesterday's post featured a delicious oven-roasted chicken. I love a roast chicken for the fact that it can be stretched into 2 (or even 3) dinners. This chicken salad would be a perfect way to use up leftover roast chicken. Although, I have to confess, the chicken used in this wrap was actually the by-product of one of my split chicken breast  processing sessions. From time to time I find split chicken breast halves on sale at my local market for as little as $.88/lb. When this happens, I purchase up to 20 lbs. and then spend an afternoon in my kitchen cutting the halves into meal-ready, boneless, skinless breast fillets for the freezer and boiling the "carcasses" into broth (recipe HERE) for future soups and sauces. I then pick the remaining meat off of the bone for chicken salad, soup, or casseroles. The 2 cups of chicken used for this chicken salad was the meat that I picked off of the bone during a Christmas break chicken processing session. You can read more about how I turned 18 lbs of chicken into 10 convenient meals HERE. It's a great way to save time (in the long run) and money!

I enjoy a good chicken salad and I am often on a quest for a great wrap "sandwich". As lunchtime rolled around one day during Christmas break, I found myself tired of leftovers, Lean Cuisine, ramen noodles, Mac n' Cheese, freezer pizza, cold cut sandwiches, and canned soup. I wanted something different and delicious. And so, I swept aside the LEGO'S and puzzles that had arrived on our little kitchen table sometime after breakfast and started hauling out the contents of my fridge to inventory and analyze for their "wrap worthiness".

First out, the chicken picked off the bone from the evening before. Second out, tortillas leftover from our most recent family "Taco Night". From there the other ingredients just fell into place: 1/4 of a leftover sweet red pepper, green onion, cilantro, shredded cheese, leftover fried bacon, ranch dressing, and barbecue sauce.

Do you do this? Pull out the contents of your fridge and get creative? The "stuff" that I need to use up is often the inspiration for a sandwich, pasta dish, or casserole. If you don't (yet), don't be afraid to get creative with your leftovers or produce that's "on it's way out"...give this a try sometime. Let your creativity flow! You may be surprised what you come up with. Waste not, want not!


After a bit of chopping, I combined the chicken, bacon, red pepper, and green onion.


Then I added the cheese, ranch dressing, and barbecue sauce. Stir it all together and scoop 1/3 to 1/2 cupful onto warmed flour tortillas (or the wrap of your choice). Top with a handful of cilantro.

Stir it all together and scoop 1/3 to 1/2 cupful onto warmed flour tortillas (or the wrap of your choice). Top with a handful of cilantro.


Now roll it up and enjoy!


As much as I enjoyed the wrap, while I was eating my lunch I began to wonder how this filling would taste warmed up. I kept thinking of the Frank's Red Hot Buffalo Chicken Dip that I like so much. And so, I heated a cup up in the microwave and sprinkled it with more cheese for a tortilla chip dip. Um....YUM! It was awesome warmed up, maybe even better!
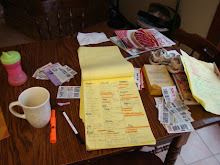
I had to leave for the evening, but on the way out I told my husband to warm the "dip" in the fridge for dinner. It was a HUGE hit with him too!

You could warm this dip in the microwave or put it into a casserole dish and bake it at 350 degrees for 20 minutes or until heated through.


BBQ Bacon Ranch Chicken Salad Wraps OR BBQ Bacon Ranch Chicken Dip

2 cups shredded white meat chicken
4 slices bacon, fried until crisp and crumbled
1/4 cup sweet red pepper, finely chopped
2 green onions, sliced
1/3 cup ranch dressing
1/3 cup barbecue sauce
1/2 cup shredded cheddar, Monterrey Jack, or Mexican Blend cheese
1 bunch cilantro
6 flour tortillas, warmed

Wraps:
Combine first 7 ingredients. Put 1/3 cup of mixture on each tortilla. Top with cilantro. Roll up, then slice in half before serving.

Dip:
Combine first 7 ingredients. Sprinkle with additional cheese. Heat in microwave or bake at 350 for 20 minutes or until heated through. Sprinkle with chopped cilantro. Serve with tortilla crisps for dipping.

* Ideas for other stir-ins: black beans, chopped green chilies, or  fresh corn.

Wednesday, January 12, 2011

Balsamic Roast Chicken with Red Onion Sauce


I'm a big fan of roasting a whole chicken. It's a delicious meal that requires little preparation and depending on how many people sit around your dinner table, the leftovers can be stretched into another meal or two. Plus, a whole bird is pretty inexpensive. I think that I paid just a little over $4 for this chicken at my local Super Kmart.

I was so pleased with this Balsamic Roast Chicken. It's easily the best roast chicken I have ever prepared! It didn't really surprise me that I enjoyed this chicken so much. My husband and I love these flavors and often make a snack of rosemary focaccia bread dipped in balsamic vinegar and olive oil. What did surprise me was how much my kids loved this (minus the onion sauce). They both asked for seconds!

So succulent and flavorful, and the balsamic-onion sauce to finish was amazing!

I decided to begin by brining my chicken. I highly recommend brining! Including this step will lend itself to a more juicy, tasty, roast chicken. My brine recipe is included below, but basically I just boiled water with salt and a little sugar to dissolve the crystals. Then I cooled the brine to around 40 degrees and dropped my chicken in for the day. You could make the brine the night before and drop the chicken in the next morning before leaving for work, or you could just brine the chicken overnight. I think mine soaked for about 6 hours today.


A little over 2 hours before dinner time, I prepared a nice little bed of chopped red onion for my chicken. Just chop an onion and spread it around the bottom of a roasting dish. (I just used my Pyrex casserole dish).


Then I combined a little dry red wine, a little broth, and some balsamic vinegar.


Really, I meant to season the bird, place it on the onions and then pour the balsamic vinegar mix over the top. But I was distracted (by certain little people begging and pleading their case to spoil dinner with animal crackers and chocolate covered pretzels ) and so I ended up pouring the red wine/vinegar mixture right onto the onions. No problem though, when the time came, I just rolled the chicken around in the onion and vinegar-wine mixture so that it got a nice little coat.


To season the chicken, just mix together some minced garlic, rosemary, salt, pepper, and olive oil (the oil allows for easier spreading).


Remove the chicken from the brine and pat dry. Then, rub the garlic-rosemary mixture under the skin before placing the chicken onto the prepared bed of onions.


Pop that bird into the oven and bake for 2 hours (or until a meat thermometer reads 180 degrees), basting with the pan juices a couple of times. This chicken emerged from the oven with a gorgeous brown skin, and the whole house smelled SO good! I couldn't wait to carve it!


While the chicken rests for about 15 minutes, transfer the pan juices into a bowl. As you can see from the picture, you'll want to skim off some of the fat...


leaving you with a rich, mouth-watering sauce to serve over the chicken.


The chicken was wonderful all on it's own with the flavors of the garlic and rosemary and all juicy from the brine, but that sauce just put it over the top! I mean it...this is the best roast chicken I have ever made! Loved it!


Balsamic Roast Chicken with Red Onion Sauce
inspired by this recipe from Healthy Cooking magazine, featured in the Aug/Sept 2010 issue

For Brine:

1 gallon water
1 cup kosher salt
1/4 cup granulated sugar

1 roasting chicken (6 to 7 pounds)
2 tablespoons minced fresh rosemary or 2 teaspoons dried rosemary, crushed
4 garlic cloves, minced
1-2 tablespoons olive oil
1 teaspoon salt
1 teaspoon pepper
1 large red onion, chopped
1/4 cup dry red wine
1/4 cup reduced-sodium chicken broth
1/2 cup balsamic vinegar

Directions

Boil salt and sugar in water until dissolved for brine. Cool to 40 degrees. Cover chicken with brine and refrigerate for at least 6 hours.

Remove chicken from brine. Pat dry. In a small bowl, combine the rosemary, garlic, salt, pepper and olive oil; rub under skin of chicken. Place onion in a shallow roasting pan; top with chicken. Combine wine and balsamic vinegar; pour over chicken.

Bake, uncovered, at 350° for 2 to 2-3/4 hours or until a meat thermometer reads 180°, basting occasionally with pan juices. (Cover loosely with foil if chicken browns too quickly.)

Let stand for 15 minutes before carving. Remove and discard skin before serving. Pour onion sauce into a small bowl; skim fat. Serve with chicken. Yield: 12 servings (1-1/2 cups onion sauce).

Nutrition Facts: 3 ounces cooked chicken with 2 tablespoons onion sauce equals 182 calories, 7 g fat (2 g saturated fat), 77 mg cholesterol, 4 g carbohydrate, trace fiber, 25 g protein. Diabetic Exchange: 4 lean meat.

Tuesday, January 11, 2011

Crispy Orange Beef


This spicy, flavorful beef recipe is the perfect way to chase away the chill brought on by our latest snowstorm. Certainly hearty, it's a great way to warm up and fill your belly following an evening of shovelling or sledding. I found this recipe on Diana's Cocina, where "The belly rules the mind". I've ordered Orange Beef at Chinese restaurants in the past, so I can say with some authority that this recipe is an excellent knock-off. It's definitely going into my "Chinese Takeout At Home" file. Sure, making these takeout recipes at home does eliminate the convenience of calling in an order and picking it up at your local strip mall Chinese joint, but this way YOU can control the quality of ingredients used and pat yourself on the back with the sense of accomplishment that comes with making it yourself!

This recipe begins with a BIG chunk o' beef. 3 pounds! It called for flank steak, but I had a round steak in my freezer, so I used that. Round steak is usually better slow cooked to yield a tender product, but I found that when sliced very thin, against the grain, the round steak worked great for this recipe.


Slice all 3 lbs. into thin, bite-sized strips.


Then thoroughly toss with 1/3 cup of cornstarch. I transferred mine into a large dish to stir in the cornstarch so that the beef and cornstarch had plenty of room to combine and didn't "slop" over the sides. Cover and rrefrigerate for 30 minutes.


Now to make that beef "crispy"! With the exception of a hamburger, I don't think I have ever fried beef. It certainly was effective in achieving a crispy texture.

Heat 1/2 to 3/4 cup of cooking oil (I used canola) in a large heavy skillet or a wok. Add the beef, in batches, and fry for 3 or more minutes until browned. I recommend stirring the beef as it fries for even browning.


Drain on paper towels.


Now let's take a couple of steps back. While the beef and cornstarch chilled, before I fried it to a nice brown crisp, I also prepared the orange peel and chopped the green onions.

For the orange peel, just remove the skin from 1-2 oranges (you need enough peel for 1/4 cup chopped, plus some for garnish). Remove the pith from the orange peel. The pith is the puffy white part between the peel and the orange slices. It tends to be bitter. To remove the pith, I just laid the orange peel pieces on my cutting board, face down, flattened them as much as possible, and then held my knife flat and parallel to the peel and applied pressure as I made a back and forth motion with my knife as I moved it across the inside surface of the orange peel. If you've ever filleted at fish, this felt much the same.


Finely chop the peel.


Drain all but 2 tablespoons of oil from the skillet that you used to brown the beef and add in garlic, ginger, orange peel, and scallions. Stir fry for about 5 minutes.


To make the sauce, combine soy sauce, rice vinegar, hoisin sauce, honey, sesame oil, red pepper flakes, and water.


Return the fried beef to the skillet with the garlic, ginger, orange peel, etc. and toss to coat. Then pour on the sauce and cook over medium high heat until the sauce thickens.


While I was busy stir-frying at the stove, my kindergartner was busy creating abstract art from the orange and onion scraps. This funny face made me laugh.


Serve the Crispy Orange Beef over hot rice and garnish with orange peel and additional scallions.

I loved this! Definitely on the spicy side with 2 teaspoons of red pepper flakes in there, though. If you've got a cold, this is a great way to clear out the ol' sinuses! Way to spicy for the kiddos though, so they ate plain strips of fried beef that I had reserved before adding it back into the mix, plain rice, and some steamed broccoli for dinner instead. Speaking of broccoli...I think that would be good stirred into this Orange Beef too!


Here's the recipe, adapted from Diana's Cocina

Crispy Orange Beef

3 pounds flank steak, boneless sirloin, or round steak, cut into thin strips
1∕3 cup cornstarch
1/3 cup tablespoons tamari or soy sauce
2 tablespoons rice vinegar
2 tablespoons hoisin sauce
2 tablespoons honey
3 teaspoons toasted sesame oil
2 teaspoon red pepper flakes (adjust to taste)
1∕2 cup water
1/2 - 3/4 cup cooking oil
8 garlic cloves, minced
2 tablespoons grated fresh ginger
1∕4 cup minced orange peel, pith removed
8 scallions, white and green parts, thinly sliced
steamed rice, for serving
orange peel, thinly sliced, for garnish

Toss beef with cornstarch to evenly coat. Refrigerate for 30 minutes. In the meantime, in a small bowl, combine the soy sauce, tamari, hoisin sauce, honey, sesame oil, red pepper flakes, and water. Set aside.


In a wok or heavy skillet, heat the canola oil. Fry the beef, in batches, until browned, about 3 minutes each batch. Remove and let drain on paper towels.


Drain all but 2 tablespoons oil from the wok. Heat the oil over medium heat and add the garlic, ginger, orange peel, and scallions and stir-fry for 5 minutes. Add the beef and stir in the sauce. Raise the heat to medium-high and stir until sauce thickens. Serve over steamed rice with the orange slices on top.
Related Posts with Thumbnails