Tuesday, October 13, 2009

Creamy Potato Soup and Oven Baked Ham and Cheese Sandwiches


In celebration of the one year anniversary of this blog, I took yesterday off. Not really. Actually, yesterday I had out-of-town company, my daughter's "See My School Night", piles of laundry, bags to pack for our upcoming trip, a Halloween costume to sew (my daughter insists that she needs to model it for her grandmas while we're visiting...upping my deadline a bit), and prep work to do for the preschool snack (this week it's the letter "P", so we're making pumpkin cookies and pizzas on a cracker). If I were superhuman maybe I could've made time to blog...but alas, I am a mere mortal. By the way, if you haven't entered your name for my giveaway, it's not too late. I'm taking entries until Thursday night. You could be the winner!

Today I'm back and with temperatures dipping into the 30's, soup is in order! I was reading a recipe for Potage Parmentier (Potato and Leek Soup) by Julia Child on a blog that I follow, Always Order Dessert (excellent name and philosophy if you ask me!) I fell in love with the recipe, it reminded me of the potato soup that my mom used to make. Right away, I decided that I needed to make my own version of this comforting classic. Now if you're in the mood for a Cheesy Potato Soup or a Loaded Baked Potato Soup, just click these links. Those are really good too. Truthfully, my family prefers those. But me, I prefer a simplified version of potato soup...like mom used to make.

Ms. Child used bacon, but I used this smoked pork loin that I pulled from the freezer. It was leftover from my daughter's birthday party. Bacon, leftover ham, and deli ham would all work just fine here. I chopped up half of a pound and fried it up in my soup pot. Then I removed the pork and set it aside for later. I left the drippings to infuse some of that smoky flavor into the soup.


Into the drippings, I added another 2 tablespoons of butter, a chopped onion, and 2 minced cloves of garlic. Saute for a few minutes, until the onions are tender.


Then add in 2 lbs. of cubed potatoes. Saute and stir for another 10 minutes. I didn't have to stir this at all. I assigned the sous chef (my 5 year old) to all of the stirring. She also tried her hand at potato peeling. I know, such responsible parenting. I promise that I advised her on proper technique and closely supervised. Hey, she's gotta learn sometime, right? I learned early. She's such a quick study that now I can't wait to teach her how to wash the base boards and scrub tile grout. : )


Now pour in 8 cups of chicken broth. Low sodium may be a good idea here. After cooking it down, I found my soup to be a touch salty. Bring the soup to a boil, then reduce heat and continue boiling for 30 minutes. The liquid should be reduced by about 1/3 and the potatoes should be tender.


Now, remove 2/3 of the soup and process in a food processor. If you don't have a food processor, you can just mash the potatoes the old fashioned way, with your mixer or hand held potato masher.


Stir the processed potatoes back into the soup and add in the pork, bacon, or ham.


Stir 2 cups of milk (I used whole) into 1/3 cup of flour until smooth. Stir the milk/flour mixture into the soup and return to a low boil for a few minutes, stirring so that it doesn't stick to the bottom.


Salt and pepper to taste and serve garnished with fresh parsley. Just look at the goods here! Hearty, creamy, chunky, smoky...delicious!


Creamy Potato Soup

1/2 lb. of ham or bacon
1 onion, diced
2 cloves garlic, minced
2 lbs. potatoes, peeled and cubed
2 cups whole milk
8 cups chicken broth
1/3 cup flour
salt and pepper, to taste
fresh parsley, for garnish

In a large dutch oven or heavy-bottomed pot over medium heat, saute the bacon or ham pieces until crisp. Remove the pork and reserve, leaving the fat (drain half of the fat if using bacon) in the pot.

Add 2 tablespoons of butter and the onion to the bacon fat and saute for about 5 minutes until tender. Add the garlic and potato cubes and continue to saute in the pan for another 10 minutes, keeping an eye to make sure that the garlic doesn't burn.

Pour in the broth, then raise the heat to high and bring to a boil, partially covered, for 5 minutes. Lower the heat and let simmer for another 30 minutes or until the liquid has reduced by a 1/3 and the potatoes are fork tender.

Using an immersion blender, food processor, handheld mixer or by processing in batches in a stand-up blender, process 2/3 of the soup until smooth. Return processed potatoes to the soup in the pot. Stir in pork. Combine the milk with 1/3 cup of flour until smooth. Pour into the soup and bring to a lazy boil.

Salt and pepper to taste. Garnish with parsley and serve.


I served this soup with my favorite ham and cheese sandwich of all time. I can't believe that I haven't posted this recipe on here yet! These are a BIG deal. I remember mentioning them here before. I served them at my daughter's first birthday party last January. I make them for parties (they're excellent for your Super Bowl get togethers or New Year's Eve parties) or an easy weeknight dinner. They're one of my most requested recipes and my husband's brother craves them for the whole 5 hour drive to our house...so I always have them waiting. They freeze well. I usually make them in bulk, 48 at a time. My husband and I set up an assembly line and turn these babies out like hotcakes. Just give em' a try. I just know you'll join the fan club!


Oven Baked Ham and Cheese Sandwiches

1 1/2 cups softened butter
3/4 cup horseradish mustard
6 teaspoons poppy seeds
1/3 cup finely chopped onion
24 hamburger buns
24 slices Swiss or provolone cheese
5-6 lbs. shaved deli ham
24 squares aluminum foil

Combine the first 4 ingredients. Spread on the top and bottom of each bun. Assemble sandwich with ham and cheese. Wrap in foil. Bake at 300 degrees for 20-30 minutes, until center of sandwich is hot and cheese is melted.

Sunday, October 11, 2009

A GIVE AWAY...because it's my one year anniversary...and the meal plan, of course.

So I sat down just now to plan my three meals for this week. Only three because we're leaving on Thursday for our annual Fall pilgrimage to our Indiana homeland. Home sweet home. Every year, I take the girls back in October and spend half a week on my parent's Northern Indiana farm and another half a week at my husband's parents Central Indiana home so that the girls can do all of the fun fall things that we love to do, like visit the pumpkin patch and go apple picking with their grandparents and cousins. There is a hidden agenda here too...with all of those babysitters around I am free venture out and have coffee with an old friend or attend a football tailgate at my beloved Purdue University. Completely kid-free. Woo Hoo! Gotta love grandparents!

As I was saying, I was planning our next three meals by skimming back through the Krista's Kitchen archives to find quick and easy recipes that I'd like to make again. While paging down through the 303 posts that I've accumulated since I began writing this blog, I finally hit the very first one. The date caught my eye. I looked a little closer. "Is that right?!" I thought to myself. I grabbed for my cell phone to double check today's date. Oh my goodness! Tomorrow is the one year anniversary of Krista's Kitchen! Hello! I can hardly believe it. I really need to pay more attention to "these things". Hey, it's not like I forgot my wedding anniversary or a child's birthday...but this blog has become pretty important to me. For one whole year I've been posting my meal plans and recipes and taking pictures of most of the food that we eat. I definitely have to thank my family for their patience as I snap last minute pictures of dinner before we can all sit down together to eat. Looking back, my contribution to the blogosphere over the last year includes some of my favorite recipes, some kitchen tips and tricks, a weekly meal plan, and occasionally a semi-original idea.

Now let's look at what I've gained from one whole year of blogging about our family's meals. It's a good deal more than I ever imagined I might take away from blogging about food. I got into it because I thought it would be easier than returning phone calls or emails from friends and family requesting recipes or asking for cooking/meal planning advice. I thought, "I'll just put it all in one place and let them find it." It may be hard to believe, but when I first began Krista's Kitchen I'd only seen one other cooking blog, The Pioneer Woman Cooks. Maybe you've heard of it? Ree is one busy and talented lady and seeing her blog inspired me to start my very own. Little did I know, there's a whole world of food bloggers out there. I've enjoyed getting to know some of you. Reading about your lives and kitchen adventures. Drooling over your delicious creations. And I've enjoyed reading all of the supportive comments, compliments, and suggestions on each of my posts. I look forward to them every day. As a result of all of this I've improved upon my cooking skills, writing skills, and even my photography has gotten better (there was a lot of room for improvement). It makes me smile to look back on those first posts, the ones that only my family and closest friends were reading, and see how different they look from what I'm posting today.

Now that I've realized that tomorrow is my blogoversary, I know the drill. I need to give something away in celebration. Like when I was in grade school and took treats to the whole class on my birthday. But, what do I have that any of you might want? I was wracking my brain for a few minutes. I'm not ready to part with any of my cookbooks. I don't have an extra magazine subscription just sitting around. I wish that I had cute cupcake wrappers or a rare spice to offer, but I don't. And then it hit me. I do have something that you might not have.

I have a jar of grass-fed Indiana beef. Excellent in a variety of recipes, it cooks up perfectly tender and delicious every time.


I have home made, home canned, fresh-from-my-grandma's-garden salsa. You can specify hot or mild if you win.


I have these gorgeous Michigan Red Haven Peaches. Eat em' right out of the jar or transform them into cobbler, pie, muffins, or whatever makes you happy.


And finally, I have 1 pound of premium pecan halves.


I will package all of these items into one happy little care package, shipped directly to your address (Continental U.S. only please) if you are the winner of this prize.

How to enter:

1. Just leave a comment on this post stating your favorite post or recipe from
Krista's Kitchen.

2.For a second entry "follow me" and post a comment letting me know that you are now following me. If you're already a follower and you'd like to enter, just let me know in your comment and you automatically get an additional entry. Thanks for hanging with me. : )

3. For a third entry, mention and link back to this contest on your blog, facebook page, or tweet about it, then leave a comment here letting me know that you've linked to this post.

All entries must be in by 11 pm EST, this Thursday, October 15th. The winner will be selected in a random drawing and announced on Friday October 16th. Good luck everyone!

Oh shoot, I almost forgot the meal plan. With the distraction of figuring out prizes for the giveaway, I didn't have time to make a grocery list. It's getting awfully late here. So, here's what we're having for dinner this week....without the grocery list.

Monday, October 12th

Potato Soup
Oven baked Ham and Cheese Sandwiches

Tuesday, October 13th

Chili Pie

Wednesday October 14th

Spicy Tuna Linguine with Garlic and Pine Nuts

Have a wonderful week!

Friday, October 9, 2009

Buffalo Chicken Pizza


Here it is, the last meal from "those two chickens". This one may just be my favorite of the four meals those chickens produced. It certainly received my husband's seal of approval. His love of Buffalo Chicken Pizza actually inspired me to come up with this recipe. Pizza Hut makes his favorite Buffalo Chicken Pizza and he orders it whenever I am out of town and every once and a while in between. I think that the Pizza Hut version is okay. But it's all the same flavor and all the same texture, bite after bite. For me, it's a little bit boring, even with the heat of the Buffalo sauce. I need more from my pizza! So I set out to create a Buffalo chicken pizza that we could both enjoy. I thought back to those awesome Buffalo Chicken Hoagies that I first made back in June. We both agree that those are delicious. I'd be lying if I said that we haven't revisited that recipe since it first appeared on this blog in early summer. Those sandwiches are da bomb! (Did I just type "da bomb"? Hmmm. Weird. I'm fairly certain that I've never uttered that phrase in my life, yet these sandwiches are so good that I feel compelled to use it here.) So that was it. I just needed to make the pizza version of Buffalo Chicken Hoagies.

This was the perfect opportunity to use up the chicken that I gleaned from broth making. I had about 2-3 cups worth of chicken here. The hoagie recipe called for ready to use Southwestern chicken strips, so I tossed this chicken with a little cumin and garlic powder to season it a bit.


Then I heated 1/4 cup of butter, a couple of tablespoons of hot sauce, a tablespoon of barbecue sauce, and chili powder in a skillet. I tossed in the chicken and let it simmer a little.


While the chicken warmed up, I melted another 1/4 cup of butter with 6 minced garlic cloves and a couple tablespoons of fresh parsley. I oiled a baking sheet and dusted it with cornmeal. Then I spread a roll of refrigerated pizza crust onto the sheet. I didn't want to stretch my crust too thin, so I didn't use the whole sheet. This pizza was more of a square than a rectangle. I poured the garlic butter mixture over the crust and then brushed it evenly across with a pastry brush.


Then I baked the crust at 450 degrees for 6-8 minutes. It turned gorgeously golden brown and filled the house with that yummy garlic butter scent that had me answering, "Is dinner ready?" more than once.


Now I was ready to spread on the chicken, followed by a healthy drizzle of ranch dressing and then some more drops of Frank's Red Hot sauce, shaken evenly over the pizza.


Now for some texture, I diced one stalk of celery and sliced some red onion. Oh yeah! Are you feelin' this yet?!


I topped it all off with some shredded cheese. Mozzarella or provolone or a mixture of both work very nicely. Bake for an additional 6-10 minutes until the cheese is melted and just getting bubbly.


If it makes you happy, serve with some more ranch on the side, a few celery sticks, and even a couple more drops of Red Hot sauce. This is one excellent Buffalo Chicken Pizza! It'll make your nose run and your mouth smile and it's perfect for a Saturday college football marathon.


Krista's Buffalo Chicken Pizza

1 tube refrigerated pizza crust
cooking oil
cornmeal
1 stick butter softened, divided
6 garlic cloves, minced
1-2 tablespoons minced fresh parsley
2 cups cooked chicken, shredded
1/2 teaspoon cumin
1/2 teaspoon garlic powder
1/4 cup Louisiana-style hot sauce, divided
1 tablespoon barbecue sauce
1/2 teaspoon chili powder
ranch dressing (we prefer Hidden Valley)
1 stalk celery, diced
1/2 red onion, sliced
8 oz. shredded mozzarella or provolone cheese

For the crust:

Preheat oven to 450 degrees. Rub baking sheet with oil (I use a paper towel) and dust with cornmeal. Unroll pizza dough from tube and press into prepared baking sheet. Melt 1/2 stick of butter and combine with garlic and parsley. Brush over the pizza crust. Put crust in the oven and bake for 6-8 minutes until golden brown.

Chicken topping:

Toss shredded chicken with cumin and garlic powder. While the crust bakes, combine remaining butter, 2 tablespoons hot sauce, 1 tablespoon of barbecue sauce, and 1/2 teaspoon of chili powder. Heat in a skillet. Add chicken. Stir until the sauce is soaked up and the chicken is heated through.

Putting it together:

Spread the heated chicken mixture over the crust. Squeeze on ranch dressing in a zig-zag pattern. Sprinkle with additional hot sauce. Top with diced celery, onions, and cheese. Bake for an additional 6-10 minutes until cheese is melted and bubbly.


Take some Prilosec and enjoy!

Thursday, October 8, 2009

Super Fast and Easy Swedish Meatballs

Let's take a one day departure from chicken to feast our eyes upon this:


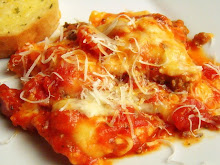
Comfort food. Meatballs. Sour cream sauce. Curly egg noodles. Dinner on the table in less than 15 minutes. There are so many things to love about this recipe, found in the latest edition of Kraft food & family magazine. Remember my 5 ingredient challenge from a couple of weeks ago? This recipe fits the 5 ingredient criteria.

Here's what you need for the sauce: a jar of beef gravy, a cup of sour cream, and fresh parsley. You could cut fat and calories here by using fat free gravy and low fat sour cream. I didn't...but you totally could. Just a thought. (This is a perfect example of where "it's the thought that counts" doesn't really apply.) Thoughts of lower-calorie ingredients are probably not going to improve my love handles. I'm just sayin'!


Now that I've concluded my tangent of reflection on lower calorie ingredients, we can move on. You also need meatballs for this. Of course. Swedish meatballs. Thanks, Mrs. Obvious. Remember the meatballs that I made and froze last week? I thawed some of them in the refrigerator for this dish. If you really want to cut corners, you could just buy the meatballs from your grocer's freezer. Who am I to judge? I'm the girl who just mixed a jar of gravy with a cup of sour cream and called it dinner.


See? Mix the jar of gravy with a cup of sour cream in a skillet. Add in the meatballs and fresh, chopped parsley. Stir until the ingredients are combined and the meatballs are coated. Cover the skillet and cook over medium-high heat until the meatballs are heated through.


That's it. It really doesn't get much easier. Well, not unless you toss one of these into the microwave:


Speaking of which, this version of Swedish Meatballs tasted very similar to the Lean Cuisine version. Only, they probably used the low fat sour cream. Good for them! So if you like that, you'll like this:


The Best Meatballs from Kraft Foods food & family magazine

Prep Time: 20 min Total Time: 38 min Makes: 8 servings

What You Need for the meatballs:

2 lb. ground beef
1 pkg. (6 oz.) STOVE TOP Stuffing Mix for Chicken
1-1/4 cups water
2 eggs

Make It:

HEAT oven to 400ºF.

LINE 2 (15x10x1-inch) pans with foil; spray with cooking spray. Mix ingredients until blended; shape into 32 (1-1/2-inch) balls, using 1/4 cup for each.

PLACE 16 meatballs in each prepared pan. Bake 16 to 18 min. or until done (160ºF).

Creamy Brown Gravy (What I call Sour Cream Sauce) adapted by me

Mix 1 jar (12 oz.) beef gravy, 1 cup BREAKSTONE'S or KNUDSEN Sour Cream and 2 Tbsp. chopped fresh parsley in large skillet; cook on medium-low heat 3 min. or until heated through, stirring occasionally. Add 16 meatballs; stir to evenly coat. Cover and cook until meatballs are heated through. Serve over hot egg noodles. Makes 4 servings, 4 meatballs and 1/3 cup sauce each.

How to Freeze Meatballs: Loosely pack cooled meatballs in freezer-weight resealable plastic bags. Lay bags flat in freezer so meatballs freeze individually. Store up to 3 months. Thaw in refrigerator several hours or overnight before using as desired.
Wednesday, October 7, 2009

Homemade Chicken Broth

Once you've cut up a chicken into bake-able, cook-able, grill-able, fry-able pieces, you're still left with some meat on those bones. If you're like me and hate to waste food, you can't stand the thought of throwing that carcass into the trash. But how do you get at those last bits of meat? You make broth!

Making your own broth is easier than you might think with little time spent on chopping veggies. Place the bony chicken pieces in a stock pot. Cut up the carrot, celery, and onion into large pieces. Toss them into the pot. Peel a couple of garlic cloves and cut them in half. Toss those in too. Toss in some sprigs of parsley, a couple of bay leaves, salt, and pepper. Pour in 8 cups of cold water.


Bring the contents of the pot to a boil, then reduce heat and simmer for 2-1/2 hours.


Remove the pieces of meat and cool.


Now you can pick that meat off of the bone and discard the fat and other unappetizing pieces. Freeze these chicken pieces for later use in casseroles, soup, or pizza OR use them sooner. Whatever fits your schedule.


Now strain the broth through a colander. You can use cheesecloth here too, or clarify the broth for clear soup using the directions found below. I knew that my broth would become broccoli cheese soup, so no need for extra straining steps here.


This recipe made about 6 cups of broth. Here are the first 4. Notice the layer of fat at the top?


Chill the broth in a refrigerator, then skim the fat off of the top and discard.



You can use the broth right away, or stick it in the fridge for a few days before using. It also freezes well for up to 6 months. I froze mine in a glass canning jar. You can use a plastic freezer container for freezing also. Mine seem to have all disappeared to my husband's place of work at this time. Transporters of leftovers, never to be seen again. I recently put out an APB for my plastic containers, to no avail. I know how to pick my battles, people. I used the glass jar.


When you're ready, thaw broth in the refrigerator and use in your recipe of choice. This week, broccoli cheese soup sounded good to me.


Chicken Broth from my trusty Better Homes and Gardens Cookbook adapted slightly by me

Prep: 30 min.
Cook: 2 hours

Ingredients

3 pounds bony chicken pieces (backs, necks, and wings from 2 chickens)
3 stalks celery with leaves, cut up
3 carrots, cut up
1 large onion, cut up
2 cloves garlic, peeled and halved
4 sprigs parsley
1 teaspoon kosher salt
1/4 teaspoon pepper
2 bay leaves
8 cups cold water

Directions
1. In a large Dutch oven or kettle place chicken pieces, celery, carrots, onion, garlic, parsley, salt, pepper, and bay leaves. Add water. Bring to boiling; reduce heat. Cover and simmer for 2 1/2 hours. Remove chicken.

2. To strain, pour broth through a large sieve or colander lined with 2 layers of cheesecloth. Discard vegetables and seasonings. If desired, clarify broth.* If using the broth while hot, skim fat. (Or chill broth, then lift off fat.) If desired, when bones are cool enough to handle, remove meat from bones and reserve meat for another use. Discard bones. Store broth and reserved meat, if any, in separate covered containers in the refrigerator up to 3 days or in the freezer up to 6 months. Makes about 6 cups broth and 2-1/2 cups meat.

3. Crockery-Cooker Directions: In a 3-1/2- or 4-quart electric crockery cooker combine chicken pieces; celery; carrots; onion; parsley; salt; thyme, sage, or basil; pepper; bay leaves; and only 4 cups water. Cover and cook on low-heat setting for 8 to 10 hours. Remove chicken. Strain and store broth and meat as above.

*Note: For crystal-clear soups, use broth that's been clarified. First, separate an egg, saving the yolk for another use. In a Dutch oven or kettle combine your strained broth, 1/4 cup cold water, and the egg white. Bring to boiling. Remove from heat and let stand for 5 minutes. Strain the broth through a large sieve or colander lined with several layers of damp, 100 percent cotton cheesecloth.

Nutrition Facts
Calories 20, Total Fat (g) 0, Sodium (mg) 300, Carbohydrate (g) 0, Fiber (g) 0, Protein (g) 0, Percent Daily Values are based on a 2,000 calorie diet
Related Posts with Thumbnails