Posts
Posts






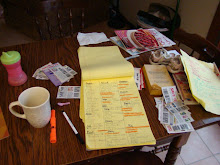
Just a couple of notes about the meal plan this week: The rain is supposed to finally stop here by Thursday (thank goodness!). Consequently, in the latter half of the week, all dinners will be prepared AND possibly eaten on the deck. Also, while laying by the pool at the Monte Carlo, Las Vegas, I discovered the Food Network magazine. I know, it's like I live under a rock or something... Anyway, I was drooling over the recipes (not the cabana boy) and marking the pages with post-its like crazy (yes, I take my post-its to the pool, what of it?!). As a result, 3 of the recipes on this week's meal plan are from the August/September issue of Food Network magazine. If you like them, I'm featuring two more recipes from the very same issue next week, so stay tuned!
Monday July 27th
Baked Spring Rolls
Pad Thai (from a box)
Tuesday July 28th
Beef and Noodles
Mashed Potatoes
*save some mashed potatoes
Wednesday July 29th
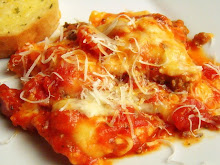
Basil Gnocchi
Thursday July 30th
Brats on the Grilled
Fried Cabbage
Friday July 31st
Back in the pizza Fridays habit again!
Click here for 6 posts with pizza recipes.
Saturday August 1st
Hoisin Chicken with Cucumber Salad
Sunday August 2nd
Hotdogs and Burgers on the grill
Chocolate Banana Cream Pie
Grocery List
Produce
ginger
green onions
garlic
cabbage
carrot
cilantro
egg roll wrappers (I find mine in produce)
potatoes (you can used the boxed variety if you like)
basil
pine nuts
shallots
2 lbs. tomatoes
jalapeno pepper
2 limes
cucumber
red onion
Meat
2 oz. deli ham
1 lb. crab meat (real or "fake")
1 quart canned beef
bratwursts
2 lbs. chicken thighs and drumsticks
Dairy
eggs
milk
butter
pecorino cheese (I'll probably use Parmesan)
half and half
Canned Goods
vegetable oil
sesame oil
olive oil
Asian-chili garlic paste
soy sauce
rice vinegar
hoisin sauce
Dry Goods
egg noodles
beef bouillon
flour
hot dogs buns
Sunday, July 26, 2009

Saturday, July 25, 2009
Bacon Wrapped Jalapeno Poppers

A little while back I was at the Westside Market and I needed a single jalapeno pepper for a recipe. One of the stands had them priced at $1 per pound, so I asked for a pepper. The man pointed to a sign: $1 minimum purchase. So, I left with a pound of peppers. Peter Piper picked a peck of pickled peppers. I used the pepper in my recipe and the rest of the peppers sat on my countertop until they started to shrivel up. I remembered a post on The Pioneer Woman Cooks with bacon wrapped jalapeno poppers and decided that it would be an excellent way to use up my peppers. I made these on a Friday evening right before my husband arrived home from work. I served them to him right after he walked through the door, with a smile, a welcome home kiss, and his Friday evening beverage of choice. Talk about kicking the weekend off right! Ladies, if you want to set the tone for a lovely weekend or perhaps you have a special Saturday home improvement project you'd like executed that requires a little buttering up, follow the above steps. Apparently a few jalapeno poppers and a warm welcome home carry some weight.
All you need are some jalapenos, cream cheese, dehydrated onion, garlic powder, and bacon.

Stir up the softened cream cheese with the onions and garlic salt.

Halve and seed your peppers.

Spread enough of the cream cheese mixture onto each pepper to fill it up.

Wrap in bacon and secure with a toothpick. Then place on an oven safe rack on a baking sheet. I like to line my baking sheet with foil for an easy clean up. Bake at 375 degrees for 20-25 minutes.

And serve. This picture isn't particularly pretty. My husband caught me snapping this and asked, "You're just going to take the picture on the paper plate like that? Maybe you should make a nicer display." I brush him off with a "this is fine.", but now that I look at it, he was right. Oh well, the reality is, I slapped them onto a paper plate and that's how we enjoyed these yummy little poppers. I was so caught up in the spicy, creamy, smoky deliciousness on my Friday night that I didn't even care about aesthetics.
Bacon Wrapped Stuffed Jalapenos adapted from The Pioneer Woman Cooks
6 jalapenos halved and seeded
1/2 package cream cheese, softened
1 tablespoon dehydrated onions
1/2 t. garlic salt
4 slices of bacon, cut into 3's
toothpicks
Mix together cream cheese, onions, and garlic salt. Spread filling onto each jalapeno half. Wrap a piece of bacon around the center of each pepper half and secure with a toothpick. Place on an oven safe rack over a baking sheet. Bake for 20-25 minutes at 375 degrees or until bacon is crisp.
For a printable copy of this recipe, click here.
Friday, July 24, 2009
Pizza on the Grill
My mom gave my dad "Grilled Pizza and Piadinas" by Craig Priebe and Dianne Jacob for Father's Day. You see, my dad loves his grill, and he's pretty handy with it too. A book about making pizza on the grill is right up his alley. However, my parents are busy people. Nearly a month had passed since Father's Day and not one pizza found its way onto the grill on the patio. And then, after the 4th of July, I went home to visit. "Oh, good you're here!" my mom smiled as I walked through the door and she slipped the cookbook into my hands, practically before I put down my suitcase. "We'd like to make pizzas on the grill on Thursday night." She knows I'm a sucker for a new recipe or cooking experience. "All you need to do is make a grocery list..." Uh huh. And cook dinner on Thursday. Not that I mind. Honestly, after about 3 days away from my kitchen I start to experience withdrawal. Cooking is such a habit for me that when I don't cook regularly, I start to feel out of sorts. Is that weird? Maybe. Anyway, back to the grilled pizza. The book that my mom purchased was excellent. I started reading it. Lots of useful information on how to grill a pizza and some wonderful recipes. I was pretty excited when Thursday evening rolled around.
My mom hurried into the kitchen loaded with groceries. I was finishing up the dessert, and glad to see her because she'd taken the cookbook with her to the grocery. I needed to make the dough and get it rising. I asked her for the book. "Just a second," she replied. Only it wasn't a second. She couldn't find that cookbook anywhere. Not mixed in with the groceries, not in the car, not anywhere in the house. Last seen: the pharmacy counter at the grocery store. After a few calls to the grocery and pharmacy, it wasn't turning up. This was probably not the very best time to point out to my mom that I never take my cookbooks to the grocery, but rather make a detailed list of ingredients. I got a "look" that I distinctly remember from my "snotty teenager" years. My youngest sister set out for the store on the way over to look for herself and I started searching the web for pizza dough recipes. The dough was finally rising by the time that both of my sisters, their husbands, kids, and my dad rolled into the driveway. This is where chaos usually ensues. With 5 grandchildren 4 years old and under (4-1/2, 3 1/2, 2, 18 months, and 1 year) you can imagine that it gets a little crazy at my parent's house when we're all together. Tonight was no exception. In an hour's time one child wandered into the cornfield (scary for a minute but he was quickly retrieved), black coffee spilled on my mom's new rug, and another kiddo (mine) got her feet caught in a mole trap. That was super scary, but once she was freed and calmed down, she just needed a little ice on her feet and was running and jumping across the lawn with her cousins in minutes. With all of this going on, dinner was running a little (or a lot) behind. I was just trying to get a few pictures before we devoured the pizzas. I certainly missed a step or two along the way.
While I was waiting for the cookbook to arrive, which by the way, vanished into thin air, I prepared the toppings. I made up a tray of toppings that catered more to the gourmet tastes in our family. Let's see if I can remember everything that is on there. That's caramelized onions, artichokes, sundried tomatoes, chopped basil, fresh mozzarella, cilantro or Italian parsley (can't remember), roasted hot red peppers, and garlic.

And I put out toppings for those who prefer the traditional. Ground Italian sausage, pepperoni, bacon, olives, mushrooms, and regular pizza sauce.

Toppings prepared, I started rolling out the dough. This recipe made 6- 10 in. crusts. I planned to brush them with plain old olive oil, but we'd actually mixed olive oil with dipping spices for the bread to curb our hunger and it was right next to me on the counter. Inspiration hit. I brushed with the seasoned olive oil and it gave the pizza a flavor boost. On a few of the crusts, I actually remembered to sprinkle some cornmeal too. The crusts went onto the grill by themselves first. I'm trying to remember for how long. Maybe 8 minutes per side? The recipe that I found didn't specify. The book did, but as I have pointed out...the book was a lost cause.

Here is my dad's pride and joy (aside from all of us, of course). It's a smoker grill, which gave the pizza a nice, subtle smoky taste.

Most of us built our own pizza to taste. Here's the first one ready for the grill. I think this has sundried tomatoes, basil, garlic, fresh mozzarella, and maybe asiago or parmesan. It was yummy!

Back onto the grill to cook the toppings. You can put the pizza directly on the grate. My dad was dead set on using the pizza stone. I started to disagree, but then I figured, his grill, his call. And really, I don't think it made any difference one way or the other.

Dinner is served...finally. This was some good pizza! My dad still claims it's the best pizza he's ever tasted.

Here are close ups of the pizzas my family created.


Grilled Pizza Crust recipe slightly adapted from www.chow.com
INGREDIENTS
2 cups warm water (110°F to 115°F)
1 (1/4-ounce) packet active dry yeast (2 1/4 teaspoons)
3 cups all-purpose flour
2 cups whole wheat flour
1 tablespoon granulated sugar
1 teaspoon kosher salt
2 tablespoons olive oil, plus more for oiling the bowl
INSTRUCTIONS
Place water in the bowl of a stand mixer fitted with a hook attachment, sprinkle yeast on top, and let rest until mixture is bubbling, about 10 minutes. Meanwhile, place flour, sugar, and salt in a large bowl and whisk to combine. Oil a second large bowl and set aside.
When yeast mixture is ready, add flour mixture and olive oil and mix on low until flour is moistened and dough starts to come together, about 1 minute. Increase speed to medium low and mix until dough starts to get smooth, about 1 minute. Increase speed to medium and mix until dough is smooth and stretches 3 to 4 inches without breaking, about 6 to 10 minutes more.
Transfer dough to the oiled bowl, cover with a damp towel or plastic wrap, and set in a warm place until doubled in size, about 1 hour. (The dough can also be covered and placed in the refrigerator for up to 2 days.)
Once dough has risen, punch down, shape, and grill as desired.
My mom hurried into the kitchen loaded with groceries. I was finishing up the dessert, and glad to see her because she'd taken the cookbook with her to the grocery. I needed to make the dough and get it rising. I asked her for the book. "Just a second," she replied. Only it wasn't a second. She couldn't find that cookbook anywhere. Not mixed in with the groceries, not in the car, not anywhere in the house. Last seen: the pharmacy counter at the grocery store. After a few calls to the grocery and pharmacy, it wasn't turning up. This was probably not the very best time to point out to my mom that I never take my cookbooks to the grocery, but rather make a detailed list of ingredients. I got a "look" that I distinctly remember from my "snotty teenager" years. My youngest sister set out for the store on the way over to look for herself and I started searching the web for pizza dough recipes. The dough was finally rising by the time that both of my sisters, their husbands, kids, and my dad rolled into the driveway. This is where chaos usually ensues. With 5 grandchildren 4 years old and under (4-1/2, 3 1/2, 2, 18 months, and 1 year) you can imagine that it gets a little crazy at my parent's house when we're all together. Tonight was no exception. In an hour's time one child wandered into the cornfield (scary for a minute but he was quickly retrieved), black coffee spilled on my mom's new rug, and another kiddo (mine) got her feet caught in a mole trap. That was super scary, but once she was freed and calmed down, she just needed a little ice on her feet and was running and jumping across the lawn with her cousins in minutes. With all of this going on, dinner was running a little (or a lot) behind. I was just trying to get a few pictures before we devoured the pizzas. I certainly missed a step or two along the way.
While I was waiting for the cookbook to arrive, which by the way, vanished into thin air, I prepared the toppings. I made up a tray of toppings that catered more to the gourmet tastes in our family. Let's see if I can remember everything that is on there. That's caramelized onions, artichokes, sundried tomatoes, chopped basil, fresh mozzarella, cilantro or Italian parsley (can't remember), roasted hot red peppers, and garlic.

And I put out toppings for those who prefer the traditional. Ground Italian sausage, pepperoni, bacon, olives, mushrooms, and regular pizza sauce.

Toppings prepared, I started rolling out the dough. This recipe made 6- 10 in. crusts. I planned to brush them with plain old olive oil, but we'd actually mixed olive oil with dipping spices for the bread to curb our hunger and it was right next to me on the counter. Inspiration hit. I brushed with the seasoned olive oil and it gave the pizza a flavor boost. On a few of the crusts, I actually remembered to sprinkle some cornmeal too. The crusts went onto the grill by themselves first. I'm trying to remember for how long. Maybe 8 minutes per side? The recipe that I found didn't specify. The book did, but as I have pointed out...the book was a lost cause.

Here is my dad's pride and joy (aside from all of us, of course). It's a smoker grill, which gave the pizza a nice, subtle smoky taste.

Most of us built our own pizza to taste. Here's the first one ready for the grill. I think this has sundried tomatoes, basil, garlic, fresh mozzarella, and maybe asiago or parmesan. It was yummy!

Back onto the grill to cook the toppings. You can put the pizza directly on the grate. My dad was dead set on using the pizza stone. I started to disagree, but then I figured, his grill, his call. And really, I don't think it made any difference one way or the other.

Dinner is served...finally. This was some good pizza! My dad still claims it's the best pizza he's ever tasted.

Here are close ups of the pizzas my family created.


Grilled Pizza Crust recipe slightly adapted from www.chow.com
INGREDIENTS
2 cups warm water (110°F to 115°F)
1 (1/4-ounce) packet active dry yeast (2 1/4 teaspoons)
3 cups all-purpose flour
2 cups whole wheat flour
1 tablespoon granulated sugar
1 teaspoon kosher salt
2 tablespoons olive oil, plus more for oiling the bowl
INSTRUCTIONS
Place water in the bowl of a stand mixer fitted with a hook attachment, sprinkle yeast on top, and let rest until mixture is bubbling, about 10 minutes. Meanwhile, place flour, sugar, and salt in a large bowl and whisk to combine. Oil a second large bowl and set aside.
When yeast mixture is ready, add flour mixture and olive oil and mix on low until flour is moistened and dough starts to come together, about 1 minute. Increase speed to medium low and mix until dough starts to get smooth, about 1 minute. Increase speed to medium and mix until dough is smooth and stretches 3 to 4 inches without breaking, about 6 to 10 minutes more.
Transfer dough to the oiled bowl, cover with a damp towel or plastic wrap, and set in a warm place until doubled in size, about 1 hour. (The dough can also be covered and placed in the refrigerator for up to 2 days.)
Once dough has risen, punch down, shape, and grill as desired.
Wednesday, July 22, 2009
Totally Edible Turkey Burgers

We've all had a dry, lackluster turkey burger. I'll eat em' but I don't love em'. I like the idea of a turkey burger. Lower in fat, better for your heart...I've just never tasted one that "wowed" me. And then when I was in Vegas over the weekend I had some phenomenal turkey "sliders" at The Grape, a wine bar and bistro in Town Square, near the strip. If you're in Vegas, this restuarant gets my seal of approval. Also delicious at this little gem; the baked brie, the garlic hummus, and the fresh mozzarella salad. Lucky me, my friend is married to the chef, so I got to sample quite a few dishes. I returned to my kitchen with a new found respect for the turkey burger and the courage to try again. I found this recipe a while back in Taste of Home and decided to give it a try. I should add that one of the reasons I've kept this recipe on the back burner is that my husband claims to despise turkey burgers. I've know him for 13 years and I believe that I learned of his distaste for the turkey burger in the first few weeks. He's stuck to his story over the years. As a result, I've never served him a turkey burger. Sure, I've secretly mixed turkey with beef in chili or in a casserole, and turkey sausage is a different story altogether. It's easy to disguise turkey sausage in soup or spaghetti sauce. But just a turkey patty on the grill? I wouldn't dream of it. Until now. These turkey burgers with caramelized onions will make you reconsider your position on the turkey burger if it tends toward the negative. I loved them, and so did my husband. He just didn't know he was eating a turkey burger. Ha. Ha.
In a bowl, combine ground turkey, chopped green onion, Worcestershire sauce, hot pepper sauce, salt, and pepper. Combine. My pastry cutter did an excellent job here.

Form the mixture into 6 patties and fire up the grill. I grilled these for 5-7 minutes on each side. You want them done, but not dry. You may notice that the two burgers on the left look different. I left those plain and just sprinkled them with seasoning salt for the kiddos. Theirs were topped with good ol' American singles rather than caramelized onions before serving.

About 2 hours before serving time, I started cooking my sliced onions in a little olive oil over low heat. An hour into the cooking, I added salt, pepper, and sugar and turned up the heat a bit to caramelize the onions for about another hour. I sprinkled with freshly chopped thyme before serving on the burgers. If you don't have 2 hours to caramelize onions before dinner, no problem. Caramelize them a day or two before when you do have time and reheat while the burgers grill.

I spread some garlic butter on the buns before toasting them under the broiler. Then I put the burger on the toasted garlic buns and topped with a generous amount of caramelized onions. Boy, were they good!
A funny story: My husband was late for dinner. I built his burger and made him a "late plate" and put it into the fridge. When he arrived home, he grabbed for the burger and after the first few bites announced how good they were. I think he even said "really good", maybe even "awesome". I don't remember exactly because I was too busy getting our daughters ready for bed and suppressing the urge to blurt out, "Ha Ha. They're TURKEY burgers." before he finished. Instead, I just smiled to myself and went about my business. I took the much awaited opportunity to let him in on my little secret a couple of hours later as we sat on the sofa, the house quiet and the kiddos sleeping. Me: So you liked the burgers? Him: Oh yeah, those were great! Me: They weren't beef. (He gave me a look) Him: Oh? Me: Turkey burgers. Hahahahah. Him: Silence and another look. But he couldn't say anything. He knew he'd been duped and he liked it. I have to say that I'm pretty proud of myself.

Turkey Burgers with Caramelized Onions adapted from Taste of Home
2 large sweet onions, cut into 1/8-inch slices
2 teaspoons olive oil
1 teaspoon butter
1 teaspoon sugar
1/2 teaspoon salt
1/4 teaspoon pepper
2 tablespoons minced fresh thyme or 2 teaspoons dried thyme
2 green onions, chopped
2 tablespoons Worcestershire sauce
1 teaspoon hot pepper sauce
1-1/4 pounds lean ground turkey
salt and pepper, to taste
6 hamburger buns, split
4 tablespoons butter
1-2 cloves garlic, minced
In a large nonstick skillet over low heat, cook onions in oil and butter for 1 hour or until tender, stirring occasionally. Sprinkle with the sugar, salt and pepper; cook over medium-low heat for 45-60 minutes or until golden brown, stirring occasionally. Sprinkle with thyme; keep warm. In a large bowl, combine the green onions, Worcestershire sauce and pepper sauce; crumble turkey over mixture and mix well. Shape into six patties. Coat grill rack with cooking spray before starting the grill. Grill burgers, covered, over medium-hot heat for 5-7 minutes on each side or until a meat thermometer reads 165° and juices run clear. Meanwhile, mix 4 tablespoons butter with garlic. Spread a thin layer over each bun. Toast under broiler. Serve turkey burgers on buns with caramelized onions.
Yield: 6 servings.
Nutritional Info:
One serving: 1 burger with about 1/3 cup onions (without the bun)
Calories: 311 Fat:12 g Saturated Fat: 3 g Cholesterol:76 mg Sodium:596 mg Carbohydrate:28 g Fiber:2 g Protein:21 g Diabetic Exchange: 3 lean meat, 2 starch
Weight Watcher's Points: 7
For a printable copy of this recipe, click here!
Tuesday, July 21, 2009
Food From My Childhood: Fresh Green Beans and Lemon Lush
Both of the recipes I have selected for my post today were frequent summer fare in the kitchen of my childhood. Our garden yielded enough green beans for 4 families. I know, because my sisters and I were assigned to help my mom weed them, pick them by the grocery sack and bucketful, snap em', wash em', and cook and preserve them. To the "little kid" version of me it seemed like a never-ending job on those humid summer afternoons as we climbed up the grassy hill to the house dragging the beans behind us, our bare feet black from the rich soil of our garden, to sit on the front porch all together. We'd spread newspaper across our laps and then pile the beans on top. With big stainless steel bowls at our feet we'd begin. Snap, snap, snap! As fast as our little fingers could move. Then the ping, ping, ping as the beans hit the bottom of the empty, metal bowls turned to more muffled sounds as the bowls filled. Until finally, ahh finally, those bowls were heaping with beans and we were finished! We turned our bowls over to my mom and tore down the lane, out of our yard, and across the neighbor's hay field like we were on fire. Straight to the pond, into the water, and swimming to be first on the raft in the middle. Our neighbors, Jeremiah and Jessica would meet us there most evenings after all of our chores were finished. We would swim and splash and laugh and play until one of the moms called for dinner. We'd part ways with a "See you tomorrow" and then head home as dusk fell and frogs sang and the mosquitoes really started biting. Still damp from the pond and kicking off our shoes, we'd swing open the door to the kitchen, and the smell of these green beans bubbling on the stove would make us realize just how hungry we were. Cooked in broth with bacon, onion, and potatoes, they're hearty enough to eat as the main course. We usually had them with just bread and butter.

And dessert, of course. Lemon Lush was a common dessert in our house. Fluffy, refreshing, and delicious, I don't think that I've made it before now. Last time I was home visiting, my mom handed me the recipe and asked if I'd make it for dinner while she ran to an appointment. After making it, I'm not sure why I haven't before. It's super easy to throw together and everyone likes it.

You're considering the Lemon Lush, aren't you? But just like my mom says, dinner first! So let's begin making the green beans.
I start with a chopped onion and bacon. The amount of bacon used depends on how many green beans you're cooking. I used a little over 1-1/2 lbs. of green beans, so I cut up 4 slices of bacon. Cook until the onion is tender and the bacon gets a little crispy.

Now peel and cube 2-3 large potatoes and add them to the pot.

Add enough broth to cover the potatoes.

Then add your cleaned and snapped green beans. Salt and pepper liberally. Cover and cook over medium heat until the green beans and potatoes are done. Maybe an hour? I went outside and played with the kiddos, returning to the stove a couple of times to give these a stir.

And that's dinner!

Green Beans with Potatoes and Bacon
1 onion, diced
4 slices of bacon, chopped
In a large pot, cook the onion and bacon together until onion is tender and bacon is crispy.
Add:
2-3 large potatoes, peeled and cubed
3 cups of beef broth (give or take)
1 1/2- 2 lbs. fresh green beans, cleaned and snapped
Salt and pepper
Add the potatoes to the onion and bacon. Add enough broth to cover, maybe a little more. Add the green beans to the pot and bring it all to a boil. Cover, reduce heat, and simmer, stirring occasionally for 45-60 minutes until the potatoes and green beans are tender.
Now for dessert...

Cut a stick of softened butter into a cup of flour. You could use 1/2 cup of ground pecans here too.

Press the crust into a 9 X 13 baking dish and bake at 350 degrees for 15 minutes. Set aside to cool.

Beat together a package of cream cheese, a cup of powdered sugar, and a cup of non-dairy whipped topping (Cool Whip).

Spread over the cooled crust.

Combine two packages of lemon pudding with 2 3/4 cups of cold milk and beat for 2 minutes. Spread over the cream cheese mixture.

Top with the remaining whipped topping and sprinkle with finely chopped pecans. Refrigerate until serving to allow it to set.

There you have it, Lemon Lush. This could totally be the nickname for a character on the cartoon series Strawberry Shortcake and Friends: The College Years. Okay, mom. Sorry. I know, I know. Binge drinking is NOT a joke. Hope you all enjoy the dessert.

Lemon Lush
1/2 c. butter
1/2 c. ground pecans
1 c. flour
1 (8 oz.) pkg. cream cheese, soft
1 c. powdered sugar
1 c. Cool Whip plus 1/2 c.
2 (3 3/4 oz.) pkgs. lemon instant pudding
2 3/4 c. cold milk
In a small bowl blend butter, 1/2 cup ground pecans, and flour with a pastry cutter until well mixed. Press well a 9 x 13 inch baking dish. Bake at 350 degrees for 15 minutes. Set aside to cool.
In small bowl, blend the softened cream cheese and powdered sugar until creamy. With wire whip fold 1 cup of the Cool Whip, spread this mixture over the cooled crust.
Pour 2- 3/4 cold milk into a bowl. Add both packages of lemon instant pudding. Beat slowly with rotary beater or low speed of electric mixer until well blended, about 2 minutes. Let stand 5 minutes or until set, then spread this mixture over the cream cheese layer.
Spread remaining Cool Whip over Lemon Lush and sprinkle with finely chopped pecans.
Refrigerate before serving.

And dessert, of course. Lemon Lush was a common dessert in our house. Fluffy, refreshing, and delicious, I don't think that I've made it before now. Last time I was home visiting, my mom handed me the recipe and asked if I'd make it for dinner while she ran to an appointment. After making it, I'm not sure why I haven't before. It's super easy to throw together and everyone likes it.

You're considering the Lemon Lush, aren't you? But just like my mom says, dinner first! So let's begin making the green beans.
I start with a chopped onion and bacon. The amount of bacon used depends on how many green beans you're cooking. I used a little over 1-1/2 lbs. of green beans, so I cut up 4 slices of bacon. Cook until the onion is tender and the bacon gets a little crispy.

Now peel and cube 2-3 large potatoes and add them to the pot.

Add enough broth to cover the potatoes.

Then add your cleaned and snapped green beans. Salt and pepper liberally. Cover and cook over medium heat until the green beans and potatoes are done. Maybe an hour? I went outside and played with the kiddos, returning to the stove a couple of times to give these a stir.

And that's dinner!

Green Beans with Potatoes and Bacon
1 onion, diced
4 slices of bacon, chopped
In a large pot, cook the onion and bacon together until onion is tender and bacon is crispy.
Add:
2-3 large potatoes, peeled and cubed
3 cups of beef broth (give or take)
1 1/2- 2 lbs. fresh green beans, cleaned and snapped
Salt and pepper
Add the potatoes to the onion and bacon. Add enough broth to cover, maybe a little more. Add the green beans to the pot and bring it all to a boil. Cover, reduce heat, and simmer, stirring occasionally for 45-60 minutes until the potatoes and green beans are tender.
Now for dessert...

Cut a stick of softened butter into a cup of flour. You could use 1/2 cup of ground pecans here too.

Press the crust into a 9 X 13 baking dish and bake at 350 degrees for 15 minutes. Set aside to cool.

Beat together a package of cream cheese, a cup of powdered sugar, and a cup of non-dairy whipped topping (Cool Whip).

Spread over the cooled crust.

Combine two packages of lemon pudding with 2 3/4 cups of cold milk and beat for 2 minutes. Spread over the cream cheese mixture.

Top with the remaining whipped topping and sprinkle with finely chopped pecans. Refrigerate until serving to allow it to set.

There you have it, Lemon Lush. This could totally be the nickname for a character on the cartoon series Strawberry Shortcake and Friends: The College Years. Okay, mom. Sorry. I know, I know. Binge drinking is NOT a joke. Hope you all enjoy the dessert.

Lemon Lush
1/2 c. butter
1/2 c. ground pecans
1 c. flour
1 (8 oz.) pkg. cream cheese, soft
1 c. powdered sugar
1 c. Cool Whip plus 1/2 c.
2 (3 3/4 oz.) pkgs. lemon instant pudding
2 3/4 c. cold milk
In a small bowl blend butter, 1/2 cup ground pecans, and flour with a pastry cutter until well mixed. Press well a 9 x 13 inch baking dish. Bake at 350 degrees for 15 minutes. Set aside to cool.
In small bowl, blend the softened cream cheese and powdered sugar until creamy. With wire whip fold 1 cup of the Cool Whip, spread this mixture over the cooled crust.
Pour 2- 3/4 cold milk into a bowl. Add both packages of lemon instant pudding. Beat slowly with rotary beater or low speed of electric mixer until well blended, about 2 minutes. Let stand 5 minutes or until set, then spread this mixture over the cream cheese layer.
Spread remaining Cool Whip over Lemon Lush and sprinkle with finely chopped pecans.
Refrigerate before serving.
Subscribe to:
Posts (Atom)