Monday, September 20, 2010

Catching Up With You and the Meal Plan 9/20-9/26

Hello friends! With my last post a whopping 5 days ago, I have some announcements, a treat and some tips to share.

First, an announcement to my newsletter subscribers: this is a "bye week" for the Krista's Kitchen Newsletter. The newsletter will be back in your inbox next Monday with all new tips, fun facts, the meal plan, and grocery list. If you'd like to subscribe to the newsletter, please click the link on the top left sidebar.

We had a fun and busy weekend back in Indiana, tailgating the Purdue game, celebrating my daughter's birthday, attending a baby shower, and arriving home very late last night. We love football season; the crisp fall mornings, the sunny afternoons, the excitement of the game, AND the tailgate parties! We've been tailgating with the same friends since college. Of course, back then, we'd just wander out of our campus dorms, houses, or apartments on football Saturday mornings and crash our parent's tailgate parties. Like a pack of thirsty wolves, we travelled from parking lot to parking lot visiting whomever's parents happened to have the music thumpin' and the grill fired up. Sometimes we'd even get lucky and the parents would tailgate together, diminishing the need to partyhop.

These days most of the original tailgaters are parents themselves. New babies show up every year, ensuring the longevity of our tradition. For example, this little guy, the son of one of my husband's fraternity brothers. Couldn't you just squeeze him?!


As a result, the tailgate parties have tamed down considerably and are definitely more kid-friendly. After years of tailgating experience, our little group has gotten game day Saturdays down to a science. The parties are well-planned. This year, our group even has a tailgating blog where assignments (who is bringing tents, tables, etc) are posted and every family can post what snacks and beverages they are bringing so that we don't end up with say, 5 pans of brownies. There's also fun stuff on there too: video clips, pictures, and quotes. What a great idea! And here's another great idea I took away from this week's tailgate party:

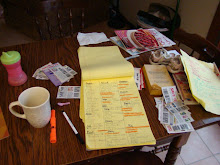
The Tailgate Toolbox:


This handy tool box belongs my skilled tailgating friends, Jen and Dave. It contains all kinds of essentials and even non-essentials that you might find yourself in need of during a tailgating party. I didn't go through the tailgating tool box, but here are some things that I spotted: seasoning salt, non-stick cooking spray, table cloth holders, rope, hot sauce, a ladle, wet wipes, hot pads, mustard, a first aid kit, pain reliever (such as Tylenol), miscellaneous hardware and kitchen tools, Spider-Duck Mardi Gras beads(?), and much more! What a brilliant way to store and tote your tailgate party essentials!


My contribution to the tailgate party? Since it was my daughter's birthday, I made THESE chocolate ganache filled cupcakes with chocolate buttercream frosting that I found on Gonna Want Seconds. Oh my goodness! They were amazing. And I have to say that they turned out SO beautifully, with the rich frosting piped on and lots of sprinkles on top. Unfortunately, I didn't get a single picture. By the time I remembered, the party was over, and the remaining cupcakes were worse for the wear, having been transported over 7 hours to a tailgate party and then sitting in the hot afternoon sun. But take my word for it, if you are looking for the ultimate chocolate cupcake, this is it!


Now for the meal plan. This week I am recycling a meal plan. That's the beauty of building up a file of old meal plans- whenever you are too busy or tired or uninspired to come up with a meal plan, you can just pull a meal plan from the past. That's just what I'm doing this week. This meal plan is from September/October of last year. If you don't have a file of meal plans built up yet, then use one of mine! Just click on the NEW "Meal Plans" icon in my right side bar and print off any of 84 meal plans, complete with a grocery list.

Before I share this recycled meal plan, I have one more announcement for my readers in the Greater Cleveland area: I still have plenty of room in my meal planning workshop next Tuesday evening, September 28th. In fact, I need 3 more people to sign up for the class to run. It will be a fun night of learning the basics of meal planning and grocery shopping. You'll leave with your own 2 week meal plan and grocery list and the skills you need to create your own meal plans in the future. Please, tell a friend! Click HERE for the link to the course catalogue.

Now for the meal plan.... (links to all of the recipes provided below)

Monday September 28th

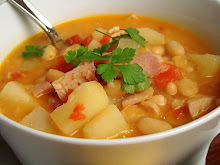
Ham and Bean Soup
Corndog Muffins


Tuesday September 29th

Spaghetti and Meatballs

Wednesday September 30th

Leftovers or Quesadillas

Thursday October 1st

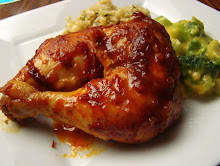
Oven BBQ Chicken

Friday October 2nd

BBQ Chicken Salad

Saturday October 3rd

Chili
Save the leftovers for a Chili Pie or Chili Cheese Dogs!

Sunday October 4th

Leftovers


Grocery List

Produce

3 onions
basil
garlic
3 potatoes
Romaine lettuce
tomatoes
green onions


Meat

ham, 2 cups chopped
hotdogs
3-4 lbs. ground beef
2-3 1/2 lb. whole chickens

Dairy

eggs
milk
cream cheese
butter
shredded cheddar

Canned Goods

whole kernel corn (frozen is ok too)
2 cans Great Northern Beans
1 can diced tomatoes with green chilies
24 oz. chicken broth
spaghetti sauce
cider vinegar
Worcestershire sauce
molasses
tomato paste
peanut oil
2 cans kidney beans
1 big can whole tomatoes
tomato juice or V8
black beans
prepared Ranch dressing

Dry Goods

brown sugar
cornbread muffin mix
spaghetti or linguine
1 box chicken Stovetop Stuffing
crushed red pepper
paprika
chili powder

Happy Fall! Hope you're all having a great week!

Wednesday, September 15, 2010

Quickie Peanut Butter Cookies


Last Spring, these flourless peanut butter cookies kept crossing my path. I forget where I first heard about them, but I kept seeing the recipe. One of the moms in my parenting group even brought them as a treat to our Monday morning meeting. They were so good and the recipe sounded super easy. But I never got around to making them. Then in June, Kim from Stirring the Pot posted the recipe on her blog. I bookmarked it. But still, the rest of the summer flew by and I didn't give another thought to these cookies. Finally, my daughter's first day of school rolled around and in her absence, I suddenly felt this maternal need to have a warm plate of cookies waiting for her when she returned home. I envisioned us sitting across the kitchen table, with the warm afternoon sun on our backs, enjoying this yummy snack and discussing her milestone day. I was short on time and didn't have many special ingredients around the house...and then I remembered this recipe! It was perfect. You just dump the 6 ingredients together. Stir, shape, and bake.

Dump the peanut butter, sugars, eggs, and vanilla into a bowl. Stir until combined.


Then mix in the chocolate chips.


Scoop the dough in tablespoon sized portions, roll it into a ball between your hands, and press a cross hatch pattern into the top, using a table fork.


Bake at 350 degrees for 10 minutes and enjoy. That's it! 2 dozen delicious cookies in 20 minutes. Gotta love that!


Here's the recipe as seen on Stirring the Pot:

Peanut Butter-Chocolate Chip Cookies
Adapted from Emeril 20-40-60 Fresh Food Fast
Makes 24 cookies
Time: Start to Finish 20 minutes (Using 2 cookies sheets w/ 12 cookies on each)
1 cup creamy peanut butter
1/2 cup granulated sugar
1/2 cup packed light brown sugar
1/2 cup semisweet chocolate chips
1 large egg, beaten
1 teaspoon vanilla extract

Position two oven racks in the center of the oven and preheat the oven to 350F.

Combine all the ingredients in a bowl, and stir with a wooden spoon until smooth.

Divide the dough into 24 portions, about one tablespoon each. (I used a small ice cream scooper, which holds about one tablespoon). Roll each portion between your hands to form a smooth ball. Place the balls of dough on ungreased cookie sheets, spacing them 1 inch apart. You should get about 12 cookies per sheet. Using a fork, press on the dough in two directions to form a crosshatch pattern.

Bake the cookies, rotating the sheets between oven racks and turning them back to front midway, until the cookies are puffed and lightly golden, about 10 minutes. Remove the baking sheets from the oven and let the cookies cool on the sheets. Then remove them with a metal spatula.

Tuesday, September 14, 2010

Chicken Tortellini Casserole


I came up with this casserole yesterday afternoon to use up some ingredients in my fridge and pantry. I was SO pleased with the result. It came together quickly, it's easily a 30 minute dinner, and it was delicious. A great way to use up leftover chicken and get your family to eat spinach!

Last week, I decided to make fried chicken from scratch for the first time ever! I brined the chicken overnight, marinated it in buttermilk and hot sauce all afternoon, played with the seasonings until I got them just right, and then fried it up in hot, splattering oil until it was crispy and golden brown. Truth be told, the perfect fried chicken offers quite a challenge to even the most experienced home cook. There are lots of steps, it's time consuming, difficult to get the heat of the oil just right so that the chicken doesn't get too brown yet done on the inside, and it makes a terrible mess in your kitchen. No wonder I've hit the KFC drive-thru when my craving for fried chicken takes over.


As it turns out, on the evening that I'd set aside for preparing fried chicken, my husband called to say that he wouldn't be home for dinner and our oldest daughter was eating dinner away too. After I pulled that crispy chicken from my cast iron skillet, I sat down to dinner with just our toddler. We thoroughly enjoyed the fried chicken together. Someday I'll devote a whole post to fried chicken, but today, I want to talk about what I did with all of those leftovers.

The best way to eat fried chicken is fresh. I think that we can all agree that even the best fried chicken is a bit lackluster when re-heated. Which is why no one in my family wanted to touch these leftovers. I did make myself a lovely panini from some of the chicken breast for lunch the next day, but otherwise all of that hard work was just sitting in my fridge un-eaten. So I decided to shred it and make a casserole.


While I was shredding the chicken, I started a pot of water boiling for the tortellini and heated a couple of tablespoons of butter in a skillet to which I added a small sliced onion.


Once the onion is tender, add in the shredded chicken and season. Here I used a Sicilian Blend and a Parmesan Blend that I had in the pantry. Some Italian seasoning, garlic, sea salt and freshly ground pepper would work well too. Cook and stir until the chicken is heated through.


Then I chopped up some sun-dried tomatoes (dry pack, not the kind in oil) and added those to mix.


Stir in some fresh, chopped baby spinach. I used two cups this time. I think that the next time, I could sneak in another cup or even two and my family would still love this. That's the thing about spinach, it's such an un-offensive vegetable. I've found tons of applications to add this leafy green vegetable, packed with antioxidants, vitamin A, calcium, and iron, into my cooking. Cook and stir the spinach in the skillet until wilted.


You could easily pour heavy whipping cream over this for a fresh sauce. I went a different route. I got this pre-made low fat Alfredo sauce from the grocery for a steal, so in the interest of a lower fat option, I poured it on.


Then add the cooked tortellini and toss to coat.


Transfer the mixture to a casserole dish and sprinkle generously with grated Parmesan. Then pop it into the oven until bubbly and...


golden brown.


This was SO good...and not too bad for you either. By using white breast meat, low fat Alfredo sauce, reduced fat cheese tortellini, and topping the casserole with flavor-packed Parmesan (rather than buttered bread crumbs) I was able to cut down the fat in this dish a bit. Plus, there's spinach in there! Serve it with a simple salad of baby spinach and fresh tomatoes drizzled with olive oil and balsamic vinegar and feel good about this dinner!


Krista's Chicken Tortellini Casserole

2 tablespoons unsalted butter
1 small onion, thinly sliced
2-3 cups cooked, shredded chicken
Italian or Sicilian Blend seasoning
garlic salt, to taste
Sea salt and freshly ground pepper, also to taste
1/4 cup chopped sun-dried tomatoes (I used dry pack, not in oil)
2-4 cups baby spinach, chopped
1 jar light Alfredo sauce
9-10 oz. low fat cheese tortellini (fresh or frozen)
1/2 cup grated Parmesan cheese

Boil water and cook tortellini according to package directions. Drain and set aside. Meanwhile, heat butter in a skillet. Add the sliced onion and saute until tender. Add the chicken and spices and cook until heated through. Stir in the sun-dried tomatoes. Add the spinach and cook and stir over low heat until wilted. Stir in the Alfredo sauce. Add the tortellini and toss until coated with the sauce. Transfer to a casserole dish. Sprinkle with Parmesan. Bake at 400 degrees until bubbly and golden brown, 10-15 minutes. If needed turn on the broiler for a couple of minutes at the end to brown the top.

For a printable copy of this recipe, please click here.

Sunday, September 12, 2010

Meal Plan and Grocery List 9/13-9/19

Do you ever get that feeling like you've bitten off more than you can chew? Over-extended yourself? Well that's where I'm at this week. Before I made the meal plan today, I looked over our family planner and made out my weekly to-do list. I have one week until I begin teaching cooking classes and I'm putting finishing touches on the class notes, I've reinstated the Krista's Kitchen newsletter for the fall (sign up link in the top left side bar) and I'm getting ready to type up the final draft, I'm planning my daughter's birthday party, packing the family for a weekend trip, I just agreed to teach the 6th graders at our church on Thursday evenings, and today I decided to develop a meal planning workbook and holiday cooking notebook (hopefully available here at the beginning of November). All of this on top of our regular Monday, Tuesday, Thursday meetings and practices, doing laundry, keeping the house in order, feeding everyone, and attempting to being a competent mommy (helping with homework, kissing "boo boos", keeping our toddler busy...and out of trouble, etc.), and a decent wife. I know that I'm not the only one out there with too many "irons in the fire", trying to make it all work...but I am feeling a little over-whelmed tonight. Consequently, this week I have developed an easy meal plan. On Monday, I'm going to make a big batch of meatballs...putting some in the freezer for quick meals during this busy time in our lives. Tuesday, I'm using leftover chicken to create a casserole. Wednesday, well...it's leftovers. Thursday is a crock pot meal and Friday, we're taking off for our homeland...good old Indiana. I also hope to post a couple of treats this week like easy peanut butter cookies and a Buttermilk Pie...so stay tuned, my friends!

Here's what we're eating this week.

Monday September 13th

Meatballs in Tomato Basil Cream Sauce

The meatball recipe featured in the link above is super easy...If I have the time, I will make and freeze the meatballs featured in my Meatball Sliders post.

Tuesday September 14th

Chicken Tortellini Casserole

Wednesday September 15th

Leftovers

Thursday September 16th

Savory Shredded Pork

Friday September 17th-Sunday September 19th

Out of Town

Grocery List

Produce

garlic
2 onions
mushrooms
basil
baby spinach
sun-dried tomatoes

Meat

2 lbs. ground beef
1 lb. ground veal
1 lb. ground pork
1 lb. cooked chicken
3 lb. pork shoulder blade roast

Dairy

milk
eggs
light cream cheese
Parmesan cheese
shredded mozzarella

Canned Goods

spaghetti sauce
prepared Alfredo sauce, preferably "light"
beef broth

Dry Goods

1 cup bread crumbs
1 cup Italian seasoned bread crumbs
kosher salt
coriander
cumin
oregano
onion powder
red pepper
freshly ground pepper
linguine noodles
hamburger buns


Freezer

9 oz. cheese tortellini

Friday, September 10, 2010

Zucchini Bread


Mmmm. A warm slice of my favorite zucchini bread slathered with sweet, creamy butter. Add a good cup of coffee to the mix and I am a happy woman. This is pure comfort food to me. I've been baking the same zucchini bread recipe since I was a little girl. It's easy to make and absolutely delicious. I have no need for a new zucchini bread recipe. Often when I am eating a dish, I am thinking about what it still needs. More spice? A certain ingredient to add to the taste or color or texture? More or less baking time? But when I am eating the zucchini bread of my childhood, I am not thinking about any of these things. It's just right.

Still, last week, I decided to try a new zucchini bread recipe. Zucchini-Oat Bread. It was one of those prize tested recipe winners from Better Homes and Gardens magazine in 2008. I figured that it had to be good. It won a prize, after all. Plus, it's healthier than my recipe: packed with oats, a whole extra cup of zucchini, AND applesauce instead of oil. I was feeling good about all of that healthy "stuff" in there. This recipe is a little trickier than mine, though. More steps.

For instance, you need to beat the eggs with an electric mixer for 2 minutes or until foamy.


Because I have a stand mixer, I just walked away while this happened and measured the dry ingredients into a bowl.


Add the sugar, applesauce, butter, and vanilla to the eggs.


Then mix in the dry ingredients until just combined. Finally, stir in the zucchini and nuts. I had some pictures of these steps and then somehow accidentally erased them. Ooops. So here we have fast forwarded to the batter in the prepared bread pan.


I was just getting ready to pop the bread into the oven when I suddenly remembered that I forgot to add cinnamon to the batter. The recipe called for 2 whole teaspoons of cinnamon in the bread, plus 1/4 teaspoon for the cinnamon-sugar topping. It was intended to taste a little cinnamon-ey. I couldn't leave it out! So....I carefully cut the cinnamon in with a knife.


I sprinkled the top of the loaf with cinnamon and sugar before baking for one hour and twenty minutes, or until the bread tests done.


Cool the loaf on a rack before removing from the pan. I removed mine a little early.(I was supposed to be 2 places within 15 minutes and I still had bread cooling...something had to give). It stuck. Luckily, I was able to scrape the bottom of the loaf out of my pan and patch it back together.


After making the Zucchini-Oat bread recipe, I had just enough zucchini left over to make my favorite zucchini bread. They really are quite different. Here's a picture of the two loaves, side by side. While the bottom of the Zucchini Oat-Bread (pictured on the right) stuck when I removed it from the pan, the top of my zucchini bread (left) crumbled when I took it out of the pan. Neither one of these loaves was going to take first prize at the fair. I will provide one excuse for the top of my bread crumbling...I decided to sprinkle the top with cinnamon and sugar like I did with the Zucchini-Oat bread. It seemed like a good idea. The cinnamon and sugar created a crumbly little crust that flaked off when I inverted it. Next time, I'll just stick to my recipe. It's sweet enough without sprinkling extra sugar on top.


Here's a cross-sectional comparison. The Zucchini-Oat Bread was heavy and dense. It was also a little chewy.


My bread had a finer, more tender crumb. It's sweeter and overall (much) better tasting.


It was an easy choice which bread to slice for my morning coffee the next day. The zucchini-oat bread may be healthier, but I didn't care for it at all.


Of course, I am biased. I grew up with "my" zucchini bread. I think sometimes we like what we're comfortable with, what we're used to. For example, I eat my BLT sandwiches with peanut butter. Why? Because that's how my mom made them for me. Of course, I think this is the best way to prepare a BLT, but I know that most people have no desire to try this flavor combination. Maybe I didn't care for the zucchini-oat bread because it was so different from what I am used to. To be sure that it wasn't just me, I arranged both types of bread on a plate and I took it over to my neighbor's house for an after school snack. My zucchini bread quickly disappeared and I brought the plate home with almost all of the zucchini-oat bread still on it. Yep. Bragging rights. : ) Although, if you're interested in the healthier, Zucchini-Oat Bread, you can click the link HERE. The three people who reviewed this recipe on the BHG site all loved it. I'm starting to wonder if I did something wrong. Hmmm.

Here's my Zucchini Bread recipe:

1 1/2 cups sugar
2 eggs
1 cup shredded, skin-on zucchini
1/4 cup water
1/2 cup vegetable oil
1 2/3 cup flour
1 teaspoon baking soda
1/4 teaspoon baking powder
3/4 teaspoon salt
1/2 teaspoon cinnamon
1/2 teaspoon nutmeg

Preheat oven to 375 degrees. Whisk the sugar and eggs together for 1 minute. Stir in the zucchini, water, and oil. Combine the dry ingredients. Stir into the egg mixture until just combined. Pour the batter into a greased bread pan and bake for 45 minutes or until a toothpick inserted into the center comes out clean.

For a printable copy of this recipe, please click here.


I handed my toddler a slice of the zucchini bread after it cooled enough to slice, then I grabbed for my camera and quietly sat back to capture her reaction. I was amused with how she used her senses to explore the new treat.

Mmmm. Smells good.


Maybe I should cuddle with it? It feels nice when I press it against my face, like this.


I guess I'll take a bite.


Hmmm. Is that nutmeg in there? Maybe a little cinnamon? Yummy.


I do like zucchini bread. I do like it, Sam I am.


Hey, I recognize that song. Oooh. Is that Dora on t.v.?


It IS Dora! Backpack....backpack.


Oh wait. I'm still holding this zucchini bread. I better eat it fast so mommy lets me go watch Dora.


What, mommy? What do you mean take smaller bites?


But I want to go watch Dora...WITH my snack...in the other room.


NO? No?! Really? Well I'll show you, lady! Here's what I think of your silly rules about eating on the carpet and taking smaller bites!


Hahahahaha!

Related Posts with Thumbnails