Thursday, March 25, 2010

Whoopie Pies

When I say that I'm making Whoopie Pies, I get one of two reactions. Either A)What're those? or B) Oh, I love Whoopie Pies! Well, to know them is to love them...and for those of you who don't know, these are Whoopie Pies:

Red Velvet with Marshmallow Fluff Filling


Chocolate with Peanut Butter Filling


Neither of these varieties is the traditional whoopie pie, which consists of two chocolate cake-like cookies with a sweet, fluffy filling sandwiched in between. According to all of the sources I checked, whoopie pies originated with the Amish. The story goes that these were packed into lunch boxes by Amish women and when the farmers or children opened their lunches and discovered these treats they would exclaim, "Whoopie!"

I've eaten these my whole life, and I never gave much thought to the name. When we were growing up, my mom would double or triple this recipe at the start of the summer. Then my sisters and I would set up a Whoopie Pie assembly line. One of us would take the little cakes off of the sheet and cool them, one would spread on the filling, and one would wrap the finished product. We wrapped them individually and then put them into gallon-sized freezer bags. When each pie was wrapped and stashed in a bag, we sealed them up and carried them to our garage freezer. All summer long we bopped into the garage for this handy snack when we took breaks from playing in the yard, working in the garden, or working on our 4-H projects in the barn. In the summer heat, these thaw very quickly...not that we waited for them to thaw before we took a bite.

When I found the recipe for Red Velvet Whoopie Pies in an old issue of Better Homes and Gardens Magazine, I suddenly remembered how much I missed this treat and I was excited to try a spin on the Whoopie Pie that I've always eaten. I posted on Facebook that I was going to make Whoopie Pies and my friend, Erin wrote back that she likes the kind with peanut butter filling. What?! Peanut butter filling? Why hadn't I thought of that? I decided that I better make some with the peanut butter filling too.

Red Velvet first:

First you combine all of the dry ingredients: flour, cocoa powder, baking soda, and salt.


In a large mixing bowl, beat 1/2 cup butter.


Add in brown sugar and beat until fluffy.


Add in the egg and vanilla and beat some more.


Add the dry ingredients alternately with...


buttermilk.


Once the ingredients are "just combined", stir in red food coloring. This recipe calls for a 1 oz. bottle of food coloring. I halved the recipe due to a butter shortage in my home, so I only used 1/2 oz. I know, this is one UGLY picture.


Depending on how big you want your whoopie pies you can drop the batter by teaspoonfuls or tablespoonfuls onto a cookie sheet. I used a tablespoon this time.


Bake at 375 degrees for 7-9 minutes. Remove from baking sheets to cool.


Now for the filling. In medium mixing bowl beat 1/4 cup softened butter and half an 8-ounce package softened cream cheese until smooth. Since my recipe was cut in half, I only made half the amount of filling too. Next time, I might make a whole recipe of filling. I really like this filling!


Fold in one 7-ounce jar marshmallow creme. I've never had whoopie pies with marshmallow creme in the filling. Lots of people make them this way, but my mom's recipe didn't call for this magic ingredient. I think that the next time I make her recipe, I'll use this filling. Yum!


Put a dollop of the filling on half of the cakes.


Smooth it out a bit.


Then top with another cake. These were really pretty. They'd be awesome for Christmas or Valentine's Day treats too!


Now on to Chocolate Whoopie Pies with Peanut Butter filling.


When you say "whoopie pie" it's probably assumed that they are chocolate. Although, pumpkin spice whoopie pies are growing in popularity. Mmmm. I got this recipe from the Martha Stewart website. It uses a traditional Whoopie Pie batter, but the twist is in the rich and creamy peanut butter filling.


My only complaint about this recipe is that the cakes stuck to the baking sheet. I know that I was supposed to use parchment paper, but I didn't have any. I figured that since the Red Velvet variety came off the sheet fine, these would too. Wrong! Luckily, no one sees this side of the whoopie pies.


Ahh, there's the rest of the cakes...still stuck to the pan.


The filling recipe calls for butter and peanut butter. I decided to substitute cream cheese for some of the butter. I really like peanut butter with cream cheese. Beat these ingredients together.


Then mix in some powdered sugar.


Just like before, spread the filling evenly among half of the cakes. The filling sank nicely into all of those divots left from our little "stuck to the baking sheet" problem. More room for filling...fine with me!


Just imagine these with a glass of ice cold milk. Seriously good. My toddler could barely keep her hands off of these. If you look close, you can actually see her little hands in the background. She was hovering while I took pictures, yelling her two newest words, "Whoopie" and "pie".


Here are the recipes:

Red Velvet Whoopie Pies from Better Homes and Gardens

Prep: 45 minutes
Bake: 8 minutes per batch


Ingredients
2 cups all-purpose flour
2 Tbsp. unsweetened cocoa powder
1/2 tsp. baking soda
1/4 tsp. salt
1/2 cup butter, softened
1 cup packed brown sugar
1 egg
1 tsp. vanilla
1/2 cup buttermilk
1 1-oz. bottle red food coloring (2 Tbsp.)
1 recipe Whoopie Pie Filling, recipe below
Directions
1. Preheat oven to 375 degrees F. Line baking sheets with parchment; set aside. In medium bowl combine flour, cocoa powder, baking soda, and salt; set aside.

2. In large mixing bowl beat butter on medium to high 30 seconds. Beat in brown sugar until light and fluffy. Beat in egg and vanilla. Alternately add flour mixture and buttermilk, beating after each addition just until combined. Stir in food coloring.

3. Spoon batter in 1- or 2-inch diameter rounds, about 1/2-inch high on prepared baking sheets, allowing 1 inch between each round.

4. Bake 7 to 9 minutes for 1-inch cookies or 9 to 11 minutes for 2-inch cookies, or until tops are set. Cool completely on baking sheets on rack. Remove cooled cookies from baking sheets.

5. To fill, dollop Whoopie Pie Filling on flat sides of half the cookies. Top with remaining cookies, flat sides down. Makes 60 one-inch or 42 two-inch cookies.

6. Whoopie Pie Filling: In medium mixing bowl beat 1/4 cup softened butter and half an 8-ounce package softened cream cheese until smooth. Fold in one 7-ounce jar marshmallow creme.

7. To store: Refrigerate in airtight container up to 4 days. Let stand at room temperature 15 minutes before serving.

Nutrition Facts
Calories 70, Total Fat (g) 3, Saturated Fat (g) 2, Monounsaturated Fat (g) 1, Cholesterol (mg) 12, Sodium (mg) 49, Carbohydrate (g) 10, Total Sugar (g) 5, Protein (g) 1, Calcium (DV%) 1, Iron (DV%) 2, Percent Daily Values are based on a 2,000 calorie diet

*Did I mention that these are low in calories?

Peanut Butter Whoopie Pies from Martha Stewart
Ingredients
For the Cookies:
1 3/4 cups all-purpose flour
3/4 cup unsweetened cocoa powder, not Dutch-process
1 1/2 teaspoons baking soda
1/2 teaspoon coarse salt
1 tablespoon unsalted butter, softened
1/4 cup vegetable shortening
1/2 cup granulated sugar
1/2 cup packed dark-brown sugar
1 large egg
1 cup whole milk
1 teaspoon pure vanilla extract
For the Filling:
2/3 cup natural, creamy peanut butter
1/2 cup (1 stick) unsalted butter, softened
3/4 cup confectioners' sugar
Coarse salt, optional

Directions

1.Make cookies: Preheat the oven to 375 degrees. Sift together flour, cocoa powder, baking soda, and salt into a small bowl; set aside.

2.Put butter, shortening, and sugars into the bowl of an electric mixer fitted with the paddle attachment. Mix on high speed until smooth, about 3 minutes. Add egg; mix until pale and fluffy, about 2 minutes. Mix in half the flour mixture, then the milk and vanilla. Mix in remaining flour mixture.

3.Drop rounded tablespoons of dough onto baking sheets lined with parchment paper, spacing 2 inches apart. Bake until cookies spring back when lightly touched, 12 to 14 minutes. Let cool on sheets on wire racks 10 minutes. Transfer cookies to wire racks using a spatula; let cool completely.

4.Make filling: Put peanut butter and butter in the bowl of an electric mixer fitted with the paddle attachment. Mix on high speed until smooth. Reduce mixer speed to low. Add confectioners' sugar; mix until combined. Raise speed to high, and mix until fluffy and smooth, about 3 minutes. Season with salt, if desired.

5.Assemble cookies: Spread 1 scant tablespoon filling on the bottom of 1 cookie. Sandwich with another cookie. Repeat with remaining cookies and filling. Cookies can be refrigerated in single layers in airtight containers up to 3 days. Bring to room temperature before serving.

Note: These freeze really well. Just wrap individually first so that they don't stick together.

Tuesday, March 23, 2010

Coconut Chicken Chili


This recipe has generated quite a bit of curiosity from my friends who keep up with the meal plan. All week long I've had people asking me, "Did you make that yet? How was it?" The buzz is understandable. I mean, Coconut Chicken Chili? Hmmm. I saw this recipe at Noble Pig, a blog that I just love for her flavorful recipes and beautiful photography. Back in December I made THIS Chicken Poblano Recipe from Noble Pig. As I type this I have 3 more recipes from this blog that I've bookmarked to try. It's good stuff! This Coconut Chicken Chili called to me from my laptop screen when I saw the pictures. I loved that it put a Thai spin on chili. I love my Thai food! All of the spices combined with the garlic, basil, and coconut milk smelled amazing as this simmered on the stove.

But here's the deal...after tasting this, I felt that it needed more intensity. Not like spicy intensity, it was spicy enough. It just needed something more. I added a little more salt. Then I added 1/2 tablespoon of brown sugar. I like my traditional chili with just a hint of sweet to play against the spice and I thought that maybe that's what this was lacking. Not it. The flavor reminded me a little of the Peanut Dipping Sauce that I made to go along with THESE Thai Meatballs,probably because they shared two ingredients in common: the peanut butter and the coconut milk. What that peanut sauce (loved this peanut sauce) had that this chili didn't was red curry paste and fish sauce. I fell asleep last night thinking that when I re-heated the chili today, I would stir in a little of each and see if this chili finally provided the "Wow!" factor that I had anticipated when I chose this recipe.

Here's what really happened...late this morning my husband called from work to tell me how amazing the chili tastes when re-heated. He took it with him for lunch. So much for stirring in extra spices. He reported that it was SO much better the next day and that you could "really taste all of the flavors and spices." Wow. Last night he was as unimpressed as I was. Not that this was horrible the first time around. It was pretty good. Just not "Wow!" Apparently, and maybe not surprisingly, it needs to sit overnight to achieve "Wow!" status. Traditional chili is the same, right? Always better the second day? I didn't get to taste it today, so I can't vouch for this recipe, but because it has my husband's vote of approval, plus the curiosity of my friends, I'll go ahead and post the recipe.

To begin, chop 12 oz. of chicken breast into little pieces. Heat a tablespoon olive oil in a skillet. Add the chicken, garlic, onion, chili powder, ginger, cayenne pepper, and salt and pepper. Cook just until the chicken is no longer pink.


Stir in a tablespoon of flour and cook for a minute longer.


Now add a cup of water, a can of coconut milk (I used light), and a tablespoon of peanut butter. Bring to a boil. It will thicken slightly.


Now stir in shredded carrot, cannellini beans, celery, green onion, and chopped basil. Return to a boil, then reduce the heat and simmer, covered for 10 minutes. Salt and pepper to taste. I also added in 1/2 tablespoon of brown sugar here.


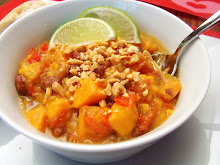
Serve it over jasmine rice and garnish with chopped peanut and more basil.


Or...put it in your fridge overnight, then re-heat and serve the next day. Apparently, this is the way to go!

Coconut Chicken Chili from Noble Pig
Adapted from Better Homes and Gardens and then adapted again by me

12 oz. skinless, boneless chicken breasts, cubed (smaller pieces are best)
1 large onion, chopped
1-1/2 teaspoons chili powder
1-1/2 teaspoons ground ginger
1/4 teaspoon cayenne pepper
1 Tablespoon olive oil
1 Tablespoon all-purpose flour
1 14 oz. can unsweetened coconut milk
1 Tablespoon peanut butter
1 15 oz. can cannellini beans, rinsed and drained
3 medium carrots, shredded with a box grater on the biggest holes
1 stalk celery, sliced
2 green onions, sliced
5 cloves garlic, minced
2 Tablespoons chopped fresh basil
1/2 tablespoon brown sugar
Salt and pepper, to taste
Garnish with fresh basil, peanuts and sliced pickled jalapenos, optional
Serve over hot cooked jasmine rice

In a large saucepan cook chicken, onion, garlic,chili powder, ginger, 1/2 teaspoon salt, 1/2 teaspoon black pepper and the cayenne pepper in hot oil over medium heat for 6 to 8 minutes or until chicken is no longer pink. (Do not over cook the chicken here, you just don't want to see pink.) Stir in flour and cook 1 minute more. Stir in coconut milk, peanut butter and 1 cup water. Bring to boiling, stirring occasionally.

Stir in beans, carrots, celery, green onion, garlic and chopped basil. Return to boiling; reduce heat. Simmer, covered, 10 minutes. Serve with rice. Top with basil leaves.

To download or print this recipe click here!

Monday, March 22, 2010

Emily's Italian Beef


A couple of months ago I tried a recipe for Italian Beef for sandwiches in my crockpot. I was disappointed when the finished product fell short of my expectations. I'd hoped for more flavor and it didn't yield quite enough au jus. Then, last month, I put out the request for favorite slow cooker recipes. Emily, a friend of Krista's Kitchen on Facebook posted this simple recipe for Italian Beef. Emily wrote about her recipe, "I have several recipes that I like but my all time favorite came from my mother-in-law! The best part...(it's) also good for beef veggie soup, beef burritos/ tacos, enchilada filling, beef and noodles, hash and pot pies!!" She adds that when making this for Mexican dishes she adds taco seasoning and that "it freezes awesome!" I'm all for freezing extra food for future meals. Good call, Emily and thank you for a wonderful recipe!

This recipe possessed the flavor that my first attempt at Italian Beef was lacking AND yielded plenty of broth to soak into the sandwich bread. This is what I was looking for! Best of all, you only need three ingredients!

To begin, you need a roast. Emily recommended a rolled or tip roast, however I had this chuck roast in my freezer, so I went with that. To season the beef you need two packets of Zesty Italian seasoning and some Spicy V8 (I used the store brand).


Mix the seasoning packets and 12 oz. of the juice in your crock pot. Add the roast, turn to coat, then cover and cook on LOW for 8 hours. I ended up turning mine over once or twice during the cooking time to give each side a turn at soaking in "the juice". I know that this was totally not necessary, but the recipe is just so easy that I had to put my hands on it a couple of times to feel like I actually did something. Oh, I know that you lose 20 minutes of cooking time each time you lift the lid of your slow cooker, but mine cooks so fast that I wasn't concerned about losing heat.


At the end of the 8 hours, the roast was "fall apart tender". I moved it to a casserole dish, pulled it apart, and then transferred the beef back into the broth remaining in the crock pot. It went for a nice swim while I readied the sandwich fixings.


I decided that I wanted some sweet onions and peppers for our sammies so I sauteed them in a little olive oil on the stovetop until tender.


This was just about perfect...


But then I thought, "This would be even better with some provolone melted over the top." So I slapped on the cheese, fired up the broiler, and slid the sandwich underneath. Then I broke the #1 rule in broiling...


I walked from the oven. YUM...charred Italian Beef Sandwiches. I've said it before and I'll say it again: NEVER walk away from the oven when using the broiler. It's bad news, Man. But the good news? I was able to salvage this sandwich. I just got rid of the burned half of the hoagie roll and ate it open faced. Whew! Close one. I would have hated to waste such a delicious sandwich.

Here is Emily's recipe courtesy of her mother-in-law : )

Italian Beef

3-4# rolled or tip roast
2 pkgs Zesty Italian "Good Seasonings" or generic
1 can (12 oz) V8 or zesty V8

Crockpot on low for 8 hrs. Pull apart. Reheat in crockpot (if prepared ahead), serve with rolls and all the fixings.

Sunday, March 21, 2010

Meal Plan and Grocery List 3/22- 3/28

You may notice that the meal plan is a little light on content this week. It’s a week full of appointments and meetings in our household and for the weekend we’re hitting the road to visit family. I’ll only cook three dinners this week. But stick around, I’ve been busy in the kitchen...I may just post a surprise or two.

Monday March 22nd
Crock Pot Italian Beef Sandwiches

Tuesday March 23rd
Baked Potato Bar with Broccoli Cheese Soup

Wednesday March 24th
Coconut Chicken Chili

Thursday March 25th
Leftovers

Friday March 26th
McDonald’s? Wendy’s? T-Bell? : ) We’ll be on the
road getting our fast food fix!

Saturday and Sunday March 27th and 28th
Cooking from my mom's kitchen. You can be sure I'll report back.


Grocery List

Produce
3 onions
garlic
carrots
potatoes
green pepper
celery
Green onions
basil

Meat
3-4 lb. beef roast
12 oz. chicken breast

Dairy
milk
Provolone or mozzarella
cheese
8 oz. Light Velveeta

Canned Goods
coconut milk
chicken broth
olive oil
Spicy V8
peanut butter
cannellini beans

Dry Goods
2 packages Italian seasoning
flour
Hoagie rolls
Chili powder
Ginger
Cayenne pepper
jasmine rice

Freezer
16 oz. broccoli florets

Saturday, March 20, 2010

Braised Short Ribs a la The Pioneer Woman


I've been thinking about using the short ribs that reside in my freezer for a few weeks. I've seen some wonderful recipes in magazines and on other blogs. It was a tough decision which to try first. I narrowed it down to The Pioneer Woman's braised short ribs and an Asian-inspired recipe. This time PW won. But you haven't seen the last of short ribs in my kitchen. I still have another package in the freezer, so I'll get to try the other version soon!

I will say that Ree knows short ribs. Her version was delicious and the braising sauce was out of this world good. I'm serious. I could eat just that stuff with a spoon. Actually, I did. I found myself standing in front of the fridge, late on the night after I baked these and spooning a bite of sauce out of the tupperware. I needed just one more taste of that sauce!


Here's the ingredient line up: kosher salt, pepper, thyme, rosemary, flour, broth, olive oil, red wine, bacon, carrots, shallot, and an onion.


Oh yeah, and you need beef short ribs too.


To get started, fry up some bacon or pancetta in a skillet. Personally, I'm partial to bacon. Bacon is smoked and pancetta is not. I prefer the smokiness of bacon and it's less expensive too. Yay for bacon!


Once your bacon is nice n' crispy, remove it from the skillet. Keep the fat and pour in two tablespoons of olive oil. Heat the oil while you prepare the ribs to meet their destiny.


Give those short ribs a healthy sprinkle of kosher salt and grind on some pepper.


Send them for a roll in the flour.


Now drop them into the heated oil and brown on all sides. PW recommended approximately 45 seconds per side. I concur. Once the ribs are browned, remove them to a baking dish. I ended up using my 13 X 9 inch Pyrex casserole dish. I believe that Ree used a lovely blue Le Creuset Round French Oven dish for this purpose. Stove top to oven. Very nice. I'm just a teensy bit jealous.


With those ribs out of the way, I tossed in the diced carrots, onion, and shallots. Cook for a couple of minutes and then...


Pour in the wine! I used Winking Owl Merlot from ALDI. It's only $3.29/bottle. It's not bad at all for a cheap wine. I've definitely had worse. It worked nicely in this dish. If there's one thing I've learned about cooking with wine, it's this: If you don't like the way it tastes in the glass, you are NOT going to like it cooked into your dinner. You can read more about my experience with "bad" wine HERE. I'm all for cutting costs, so go for the cheap wine... but be sure to taste it first.

Okay, back to what's cooking. So, stir the wine dig that girl (darn that Ally McBeal-esque trait. I always have a song playing in my head). Besides, it's spill the wine. (Did I mention that I also tend to make up my own lyrics?) Man, what is up with me?! It's one tangent after another tonight. I swear that I haven't even touched a drop of wine myself. Focus, Krista. Focus. Anyway, stir the wine and loosen any bits of bacon, veggies, or fried flour from the bottom of the pan. Bring the wine to a boil and cook for two minutes. Then stir in the broth, a teaspoon of kosher salt, and pepper. I also sprinkled in dried rosemary and thyme. You're supposed to use fresh, but my herbs are dead and the grocery was asking a crazy amount for the little plastic packets of fresh herbs.


Pour the braising liquid over the ribs.


Cover and bake. I don't have a cover for this baking dish, so I used aluminum foil. These should bake at 350 degrees for 2 hours, then reduce the heat to 325 and cook for an additional 30 to 45 minutes. Ribs should be fork-tender and falling off the bone.


Let them sit, covered for 20 minutes once you've removed them from the oven. Check em' out!


Uh-oh. I'm about to embark upon another tangent... here's the thing about short ribs: they are really fatty. Which isn't necessarily a bad thing. That fat creates a tender, flavorful meat that many other cuts could never rival. However, are you actually supposed to eat the fat? I only ask this because in the Pioneer Woman's post she served them on the bone, fat and all. I've seen a number of other food blogs post about short ribs lately, and in the pictures, they all served these delicious, tender ribs whole as well. I certainly couldn't bring myself to eat the fat and to pick around it at the dinner table would be a messy business. I almost wouldn't want to eat these in public. I mean, you should see me gnawing on some baby backs at the rib joint. It ain't pretty.(Just give me a rib bib and a moist towelette and I'm good to go.) I'm certainly not "prissy" when it comes to meat on the bone, but I can't imagine tackling these with an audience. Am I missing something? Probably you just use your fork to separate meat from fat, right? I know I sound so un-cultured right now. Short rib lovers of the world, please, enlighten me.

I resolved to peel away the fat and search for bits of meat between the layers.


For my kiddos (and my sanity) I separated the meat from the bone and fat.


I took a few tastes as I was picking through the ribs and I thought to myself, "this tastes a lot like pot roast." Then I went back a re-read Ree's post about short ribs and noted her thoughts, "If you’ve never had beef short ribs before, you’re missing out on one of life’s great pleasures—and I’m not exaggerating this time. Beef short ribs are like the most flavorful, delectable, tender, soft pot roast you can possibly imagine—but the meat is on a handy stick for your eating convenience." Okay, so I'm not crazy. Well, at least not when it comes to short ribs.

Here is some of the meat I gleaned from the ribs.


The meat itself was perfect, but the sauce, I'm telling you...THE SAUCE...Amazing! I was trying to think of what else I could spoon it over when I ran out of meat. Ree recommends polenta. Excellent thought!


Okay, here's the recipe with my modifications...

Ree's(aka The Pioneer Woman) Braised Short Ribs original recipe found HERE.

Ingredients
•8 whole Beef Short Ribs
•Kosher Salt & Pepper To Taste
•¼ cups All-purpose Flour
•6 pieces Bacon, Diced
•2 Tablespoons Olive Oil
•1 whole Medium Onion, Diced
•3 whole Carrots, Diced
•2 whole Shallots, Peeled And Finely Minced
•2 cups Red Wine such as Merlot
•2 cups Beef Or Chicken Broth (enough To Almost Cover Ribs)
•1/4 to 1/2 teaspoon dried Thyme
•1 teaspoon dried Rosemary

Preparation Instructions
Salt and pepper ribs, then dredge in flour. Set aside.

In a skillet, cook bacon over medium heat until complete crispy and all fat is rendered. Remove bacon and set aside. Do not discard grease.

Add olive oil to pan with the bacon grease, and raise heat to high. Brown ribs on all sides, about 45 seconds per side. Remove ribs to baking dish. Turn heat to medium.

Add onions, carrots, and shallots to pan and cook for 2 minutes. Pour in wine and scrape bottom of pan to release all the flavorful bits of glory. Bring to a boil and cook 2 minutes.

Add broth, 1 teaspoon kosher salt,plenty of freshly ground black pepper, and herbs. Taste and add more salt if needed. Stir in bacon. Pour liquid over the ribs; they should be almost completely submerged.

Cover and place into the oven. Cook at 350 for 2 hours, then reduce heat to 325 and cook for an additional 30 to 45 minutes. Ribs should be fork-tender and falling off the bone. Remove pan from oven and allow to sit for at least 20 minutes, lid on, before serving. At the last minute, skim fat off the top of the liquid. (Can also refrigerate mixture, then remove solid fat from the top.)

Serve ribs (or rib meat removed from the bone) topped with cooking liquid (the sauce).

To download or print this recipe click here!
Related Posts with Thumbnails